Where to start repairing the apartment. Quick and inexpensive repair do-it-yourself in the house quick repair apartment do it yourself
It is very important to identify the real scope of work and relate them to their financial capabilities. All design and design decisions must be taken before the start of repair work. Redoing consignable, long and sometimes impossible.
Why start repairing the room?
Having coped with the preparatory process and being in front of bare encouraged walls, you still do not fully imagine all the volume of upcoming costs and works. However, it is already possible to navigate where and what will be, which colors are optimal in a particular room and where the computer, TV and other electrical equipment will be installed. We definitely pay attention to the location of the windows and the need for additional lighting rooms. What for? Because starting repair follows from the equipment or re-equipment of the electrical network, including the location of the lamps - the main and additional.
It is necessary to do in old apartments that are repaired completely and in new buildings. It's no secret that in new homes, the wiring is mounted without taking into account the wishes of the owner. Each Novosel has invariably arise a desire to make the most accommodating housing for their needs. The abundance of electrical equipment requires an optimized powerful power grid with many branches. Very uncomfortable in the new apartment to unwind all sorts of extension cords and install additional outlets.
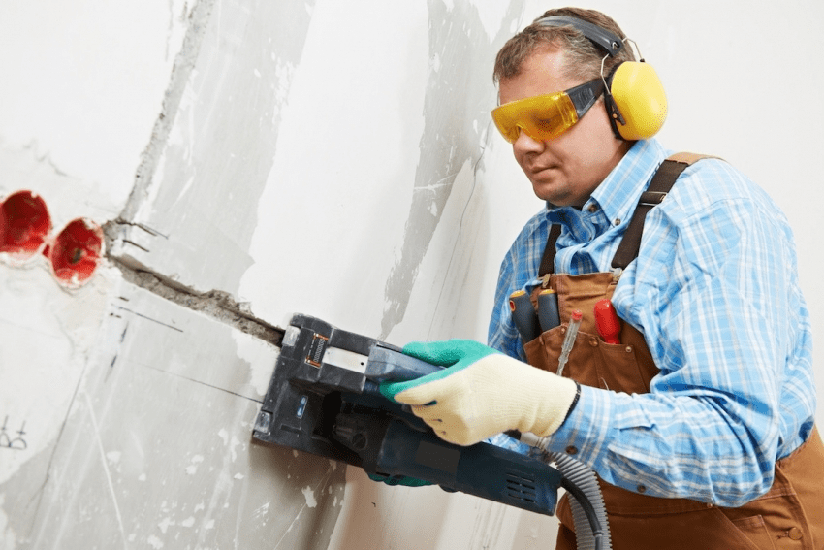
In parallel with the electrical network, mount the air conditioning system and the elements of the fastening of the heating network devices. It is also necessary to perform work, requiring loaves, drills, cutting of grooves, fines, recesses and other ugly walls, gender and ceiling, accompanied by the formation of dust and fragments of bricks, concrete and gypsum. Then calmly clean the garbage and proceed to the preparation of the foundation of the future floor.
Here are some options:
Installing a draft millet;
Pouring a concrete screed;
preparation for the installation of a warm floor;
What's next?
The next stage of repair work concerns windows. If replacement is required - change. If the windows are already installed and satisfy your request, then this stage is missing, without forgetting to inspect the state of slopes, the presence of thermal insulation, the sealing of the slots. It is worth checking how the flaps are open and closed, there is no distortion, what are the vertical and horizontal levels. It is very difficult to eliminate these seemingly obvious disadvantages after plastering and painting walls or sticking wallpaper. Internal window sills are also desirable to install. Polyethylene film will help protect them from splashing and putty.Of course, this work can be done later, when installing interior doors, but this option is more practical.
If the wall room requires additional leveling and a significant amount of work before painting, then calculate the total number of building mixtures required for the processing of all walls to be repaired. Building materials, despite the high cost, should always be taken with a slight margin. It is very inconvenient to run for a bag-two putty, which, as a rule, ends in the most inappropriate and responsible moment.
Sequence of work on repair and decoration of the room: Frequent questions
What is first: band screed or plaster / putty wall?The answer to this question is unequivocal - before starting the walls of the walls, it is necessary to finish all the preparatory work with the floor. It should be ready, after cleaning, to the installation of decorative flooring.
Floor coating is mounted last, be it laminate, parquet or bulk floor with 3 D effect. The prepared base of the floor is closed by cardboard or film - it will make it easy to remove traces of plaster works, and such arise inevitably.
Prior to the start of putty-plaster work, it is necessary to finish all manipulations with plasterboard, if any. All partitions, niches, decorative and functional parts must be made before the "wet" phase of the finish. All the works of this kind, including the ceiling leveling, must be performed in one technological cycle, so as not to return to them, remembering, for example, that "somewhere here" a niche for storing a ski or installation of a safe. What at first: floor covering or installation of doors?
Outdoor coverage of any type should be formed before installing interroom doors. This will help to avoid mistakes when they are installed and achieve a minimum gap between the threshold or the floor plane and the door sash. Installation of the door - the work is clean and accurate, not requiring the use of solutions, glue or other substances capable of blurred clean floor. The tools used to damage it at the same time, with neat work, not in a position.
But it concerns the doors directly. The door frame can be put before - before aligning the walls. This will allow you to remove all the gaps and irregularities near the opening. If the walls and openings are originally perfect, you can postpone the installation of the box for later.
In case of early installation box, it is important to take into account the height of the future flooring!
What is first: glue wallpaper or laying a laminate (parquet, carpet)?
The wallpaper of any type on the prepared walls are glued before the start of work on laying the decorative flooring. This is true for painting walls.

True, on this issue there are different opinions. Supporters of the second option respond to this question as well as the question that first: paint the ceiling or glue the ceiling plinth. According to their position, the wallpaper is glued after installing the floor and the ceiling plinth, because it is possible to replace the walls of the walls at any time, not the touched plinths neither from below. And the edges of the wallpaper just just cut into the level of the plinth.
Painting the ceiling is made after installing the upper plinth. In this case, it is very convenient to eliminate all the irregularities and loosenness of the connection, and then the plinth and the ceiling are painted in one intake and look monolithically.
What is first: stretch ceiling or wallpaper / painting?
The specificity of the stretch ceilings allows them to install them at the final stage of the repair work, after painting the walls and sticking wallpaper. This work is very clean, and damage the walls or the floor when it is fully difficult.
The principle of the priority of work "top-down" in this case does not work. It concerns mostly traditional repair work. New technologists make their own adjustments. Specialists who mounted stretch ceilings are recommended to invite them by the end of repair.
***
If you make a short list of sequence of repair work in the room, it will look like it will be in this way:
wiring; heating and air conditioning system; Preparation of floor base; dismantling / installation of windows; Preparation of walls under wallpaper or painting; ceiling (all works); Painting of walls or pasting wallpaper; finishing floor; installation of doors; thresholds and outdoor plinth; Stretch ceilings. This order is not an axiom. Each master chooses the sequence that is convenient to him. But in general, the order looks like this.
The issue of repairing the room is almost always resting in the budget of future works. Most often, the owners of the apartment or at home appear before the choice - to make the room repair with your own hands in a cosmetic version, without postponing the case in a long box, or schedule for an indefinite future capital restructuring with redevelopment and serious design updates. Most of the masters in such a situation are recommended to carry out the cosmetic room repair, during which you can solve the vast majority of problems with the interior of the room.
How to properly approach the organization of repair in one room
It is always inconvenient to start repairing the room and even scary, especially if there is no sufficient experience, and from the helpers at hand only the cheat sheet on the repair of the room with their own hands for beginners. But, as a rule, uncertainty and doubts pass when it becomes clear the amount of future work and the issue is resolved, in which sequence to make repairs in the room.
Therefore, the first thing is the master plan for cosmetic repair, and most importantly, before trying to make repairs in the room, it is necessary to compile a detailed estimate for the materials and consumables. This is a prerequisite, even for repairing in a small room, you will need to make a list of several dozen items.

Where to start repairing in the room - not fundamentally, it is possible to carry out repair work in the sequence that seems more convenient in these specific conditions. Traditionally, the room repair is starting with their own hands from the most "dirty" or drafts and finish with subtle finishing procedures.
A typical list of works or a repair sequence in the room is as follows:
- From the walls, the ceiling and floor is removed by the old finish. The removal of the floor covering gives the largest percentage of dust and dirt, so it is removed primarily;
- Conducting floor preparation is carried out for further laying of a new floor covering;
- Repair of wiring, transferring and hanging lamps, switches, unfold corrugations under television and Internet cable;
- The walls and ceiling are cleaned and sweep. If the plans for cosmetic repairs are supposed to change the wallpaper on a more modern type of finish, it will be necessary to perform alignment of walls with plaster plaster;
- The ceiling surface is equal to the same way. Under whitelle or painting, the ceiling is rubbed, plastering the lime-gypsum mixture and laid decorative coating;
- The decorative decoration of the walls is performed, the ceiling plinth is glued, the facing of interroom doors changes;
- The new flooring is placed, the plinth is installed, the lamps are placed, the switches are installed.
Of course, at every stage of repair of the room, photo, a large amount of garbage and dust will be formed. Not only will you have to regularly remove the room and take the garbage dusties, you will need to try to close the sections with the repair of the protective polyethylene film to avoid dusting the surface.
What should not be included in the cosmetic room repair
The wizard finishers often call the cosmetic repair of the work "for three days" in order to update the interior in the room, more, as a rule, is not required. The list of repair activities do not include the most expensive work:
- Redevelopment of premises with the transfer of interroom partitions;
- Replacement of the heating system;
- Installation of expensive multi-tiered suspended ceilings;
- Glazing balcony and replacement windows on double-glazed windows;
- Warm floor equipment in the room.
It is clear that all the listed components of repair require serious financial costs and attracting qualified specialists to the work. Time to hold such serious events will be required no day and not two. In addition, this is the specificity of the repair in the room, that the willy-nilly dust and the construction trash sprawl across the apartment. Therefore, the situation is regulated in this way - either the cosmetic repairs are made in a separate room, or the whole apartment "gets up" to capital repairs.
In general, in a plan for cosmetic repairs include everything that can be made in a couple of days with their own hands for relatively small money.

The main task of cosmetic repair
The main goal of repair work is to refresh the interior of the room, remove the minor defects and damage accumulated over the years, insanely annoying and interfering in everyday life.
In rare cases, cosmetic repairs becomes a consequence of force majeure circumstances, for example, the flooding of the room with neighbors in the floor above or preparing the room to surrender in the hiring. There may be a lot of reasons, but the main thing is still maintaining the room in a comfortable condition.
Properly performed cosmetic repairs makes it possible to save on the volumes of future overhaul, for example, the fulfillment of the center of the floor and alignment of the walls at least will reduce the costs of time and forces to prepare for overhaul, naturally, provided that the room repairing the photo is made as in good faith and high quality .

The next stage of repair, cost distribution and load
One of the most difficult stages of cosmetic repairs are fair to plan budget planning and procurement of materials. Especially if you plan most of the repair procedures with your own hands. The reason is simple - in lovers and beginner masters, there is no idea about how much the material will be needed on this or that section of the work.
In this case, the problem is solved in two ways:
- Compiled list work and estimates can be shown to an experienced master who will help calculate the expense of the room quadrature;
- Calculate flow Based on the standard recommendations of building materials manufacturers, increasing the stock of glue, plastering, wallpaper, flooring by 10% of the calculated indicators.
In the latter case, the costs of acquiring materials will increase significantly, but ultimately the remains of cement, dry plaster and adhesive can be used for the cosmetic repair of other rooms in the apartment. In addition, the list of often helps to get a wholesale discount, so that there should be no significant failures in the budget of the future cosmetic renewal of the room with a competent organization of procurement.

Preparatory stages of repair in the room
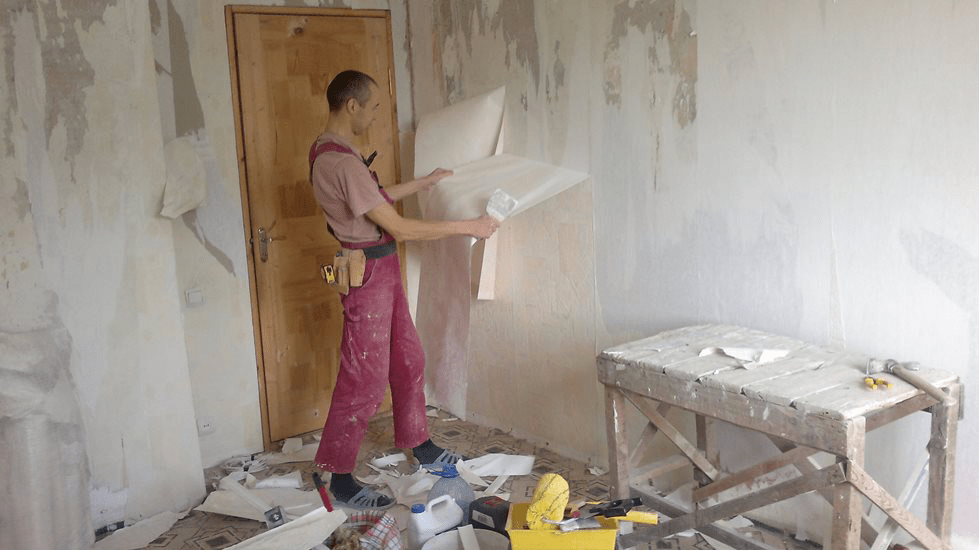
The first, the most time-consuming stage there was always a rough ridge of walls and a ceiling. Usually repairs in the room begins with the removal of furniture items and seal the entrance door to protective awning. You can use a dense polyethylene film or an old blanket. The improvised curtain will protect the rest of the apartment from the noise and dust, which, even with very neat work, the use of the vacuum cleaner and the damp floor cleaning is always accumulated in a room in considerable quantities.
Before repair, lamps are necessarily removed, instead of a chandelier in the room, leave a cartridge with a light bulb. If the room is installed double-glazed windows, it will be useless to tighten the film and the window opening before repair. It is clear that the film is closed and the floor covering, it is easier to minimize placed polyethylene than to wash the dirt in the room every evening.
We remove the old finish from the walls
A third of the scheduled time is due to the preparation for cosmetic repairs. During this time, you will need to remove the blots and wallpaper from the walls of the room. If there are areas with damaged plaster, it will take another day in order to knock down the plaster from the walls.
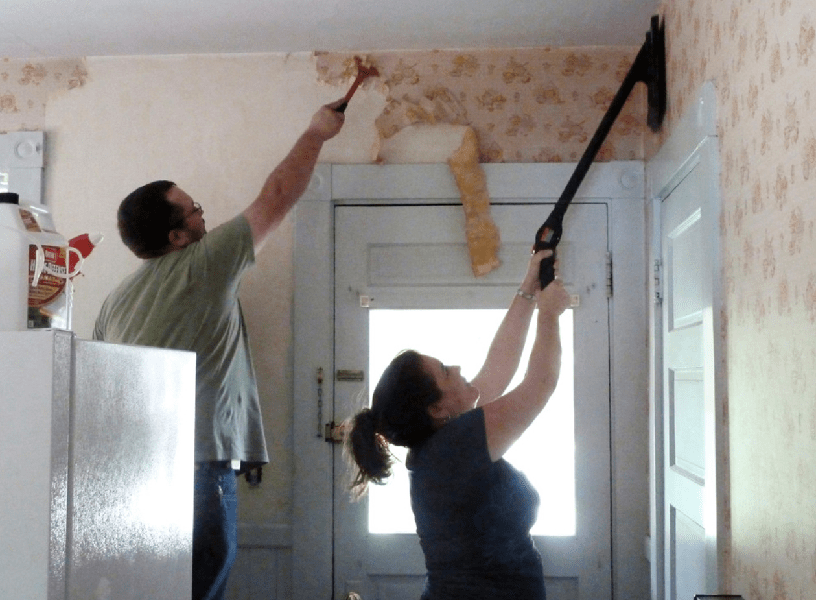
Old wallpaper is removed by either by one panel, or they will be scrooks for a long time with small pieces, it all depends on the glue used. Before removing the wallpaper, the surface is moistened from the sprayer with a small amount of water. After 20-30 minutes, the tag can be removed by flap. For highly strong adhesives, boiling water and steam are used. In any case, after the sprinkle of the old chopper, you will need to go through a vacuum cleaner and a rigid brush to remove the dust and remnants of glue.
Rogging and restoration of the ceiling surface
The ceiling is freed from the decorative coating much faster and easier than the walls. If the plans of the cosmetic repair will be a sticker of polystyrene plates or laying of plastic panels, then it will be enough to remove the top layer of whitewash.
It is more difficult to the situation if the ceiling in the room is painted with water-level paint or bites. In this case, you will need at least a day to remove the durable layer of the old finish.
The most common option to restore the ceiling during cosmetic repairs involves the alignment of the ceiling overlap plane. In any room of any apartment, the ceiling slabs lie with a differential in several degrees, which leads to a difference in the height of the ceiling near the opposing walls of the room from 2 to 5 cm.
If the time and budget of cosmetic repair allow, it is best to perform the alignment of the ceiling overlap with high-quality plaster plaster.
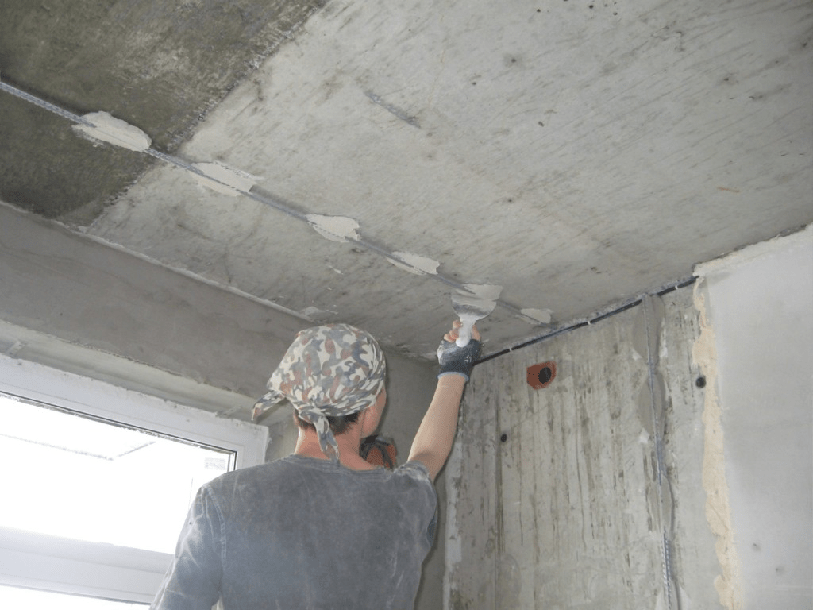
To do this, plastic rails are coiling and tighten the plaster with a plaster grid. Reiki-beacons glue alabaster, focusing on the pre-stretched marking horizontal cords. The grid is sewn on dowels. The total time required for the ceiling alignment in the room is 5-6 hours of operation.
In one working day you can complete the full repair of the ceiling. The next day, you can rub the surface and paint surface.
Cosmetic repair work with room walls
During the cosmetic repair, the walls are flattering and plastering only in exceptional situations, when this requires a situation, for example, the appearance of a large amount of cracks or the rocking of plaster. In addition, the total area of \u200b\u200bthe walls of the room is usually tripled exceeding the area of \u200b\u200bthe ceiling, which in itself requires a lot of time and materials.
Therefore, during cosmetic repairs, the preparation process is limited by a cutting of small cracks, followed by shtcloth and surface grinding. Sometimes, in order to align the plane of a separate wall, especially problematic foster is subjected to grinding with electric grinding.

In addition, at this stage of repair work it is easy to change the profile and configuration of wiring wiring in the room. It is enough to labby the channels at the bottom of the walls to the place of installation of new electrical sockets, break through the "glasses" for cutting and install the sockets themselves. Channels laid in channels with wiring can be witching plaster or alabastern weight. All works will take a maximum of 2-3 hours. At the end of the preparation for decoration, the surface is carried away by a vacuum cleaner and ground.
Blood preparation
After the end of the most labor-intensive work with the preparation of the ceiling and walls, you can move to stripping and preparation of the floor. If concrete floors, with a floor-based floor-based coating, then cosmetic repairs can limit the resetting of laminate plates, with a replacement of a lining material or without any. Most often in the room change damaged plates, after which the coating is polished using wax mastic.
Linoleum coatings in cosmetic repairs are cut, the base is determined to concrete, it is ground and closes with a thermal insulating lining based on foamed polyethylene.

If wooden floors are equipped in the room, then the flooring themselves are observed and are repaired, then the joints are clogged and coincided, after which the surface is grouped and preparing under painting.
Do not forget about trash and dust
Any repairs, even the simplest and superficial, are always accompanied by the formation of a large amount of garbage and dust. Before repair, you need to prepare two or three polypropylene bags, in which all garbage from the room will be collected daily. At the end of the day after each finishing operation, the wall and the floor are cleaned from the raised crumbs and residues of the plastering solution, and before finishing the walls are a vacuum cleaner or a wet brushed.
If it is supposed to align the walls of the room with plaster plaster, then the amount of garbage will increase five to six times. It will be necessary to consider in advance and find a way to collect and remove 150-200 kg of cement and sand garbage drops. It is impossible to send it to garbage chute or garbage tanks, you will need to order a special service for the removal of construction waste.
Cosmetic Repair Operations in Room
The first finishing ceilings are performed. Typically, the renovated and ground surface is ground and stained with acrylic paint of light tones.

If wallpapers are used in the interior of the room, ceilings can be decorated with fluiseline or vinyl wallpaper in the tone of the future wall decoration. The usual practice for registration of lamps and chandeliers is considered to use imitation of stucco from polystyrene foam and decorative ceiling plinths.
The finishing of walls in the room is considered one of the most responsible and at the same time labor-intensive cosmetic operations. Even with the fact that half of the walls in the room will be closed with furniture, all the same as a certain part of the walls will be well viewed by all those present in the room. If during the cosmetic repair, it was not possible to highlight the surface of the walls, we can only hide the disadvantages under the wallpaper. It is best to tissue-based tissue trellis or with a pronounced embossed textured surface. There will take 7-8 hours or full time on the room.
Repair doors and floor in a small room
The wooden board of the old layout often has to be hiding under linoleum or laminate. In this case, the surface of the flooring is polished by a cyclical machine, and the joints are crossped with nails, clogged at an angle to the board. At the next stage of repair, the surface of the floor is sewn with OSB plates, after which a linoleum or any other option of flooring can be laid in the room.

The situation is complicated if concrete floors are aligned in the level of the screed in the entire apartment. In this case, any floor covering in the room will lead to the appearance of the clad, so laying the laminate or parquet should be planned simultaneously in all rooms.
The final stage is considered to restore interroom doors. Lutka and the door itself, if they are in good condition, can not be changed, but to subjected to restorations with cleaning and surface polishing. The external facing of the door frame during the repair is traditionally replaced by a new one. The replacement of the door with the carrier box is planned for overhaul, usually so that the doors of one style and execution in the entire apartment or house.
Conclusion
Room repair, even in a cosmetic version, requires careful preparation, first of all, in the details of the future interior of the room, the method of decorating walls and gender. Any attempts to postpone the decision for the future, to make random, as it turns out, will lead to a significant increase in costs and an increase in the time required for the restoration of the room, two or three times.
Normal everyday business: Apartment clearly requires repair, and there is little money. How to make an inexpensive apartment repair with your own hands? It seems to be the simplest, obvious way: Surface cosmetic repairs. That is, the plywood of the wallpaper, the plains of the ceiling, painting, fixing the creaking floor; Perhaps - replacement of windows.
However, if you calculate the labor costs and consumption of materials, it turns out that by increasing the cost of labor half, and the consumption of money on a quarter, you can give the apartment a completely different kind, and for a long time. How much you need to invest specifically - depends on the prices in the region, but the general methods that the apartment can be made cozy and elegant inexpensive, the same.
Cash savings in the repair of the apartment with their own hands, as well as the Earth in ancient legends, on three whales and slowly hurrying the turtle under them:
- Do not worry work. Nothing happens from nothing. Or money, or work.
- Everywhere, where possible, the capital, but did not change the kind of old, but reproduce.
- Maximum savings we take where it does not affect the quality of work and will not be visible.
- We are broader the expenditure of labor and money in time: I conceived repairs in the summer or in the fall, we spend the preparation for the year, and then they wear everything and make everything quickly. Sharely post 200-300 thousand rubles - a problem, but to split them with parts per year - it is quite possible. In addition, there will be a time to death seven times - a rejection once.
Where it is difficult to save
The only site where you have to invite a specialist - alteration and strengthening of electrical wiring, if it is old and weak. Here is the only way of savings - to negotiate with the Dazov electrician. It will perform the work of pieces, in his free time, but the probability of hacktare will be even less than that of the "branded" specialists: after all, he then all this and serve.

It is better not to save on the electric and wiring, but some moments, such as setting the sockets can be carried out on their own.
Tool
A good specialized tool makes much easier and cheapens work. But buying it for it. Therefore, tool as needed to rent better. On costs it will come out a bit if you decide in advance with the design and make up an approximate work plan for yourself.
Season
Plumbing
Patient question with independent cheap repair - replacement of plumbing. If she is still "live", only closed, then you can clean and paint. How to do it will be described below. But if there are chips and cracks, then you want - do not want, you need to change.
For such a case, here's the information: Novoseli, especially in the houses above the budget category, often at the entrance to the entry overhaul, and excellent, completely new faience and cast iron plumbing turns out to be in the landfill. Polygon operators (simply - dusty garbers) have long been turned by this circumstance in a profitable business.
In direct contact on the service phone with strangers, they do not go, but the methods of the sarafined radio to them are quite possible to reach them. The rate is from a third to half of the factory price for the subject of ego. And do not think that you will be held on a landfill and show where it lies. You will be offered to choose from clean, thoroughly washed products, for which at least sit down immediately.
Construction garbage
The next sick question is the export of construction garbage. The operation is not cheap, and requires paper hassle. Output: basement, barn, cottage or chunnel and a few b / y bags from plastic cramps purchased for a penny. The construction garbage does not waste and does not boot, then you can pour it on the bucket into the container on the house damage. There is nothing illegal in this.
After reading this article, you will learn how to make room repair with your own hands, how to come up with design, pick up finishing materials and sequentially, step by step, perform all work.
What are rooms in modern apartments
Soviet experience in repairing rooms with their own hands is still close to many of our fellow citizens.
Houses designed 20 years ago have balconies, tightly brass windows. Thus, sunlight can not penetrate the room at all.
The atmosphere of the home comfort on the old Soviet habit is created by building a row of brown cabinets on the one hand, and a number of seats (sofa and a pair of monsters chairs) are usually occupied by the opposite wall.
The view of the cabinets from this angle, indeed, opens the most panoramic. Thus, the room places the missing feeling of a narrow corridor. Carpets on the walls with psychedelic patterns complement the cozy interior of a typical room in a typical apartment. Familiar?

Outdated design
Solving, what kind of repair to make in the room, first of all get rid of the rubble, as well as the designer ideas of the era of the era. Today in fashion, bright rooms, cheerful paints, functional furniture and large spaces.
Where to begin
Determine what room start repair. For all rules, overhaul in the apartment begins with its very far corner.
Lastly, the entrance hall is repaired. Why? Because the corridor is the most passing place in the apartment. Therefore, the construction garbage, dust and dirt, one way or another will appear here. Not so insulting if they cover the old finish, which you still were going to delete. But if the garbage will fall on the new newly decorated walls in the hallway, you quickly realize your mistake.
Decramrating with the place of repair, decide how the outcome of your work should look like. Would you like to make only cosmetic repairs or dream of global interior changes?
On a sheet of paper or in a specialized computer program, create a sketch of the future room. By approving the "project" with the family and coordinating it with the budget, write down the steps to achieve goals.
Note! Even if you are very economically spent money on repairs, at the stage of the design of the design project, I still would not hurt to take advantage of the help of professional designers. They will help not only competently change the interior, increase the space, but also pick up the finishing materials that will perfectly fit into your budget.
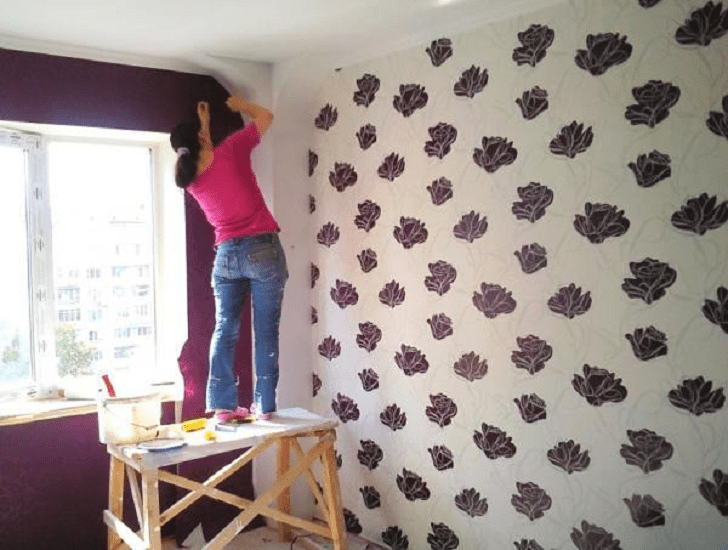
Removal of wallpaper
Sequence of work
Dismantling
The sequence of repair of the room, like any other room, as a rule, is not distinguished by a variety.
- Repair starts with removal from the walls and ceiling of old coatings. If you plan to transfer the floor covering, the dismantling works will touch the floor.
- Preparation for dismantling lies in the removal of all furniture. If it is impossible, all surfaces are better to cover.
- At this stage, wallpapers are removed, paint and plaster and ceiling are removed from the walls. Further actions will depend on what kind of decoration of the apartment you are going to do.
Alignment of walls
- If the walls are planned to be sealed with thick wallpaper, cutting with wall panels, and close the ceiling with a tension or mounted construction, you can not waste time on the leveling of surfaces. Listed finishing materials will perfectly hide all flaws.
- In the case, if the repairs lies in the cracking of thin paper wallpaper, applying a layer of decorative plaster on the walls, the smooth surface will be necessary. The excellent result is achieved by applying the primer on the walls and ceiling and 2-3 layers of putty.
Note! Before applying each new layer, putty should be given to dry for 24 hours.
- If the repair involves the installation of electricians, reinstalling the heating pipes, the installation of the air conditioner, stretch and mounted ceilings, these works are performed before the finishing of the room.
The last stage - pasting walls with wallpaper, installation of wall panels, applying decorative plaster. Of all the above, the most democratic price is inherent in the wallpaper.

Decoration Materials
When choosing materials, it is worth considering the type of room in which the repair is performed. For example, inexpensive paper wallpaper or decorative plaster, which has resistance to mechanical damage is suitable for children's finishes.
Performing a room repair, acquire more expensive materials, because the living room is a face of the house. The trim of the bathroom assumes the presence of thermal and moisture-resistant materials - tile, film tension ceilings.
For repair of the room, 16 square meters. m can leave 6 wallpaper rolls and 6 packs of wallpaper glue. It is worth considering these numbers when purchasing materials in the store.
Thus, the repair of the room is, though the tedious, but the solid task, which (if you subnote it with the whole family) can be solved as soon as possible. Of course, it all depends on the dimensions of the room you are going to repair.
Summing up
We hope our article was useful for you. In order to more accurately deal with the technological and practical question, our website presents a detailed photo and video instruction in which you will find useful information on this issue.
Photo Gallery
kursremonta.ru.
Room repair do-it-yourself | School repair
Ready to tell everyone (and show in pictures), as you can relatively cheap to make a good repair. If everything is in order with the hands, it is not difficult.
So, a specific object. Room 15 sq.m. Future bedroom. Rectangle 3x5m, height 2.65m. Repair in it was not produced for a long time. There are no obvious construction defects (walls, ceiling visually smooth, the floor is smooth horizon).
Due to the fact that the removal of furniture was gradual, then the repair stretched a little in time. It all started with the preparation of the project of a future room, an approximate placement of furniture and original design ideas. Repairs began with replacing the old wooden frame on a modern plastic two-chamber window. Made and mounted without complaints. The next stage was the replacement of the radiator. The grinder was cut the old pipes, and in their place put metal-plastic pipes with a new radiator. In the future, the pipe was planned to sew gypsum. The floor, thank God, was in very good condition, it was decided not to touch him and not to do the tie. After the end of the old furniture, it began to make a frame for gyrors from metal profiles. First it was decided to sew an outdoor wall with a window. Ceiling PP 60x27 ceiling profiles and PPN 27x28 guide profiles, which were used in the future were used. The main complexity was in accurate measurements of the installation of the hypin from the wall. The pipes prevented, and to increase the distance from the wall did not allow the already mounted windowsill. But the level and plumb and there they did their job. First secured the profile on the ceiling. The plot outlined the place where the profile should be installed on the floor. After that, screwed PN and on the walls. Further installed vertically PP and secured them in several places to the wall using direct suspensions. It turned out a ready frame for one wall. By laying the opening of mineral wool for heat-sound insulation, the wall has sewn plasterboard. At the same time, the window slopes were insulated and sewn, using the same metallic frame for this.
After that, they started making the frame on the adjacent walls. Determined the angle from which all measurements are made, the folding thread painted on the ceiling and on the floor parallel lines for which later it is necessary to fix the guides of PPNs. On the walls there were niches that should be on the project. Popping the PPN on the floor and on the ceiling, began to make vertical racks from PP 60x27. A profile was cut 7-10 mm less than the height of the room, inserted into the pn every 60 cm and fucked to the wall in three places after about 70 cm using direct suspensions. In places where the niches, first mounted in the wall on the wall, cutting and flexing it as it should be on the ground.
At the same time, in places of future sockets, the wall was put on the wall under the mounting boxes. The bulk of the sockets and all the switches were planned to do on the hypotherapy wall, so the walls were minimized in two places, a rosette and a socket in a niche.
After the main frame was made, weak the low-current wires - the phone, Ethernet, TV. The weakness was on the top of 3-5 cm from the ceiling. The power cable in the future was laid slightly lower, about 10 cm from the ceiling.
So far, construction went, the old door did not dismantle. She was removed at the last moment when all dirty and dusty works were made, almost before sticking wallpaper. In the meantime, the framework of the frame was going on, the URSA-100 insulation was laid between the guides. At first he kept the wall due to the fact that the frame itself was held, and in the subsequent, the power wires were triggered on top, which were quite well pressed the insulation to the wall, so he did not fall under his own severity. All power wires were NYM 3x1.5, NYM 3x2.5 and NYM 4x1.5 was used on the passage switches. The entire power cable for reinsurance was laid in the corrugation. The electrician circuit was rather complicated and the cable left a lot. About 150 meters of power cable and about 50 meters of low-voltage took 15 meter room. The power cable was fucked to a metal frame from the inside with the help of clips, and with each other with plastic screeds. The connecting boxes were planned in the corners of the room, one on the socket group, two on the lighting.
After some time, all the walls were insulated and the entire cable was tricked. The frame began to sewer plasterboard. Used ordinary plasterboard (not moisture-resistant) 1200x2700mm. Sliced \u200b\u200bheight, put, fucked with self-draws. On the spot noted the holes for the sockets, the switches and drilled them with the crown, immediately installed the mounting boxes and pulled the wires outward. Niche in the gypoks also chopped the electric lobby at the place. After you have sewn all the walls, I made a lotion and sidewall niches. In semicircular niches, the sidewalls soaked and bent over the place.
When the walls were all covered with plasterboard, proceeded to the manufacture of a multi-level ceiling design. All marking was made on the ceiling, the contours of the ceiling, the location of the lamps, mirrors were drawn. Based on this markup, in the future, the cutting frame was made. All sequence of work can be seen in the photos. In parallel, electrical connecting boxes were collected, the wires are twisted and welded.
After the ceiling was ready, all the joints were shaked, using a fogenfuller, a resident of the Kyrgyz Republic, a sickle and a cornering paper tape. The bends of the niche and the ceiling were reinforced with plastic flexible corners, which in the future shelted. After putty, the old door was dismantled, and in return is new. Before sticking wallpaper, the window slopes and sidewalls of niches painted with white washing paint Delux. The ceiling painted with water-mounted paint several times.
Wallpaper sticking took one day. After that, for some time the floor was sulfted for some time, the remaining chunks of the hypot on the garbage were carried out, partially endured the tool.
Read also
On the floor was decided to put the German laminate Tarkett. Thank God, the floor was even and decided not even removing the old linoleum, and put it right on it using a 2-mm substrate. The waterproofing was also not made due to the fact that the linoleum itself does not miss moisture. The laminate for the project was to lie diagonally, so it was put. After the floor was made, it remains to finish the little things. Fasten the plinth, somewhere to trim the wallpaper, wash the mirror on the ceiling from the tape, to suck the jack of the window and the slop, etc. The room is ready, it remains to wait when they bring ordered furniture.
Naturally, after everything was ready, ideas appear, as it was possible to do better, more correctly. You see how not it was necessary. Here also. It was necessary to test the heating pipe to the radiator. The current of water through the battery goes upwards, but the opposite is necessary. Because of this, there is no 100% efficacy of heat radiator. The second minus when repairing is that because of the laziness, old wallpapers were not completely sorted. May be mocking under the insulation. The third minus - vaporizolation was not made. And the last undership is the lack of supply ventilation. Sealed windows of the air are not allowed and the room is felt in the room. I would like to further install the KIV valve. It is possible to fix it, although it would be easier to think about it at the very beginning of the repair process.


Discuss an article on the Masters Forum
homeMasters.ru.
Room repair do-it-yourself: where to start?
If you planned the room repair with your own hands, but do not know where to start, having familiarized yourself with the materials of our site "Repair" you decide this problem. Adhering to our advice, repair work is not to delay for a long time, and the final result will please you.

First of all, you should understand that the room repair needs serious preliminary preparation. The most important point is to prepare a detailed plan of repair, taking into account all the nuances. Consider tips on the organization of repair from professionals:
- What type of repair to choose: capital or cosmetic.
- Preparation of interior design and detailed repairs plan.

- Determine the main stages of the room repair.

- Make a list of necessary tools and materials.

- Schedule upcoming expenses.

- Release the room.

- Where to start repairing the room with your own hands.

Now let's stop at each of the stages in more detail by attaching photos and videos.
What room repair is needed: capital or cosmetic
First of all, you need to decide on the volume and complexity of future repair. So that the apartment was clean and light enough to carry out surface, cosmetic repairs: the replacement of wallpaper, the change of old linoleum, the plains of the ceiling, the color of the walls, etc.
If you are planning to get rid of the whole old and boring, solve to overhaul with the implementation of windows, alignment of walls, installation of new floors, as well as modern ceilings. Your accommodation will be transformed and will become beautiful and new.We do not recommend refusing to help professionals when conducting overhaul. First of all, it concerns the creation of a stylish design of the room, which includes redevelopment, as well as demolition of some partitions and walls.

Planning repairs, pushing out of your financial opportunities.
Choose the interior design and decide on the repair plan
At the very beginning, decide on the design and interior of each individual room you are going to change in your apartment. You can seek help to experienced designer, which will slightly increase your financial costs for repairs.

For a room where you are going to perform repairs, you need to perform detailed drawings of all stages of work, in their clear sequence.
We advise you to fulfill five scaffold sketches for all individual rooms. In the first drawing, we recommend displaying the view of the premises from above, and on the other four - each wall. All drawings will complement the detailed description as well as the sequential repair plan, which will avoid inaccuracies and simplified work.

- Places Location of furniture. Those walls that rush into the eyes most need to pay maximum attention and use the highest quality finish.

- Think well on where it is better to place chandeliers and lamps so that the light can better illuminate the room.

- Considering the location of household appliances, mark places for the outlet. To then competently design electrical wiring in different rooms.

- Think out the location of the main decorative elements: mosaic, paintings, brick wall.

In terms of repair, you must specify the necessary finish option: painting, wall pasting with wallpaper, etc. To separate the room on separate zones, we advise you to paint one of the walls with different color to emphasize attention and visually divide the room. Such moments also need to be reflected on the plan.
How to define the sequence of repair of rooms in the apartment
According to the advice of specialists to avoid unnecessary dust and dirt when repairing the repair, we advise first to repair the rooms in the rooms that are located away from the entrance door. The last steps of repair is better to choose the passing rooms, as well as the corridor through which construction tools and materials will often sweep. In order not to scratch or stain the finish of the already repaired wall, and also not damage the new floor.
As an additional protection of the renovated room, a cellophane film can act (it is fixed from the outside of the door). It provides reliable protection of the room from construction dust, dirt, plaster, paint and random damage.Room repair in the apartment: do it yourself or by experts
Do not fulfill all repair work yourself. If necessary, repairing repair or only especially difficult events can be entrusted with experienced specialists. First, knowledge and experience will allow them to repair high quality and quickly. Secondly, you do not have to buy expensive tools with which the screed is poured or a tile is laid out.

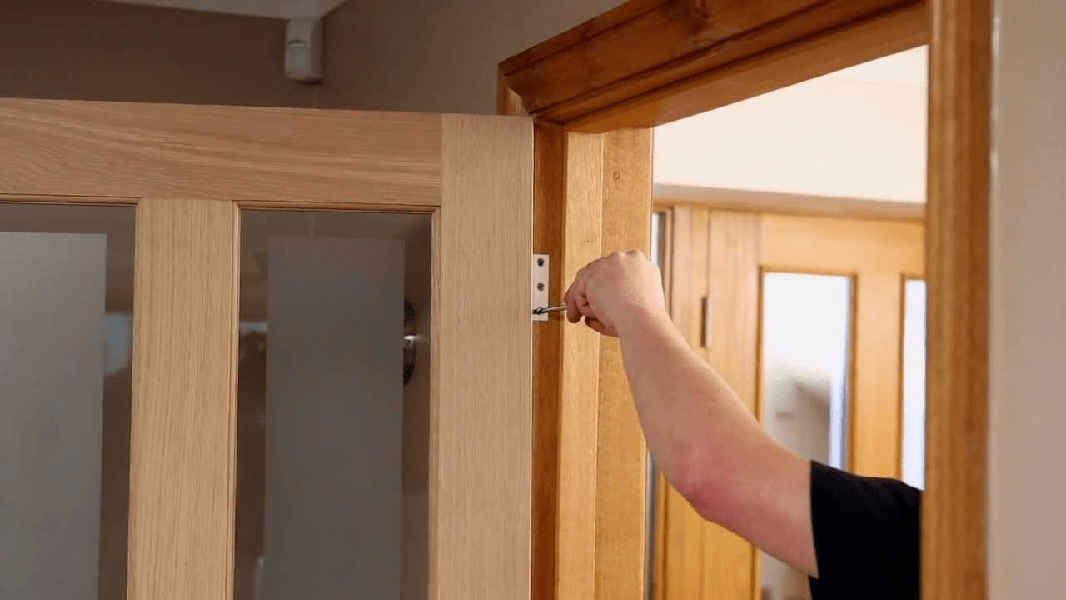
Even if the installation process of the interior door seems to you simple, the slightest inaccuracy in this regard is unacceptable. Of course, hang and put furniture in the kitchen, align the walls and make a small color you can independently. However, more complex repair work entrust to those skilled in the art that there is no consequence to redo them, which will significantly increase financial costs.

Make a list of necessary tools and materials
- After selecting the design of the room, the interior and furniture, you need to make a complete list of building materials. Their total value and the number directly depends on the repair work, as well as the methods of their conduct. If you have the necessary budget, it is worth purchasing construction materials with a minor reserve.

- Prepare a list of decor elements: shelves, holders, paintings, mirrors, etc. Start purchases from selected decor elements. If there is no planned decor element, you can quickly change it or develop a new design room repair plan.

- Prepare a list of necessary tools for repair. To do this, use the councils of the consultant in the construction stores of your city or professional repair shops.

Calculate expenses
When preparatory work was performed: sketches and repair plans were made, lists of all tools, materials were prepared, made a decision on the possibility of repairing the room on their own or with the help of repairmen specialists, you will calculate the average total price of the planned repair.
Do not hurry with the purchase of all materials when you first visit the store. In the compiled tool lists and materials, perval the cost of various stores, which will save on purchases. Carefully treat the choice of service brigade services. Special attention should be paid not to the cost of repair work, as well as on feedback from our acquaintances about the quality of repair services.

Release the room
To ensure reliable protection of furniture from damage, construction dust and dirt, collect it in the central part of the room. After that, cover the polyethylene film. Therefore, free access to the ceiling and walls. Expentent equipment and clothing are recommended to transfer to other rooms.

Room repair do-it-yourself: where to start and what a sequence of work
Repair work is worth starting with the most dusty: replacement of windows, window slopes and installing new windowsill. Thus, you can avoid dust and mud when performing painting, when opening the windows are prohibited to avoid increasing humidity and temperature drops. When the slopes, windows and window sills are installed, close them with an organomet or polyethylene film to eliminate random contamination and mechanical damage.
Take care of the markup of places to install additional outlets, make the wiring of electrical appliances. At the current stage, do not install the outlets and do not attach them to the shield.
When using welding work (for example, when replacing batteries), perform them simultaneously in various places of the apartment to quickly carry out this complex and dusty stage of work, which sometimes includes breakdown of walls.

Before repairing floors, walls, ceilings need to be conducted by a water or laser level. Start with applying the thickest layers of solution. During their drying, you can perform other minor work without downtime.
Upon completion of such a preparatory stage, proceed to repair, performing it in the following sequence: repair ceiling, walls, floor. First, work is performed using putty, gypsum, cement mixtures. Then proceed to the installation of the floor, doors and slopes.
Latest stages of repair work:
- coloring or pasting ceiling;

- painting walls or pasting wallpaper;

- installing flooring;

- installation of thresholds, plinths and platbands.

Observing the right order during repair and having a clear action plan, you can avoid many mistakes, save time and money. This is one of the main components of durable and beautiful repairs, along with the observance of the technologists and the quality of the materials used.
Maybe you will also be interested in:
remontik.org.
How to make repairs in the room?
 Repair - concept rather tensile. For someone, repair it means to completely defeat the entire room and finish all surfaces from scratch, for others and replacing wallpaper - repair. Therefore, for a start, you need to decide what you want to do: Cosmetic repair or capital, as well as outline the front of work and their sequence.
Rightly planned repair will take less time, and also will save money. How? This will be discussed further.
How to make repairs in the room with your own hands?

So, several rules following which your repair will proceed exactly and smoothly, without unpleasant surprises and unforeseen complications.
Rule number 1. Decide in advance with the room design. It is much easier to select materials for repair, when it is just known that it should be ultimately. To design design, you can use the services by a specialist, and you can do everything yourself. It will not be superfluous to view thematic logs or sites. With the help of special computer programs for visibility, you can create a picture of a future room.
Rule number 2.. Check out the new products in the building materials market. The modern market offers many materials for roughing and finishing surfaces of surfaces that can significantly simplify and speed up repair work. The choice of building materials is better to entrust experienced builders who are focused on price and quality issues and can choose exactly what you need.
Rule number 3.. Buy everything you need to repair in advance. Before you go shopping, you need to determine what will be needed in what quantity. In order to calculate the consumption of materials, it is necessary to measure the parameters of the room: its exact area, the length of the walls, the height of the ceiling, the size of window and door openings, etc. These data should be as accurate as possible, so measurements are better to spend several times. Based on the data obtained, you can make calculation of all materials. It is desirable that the amount of materials be determined exactly, otherwise they will have to overpay for their amount of them, or then buy them.
Buying building materials best on wholesale bases, where prices are below, and the range is quite wide. It will also be more profitable to purchase all the necessary goods in one place, unless, of course, it is possible. Given the discount systems that directly depend on the purchase price, it will be possible to count on a significant bonus and free shipping.
Using the repair materials that need to be specifically ordered or the number of which is limited, you need to accurately determine their consumption. When lacking such materials, the repair may suspend or have to use other materials, which will definitely affect the result.
Rule number 4.. Before starting repair work, you must endure all the furniture and other interior items from the room. If they leave them, they will not only interfere with the free move, but most likely they themselves come to an unsuitable condition, covered with construction dust, scratches, paint or solutions stains, etc. Not to mention the fact that in this case it is almost impossible to make a high-quality floor covering. So it is better to spend a couple of hours on the removal of furniture than the sweat and then throw it away. To do this, you can use the help of loaders or to independently clear the repair area.
Rule number 5.. Prepare a set of necessary tools in advance so that during repairs are not distracted in search of a drill or hammer. A set of tools directly depends on the planned works and the technology of their conduct. Must be necessary to be at the ready rags, solvents, a bucket with water. Almost no repair can be carried out without scaffolding. At home, they can replace the table of suitable height, allowing the most convenient work on the finishing of the top of the walls and the ceiling. Please note that such a table will almost certainly lose its former look after the repair, and use it further as furniture in the apartment is unlikely to succeed.
In addition, you need to think about your safety, having prepared a respirator, glasses, gloves, etc.
Rule number 6.. Be sure to completely remove the old finish. This applies to the flooring, old wallpapers, opened plaster, etc. Dismantling finishes is carried out, starting from the floor. Even if you are not going to change the floor covering (for example, carpet or laminate), it is better to remove it, otherwise it does not live to the end of the repair.
As for the walls, they are not necessarily cleaned to a brick or concrete base. If they are smooth, recently splashing, without cracks and roughness, you can apply a new finish. Old wallpaper or other finish finish need to be removed to apply a new one. With wallpaper, it usually does not arise problems, but if you "lucky enough to deal with old paper wallpaper, which were glued" for centuries ", you will have to make efforts to not damage the surface of the wall. In this case, the wallpaper is wetted with soapy water, which contributes to their removal.
Disassembling the ceiling decoration depends on its type. If it is whitewashed, it is removed using a special brush. If the ceiling is covered with water-free paint having a completely normal form, it is not worthwheeling. In cases of appearances on the surface of cracks, shocking plaster, or other serious defects, it is necessary to clean it to the base.
If the room is planned to replace windows and doors, they also need to be dismantled before starting repair work, since it is enough "dusty" process, and in some cases it requires even partial destruction of the walls. If the windows and doors will be used for the previous one, then after the end of all works associated with mud and dust, their surface is cleaned, if necessary, polished and spreads. It should be done only after a thorough wet cleaning of the apartment so that small dust particles are not sedated to the painted surface. Otherwise, the result will be a rough and non-accurant surface. Before mounting, a protective film that protects them from possible damage is applied to the new windows and doors. It is desirable not to remove it immediately after installation, and leave until the complete end of all repair work. At the same time, it will protect the surface from falling onto it dust, drops of paint or solution and other substances capable of damaging it.
Rule number 7.. Remove the construction trash after each stage of repair. For all the time it will be accumulated by such a quantity that it becomes simply impossible to work in the room, so everything is superfluous to take place immediately, and the floor can be worn regularly so that the dust does not accumulate.
Rule number 8.. Plan a repair work so that at the beginning there were all "dirty" processes, leaving behind a lot of garbage and dust, and only then finish. Consider in more detail the sequence of work.
Where to start repairing the room?

Traditionally, the repair begins with the ceiling. Decide what exactly you want to do with it. If this is an alignment of the surface with a putty, you need to immediately apply it, and then to open it so that later it is no longer returned to the ceiling finish. The resulting dust is preferably removed. The plasterboard ceiling is also mounted, sweeping and squeaks immediately, but the suspension structures, panels or stretch ceilings are installed after the end of the walls are finished, otherwise the construction dust can be settled, and their surface can be blocked or damaged.
In general, in most cases of repair, the ceiling finish is in the first place, although there are exceptions. For example, when it is planned to finish the ceiling and walls with putty, work is carried out in parallel, after which the ceiling, if necessary, is covered with finishing finish, and then the finishing layer is applied to the walls (decorative putty, wallpaper, paint, etc.).
After the ceiling there is a turn of the walls. First you need to determine their evenness, the quality of the corners, as well as the condition of the previous draft finish. If before the walls did not align, then most likely it will be necessary to do. Another common problem is uneven angles. Almost all finishing finishes require the presence of a maximum surface and direct corners, as they will not be able to hide the defects of the walls. As a result, even expensive types of finishes will look like a sorry on the hill walls, when using wallpaper, the likelihood of skewers, inconsistencies of the drawing and the appearance of other defects. Therefore, the preparation of walls for the finishing finish is a mandatory and responsible stage of repair.
The type of finishing walls for walls is selected depending on the selected style style. It may be paint, decorative putty, various types of wallpaper, panels. You can start with the finish finish immediately after the end of all works associated with dust or other possible pollution.
It is important to remember that it is the walls in many respects determine the appearance of the room and the quality of repair. Any defect on their surface can spoil the overall impression. Therefore, when working with them, you need to be extremely attentive, clearly follow the technology of application of finishing materials, use only high-quality products.
Recently, the use of various built-in wardrobes, drywall shelves, partitions and other functional decorative interior elements has become popular. They allow you to fully use the useful area of \u200b\u200bthe room, without clinging to her heavy furniture objects. In addition, they create a unique interior and make it possible to embody the original design solutions. To create them, metal profiles and plasterboard sheets are commonly used, which are shit after installation and, if necessary, be painted or covered with another finish, similar to the walls or vice versa, highlighting them. Installation of such structures should be parallel to the finish finish of the walls. The assembly and fastening of such structures requires certain skills, so it is better to seek to create for help from specialists. Ignorance of their assembly technologies can lead to the destruction of structures, damage the materials, and possibly the surface of the walls. So it is better not to risk and immediately turn to professionals.
Pole repair It may include as a simple replacement of floor covering and replacing its entire design. In the first case, the floor can be done immediately after the finishing of the walls, in the second - before the finish finish. The complete replacement of the floor provides its alignment by filling the concrete screed, the installation of "warm floor" and other works. At the same time, the likelihood of damage to wall decoration is large.
Before repairing the floor, it is necessary to remove all the garbage and thoroughly wash the surface. Dust, sand, earth, residues of mixtures and other extraneous materials should not accumulate, and they can not be plated. Foreneous particles can subsequently cause premature sex wear.
The surface of the floor must be smooth, and not only because it is beautiful. It is quite difficult for an uneven surface, and over time it can quickly lose its appearance. Floor coating itself is mounted after the final completion of all other works. Over the repair, the floor is constantly led by loads: moving forests and tools, constant walking, blows, stains from paints and mixtures, dust layers. If the coating is used before, it will not last even until the end of the repair. The same applies to the plinths that are mounted after laying outdoor coverage. Modern model of plinths are not only fastening without problems, but also have special lids that hide the elements of fasteners.
Planning a sequence of repair work, you need to remember that the main thing is not to spoil what has already been done. If you do not follow this principle, you can immediately prepare for a new repair, requiring additional time and money.
postroy-sam.com.
where to start, cosmetic, sequence
The issue of repairing the room is almost always resting in the budget of future works. Most often, the owners of the apartment or at home appear before the choice - to make the room repair with your own hands in a cosmetic version, without postponing the case in a long box, or schedule for an indefinite future capital restructuring with redevelopment and serious design updates. Most of the masters in such a situation are recommended to carry out the cosmetic room repair, during which you can solve the vast majority of problems with the interior of the room.

How to properly approach the organization of repair in one room
It is always inconvenient to start repairing the room and even scary, especially if there is no sufficient experience, and from the helpers at hand only the cheat sheet on the repair of the room with their own hands for beginners. But, as a rule, uncertainty and doubts pass when it becomes clear the amount of future work and the issue is resolved, in which sequence to make repairs in the room.
Therefore, the first thing is the master plan for cosmetic repair, and most importantly, before trying to make repairs in the room, it is necessary to compile a detailed estimate for the materials and consumables. This is a prerequisite, even for repairing in a small room, you will need to make a list of several dozen items.

Where to start repairing in the room - not fundamentally, it is possible to carry out repair work in the sequence that seems more convenient in these specific conditions. Traditionally, the room repair is starting with their own hands from the most "dirty" or drafts and finish with subtle finishing procedures.
A typical list of works or a repair sequence in the room is as follows:
- From the walls, the ceiling and floor is removed by the old finish. The removal of the floor covering gives the largest percentage of dust and dirt, so it is removed primarily;
- Conducting floor preparation is carried out for further laying of a new floor covering;
- Repair of wiring, transferring and hanging lamps, switches, unfold corrugations under television and Internet cable;
- The walls and ceiling are cleaned and sweep. If the plans for cosmetic repairs are supposed to change the wallpaper on a more modern type of finish, it will be necessary to perform alignment of walls with plaster plaster;
- The ceiling surface is equal to the same way. Under whitelle or painting, the ceiling is rubbed, plastering the lime-gypsum mixture and laid decorative coating;
- The decorative decoration of the walls is performed, the ceiling plinth is glued, the facing of interroom doors changes;
- The new flooring is placed, the plinth is installed, the lamps are placed, the switches are installed.
Of course, at every stage of repair of the room, photo, a large amount of garbage and dust will be formed. Not only will you have to regularly remove the room and take the garbage dusties, you will need to try to close the sections with the repair of the protective polyethylene film to avoid dusting the surface.

What should not be included in the cosmetic room repair
The wizard finishers often call the cosmetic repair of the work "for three days" in order to update the interior in the room, more, as a rule, is not required. The list of repair activities do not include the most expensive work:
- Redevelopment of premises with the transfer of interroom partitions;
- Replacement of the heating system;
- Installation of expensive multi-tiered suspended ceilings;
- Glazing balcony and replacement windows on double-glazed windows;
- Warm floor equipment in the room.
It is clear that all the listed components of repair require serious financial costs and attracting qualified specialists to the work. Time to hold such serious events will be required no day and not two. In addition, this is the specificity of the repair in the room, that the willy-nilly dust and the construction trash sprawl across the apartment. Therefore, the situation is regulated in this way - either the cosmetic repairs are made in a separate room, or the whole apartment "gets up" to capital repairs.
In general, in a plan for cosmetic repairs include everything that can be made in a couple of days with their own hands for relatively small money.

The main task of cosmetic repair
The main goal of repair work is to refresh the interior of the room, remove the minor defects and damage accumulated over the years, insanely annoying and interfering in everyday life.
In rare cases, cosmetic repairs becomes a consequence of force majeure circumstances, for example, the flooding of the room with neighbors in the floor above or preparing the room to surrender in the hiring. There may be a lot of reasons, but the main thing is still maintaining the room in a comfortable condition.

Properly performed cosmetic repairs makes it possible to save on the volumes of future overhaul, for example, the fulfillment of the center of the floor and alignment of the walls at least will reduce the costs of time and forces to prepare for overhaul, naturally, provided that the room repairing the photo is made as in good faith and high quality .

The next stage of repair, cost distribution and load
One of the most difficult stages of cosmetic repairs are fair to plan budget planning and procurement of materials. Especially if you plan most of the repair procedures with your own hands. The reason is simple - in lovers and beginner masters, there is no idea about how much the material will be needed on this or that section of the work.
In this case, the problem is solved in two ways:
- A compiled list of works and estimates can be shown to the experienced master who will help calculate the expense of quadrature of the room;
- Calculate consumption based on typical recommendations of building materials manufacturers, increasing glue, plastering, wallpaper, flooring by 10% of the calculated indicators.
In the latter case, the costs of acquiring materials will increase significantly, but ultimately the remains of cement, dry plaster and adhesive can be used for the cosmetic repair of other rooms in the apartment. In addition, the list of often helps to get a wholesale discount, so that there should be no significant failures in the budget of the future cosmetic renewal of the room with a competent organization of procurement.

Preparatory stages of repair in the room
The first, the most time-consuming stage there was always a rough ridge of walls and a ceiling. Usually repairs in the room begins with the removal of furniture items and seal the entrance door to protective awning. You can use a dense polyethylene film or an old blanket. The improvised curtain will protect the rest of the apartment from the noise and dust, which, even with very neat work, the use of the vacuum cleaner and the damp floor cleaning is always accumulated in a room in considerable quantities.
Before repair, lamps are necessarily removed, instead of a chandelier in the room, leave a cartridge with a light bulb. If the room is installed double-glazed windows, it will be useless to tighten the film and the window opening before repair. It is clear that the film is closed and the floor covering, it is easier to minimize placed polyethylene than to wash the dirt in the room every evening.
We remove the old finish from the walls
A third of the scheduled time is due to the preparation for cosmetic repairs. During this time, you will need to remove the blots and wallpaper from the walls of the room. If there are areas with damaged plaster, it will take another day in order to knock down the plaster from the walls.

Old wallpaper is removed by either by one panel, or they will be scrooks for a long time with small pieces, it all depends on the glue used. Before removing the wallpaper, the surface is moistened from the sprayer with a small amount of water. After 20-30 minutes, the tag can be removed by flap. For highly strong adhesives, boiling water and steam are used. In any case, after the sprinkle of the old chopper, you will need to go through a vacuum cleaner and a rigid brush to remove the dust and remnants of glue.
Rogging and restoration of the ceiling surface
The ceiling is freed from the decorative coating much faster and easier than the walls. If the plans of the cosmetic repair will be a sticker of polystyrene plates or laying of plastic panels, then it will be enough to remove the top layer of whitewash.
It is more difficult to the situation if the ceiling in the room is painted with water-level paint or bites. In this case, you will need at least a day to remove the durable layer of the old finish.
The most common option to restore the ceiling during cosmetic repairs involves the alignment of the ceiling overlap plane. In any room of any apartment, the ceiling slabs lie with a differential in several degrees, which leads to a difference in the height of the ceiling near the opposing walls of the room from 2 to 5 cm.
If the time and budget of cosmetic repair allow, it is best to perform the alignment of the ceiling overlap with high-quality plaster plaster.

To do this, plastic rails are coiling and tighten the plaster with a plaster grid. Reiki-beacons glue alabaster, focusing on the pre-stretched marking horizontal cords. The grid is sewn on dowels. The total time required for the ceiling alignment in the room is 5-6 hours of operation.
In one working day you can complete the full repair of the ceiling. The next day, you can rub the surface and paint surface.

Cosmetic repair work with room walls
During the cosmetic repair, the walls are flattering and plastering only in exceptional situations, when this requires a situation, for example, the appearance of a large amount of cracks or the rocking of plaster. In addition, the total area of \u200b\u200bthe walls of the room is usually tripled exceeding the area of \u200b\u200bthe ceiling, which in itself requires a lot of time and materials.
Therefore, during cosmetic repairs, the preparation process is limited by a cutting of small cracks, followed by shtcloth and surface grinding. Sometimes, in order to align the plane of a separate wall, especially problematic foster is subjected to grinding with electric grinding.

In addition, at this stage of repair work it is easy to change the profile and configuration of wiring wiring in the room. It is enough to labby the channels at the bottom of the walls to the place of installation of new electrical sockets, break through the "glasses" for cutting and install the sockets themselves. Channels laid in channels with wiring can be witching plaster or alabastern weight. All works will take a maximum of 2-3 hours. At the end of the preparation for decoration, the surface is carried away by a vacuum cleaner and ground.

Blood preparation
After the end of the most labor-intensive work with the preparation of the ceiling and walls, you can move to stripping and preparation of the floor. If concrete floors, with a floor-based floor-based coating, then cosmetic repairs can limit the resetting of laminate plates, with a replacement of a lining material or without any. Most often in the room change damaged plates, after which the coating is polished using wax mastic.

Linoleum coatings in cosmetic repairs are cut, the base is determined to concrete, it is ground and closes with a thermal insulating lining based on foamed polyethylene.

If wooden floors are equipped in the room, then the flooring themselves are observed and are repaired, then the joints are clogged and coincided, after which the surface is grouped and preparing under painting.
Do not forget about trash and dust
Any repairs, even the simplest and superficial, are always accompanied by the formation of a large amount of garbage and dust. Before repair, you need to prepare two or three polypropylene bags, in which all garbage from the room will be collected daily. At the end of the day after each finishing operation, the wall and the floor are cleaned from the raised crumbs and residues of the plastering solution, and before finishing the walls are a vacuum cleaner or a wet brushed.
If it is supposed to align the walls of the room with plaster plaster, then the amount of garbage will increase five to six times. It will be necessary to consider in advance and find a way to collect and remove 150-200 kg of cement and sand garbage drops. It is impossible to send it to garbage chute or garbage tanks, you will need to order a special service for the removal of construction waste.
Cosmetic Repair Operations in Room
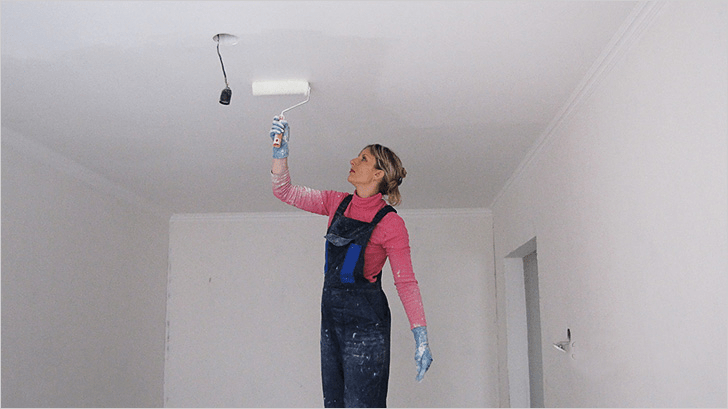
The first finishing ceilings are performed. Typically, the renovated and ground surface is ground and stained with acrylic paint of light tones.

If wallpapers are used in the interior of the room, ceilings can be decorated with fluiseline or vinyl wallpaper in the tone of the future wall decoration. The usual practice for registration of lamps and chandeliers is considered to use imitation of stucco from polystyrene foam and decorative ceiling plinths.

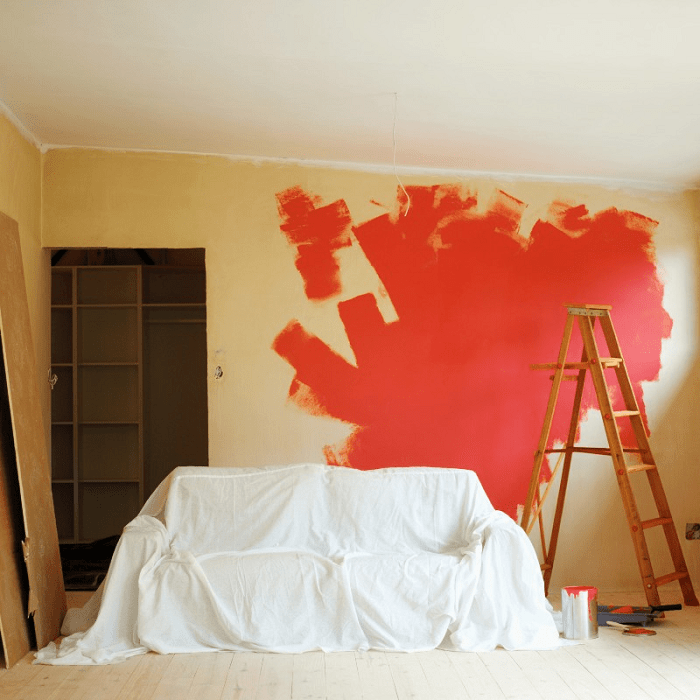
The finishing of walls in the room is considered one of the most responsible and at the same time labor-intensive cosmetic operations. Even with the fact that half of the walls in the room will be closed with furniture, all the same as a certain part of the walls will be well viewed by all those present in the room. If during the cosmetic repair, it was not possible to highlight the surface of the walls, we can only hide the disadvantages under the wallpaper. It is best to tissue-based tissue trellis or with a pronounced embossed textured surface. There will take 7-8 hours or full time on the room.

Repair doors and floor in a small room
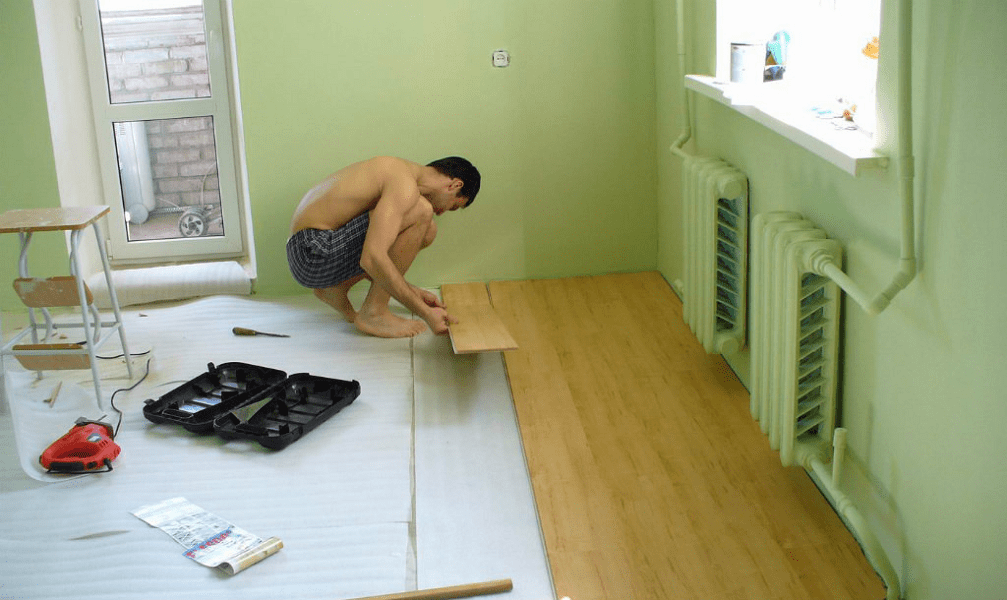
The wooden board of the old layout often has to be hiding under linoleum or laminate. In this case, the surface of the flooring is polished by a cyclical machine, and the joints are crossped with nails, clogged at an angle to the board. At the next stage of repair, the surface of the floor is sewn with OSB plates, after which a linoleum or any other option of flooring can be laid in the room.

The situation is complicated if concrete floors are aligned in the level of the screed in the entire apartment. In this case, any floor covering in the room will lead to the appearance of the clad, so laying the laminate or parquet should be planned simultaneously in all rooms.
The final stage is considered to restore interroom doors. Lutka and the door itself, if they are in good condition, can not be changed, but to subjected to restorations with cleaning and surface polishing. The external facing of the door frame during the repair is traditionally replaced by a new one. The replacement of the door with the carrier box is planned for overhaul, usually so that the doors of one style and execution in the entire apartment or house.

Conclusion
Room repair, even in a cosmetic version, requires careful preparation, first of all, in the details of the future interior of the room, the method of decorating walls and gender. Any attempts to postpone the decision for the future, to make random, as it turns out, will lead to a significant increase in costs and an increase in the time required for the restoration of the room, two or three times.
bOUW.RU.
For repair you will need various brushes and rollers
Rooms in our house have a different appointment and each of us has its own vision of the necessary transformations during repairs. Therefore, we will consider only one of the room repair options. We will analyze in detail how to make repairs in the room with your own hands an average resident who knows how to keep power tools and is ready to learn and work independently.
What do we do
We will analyze the simplest repairs in the room, but with the addition of the cabinets with the shelves. Ceiling make one-level with a glued figure. Walls with wallpaper, and on the floor Laminate bed.
Preparation for repair

Facing wall tiles
First of all, you must endure all things from the room. Now we need to clean the walls from old wallpaper, paints and limes. If the plaster falls off or "breathes" - it also needs to be removed from the wall. In any case, those sites that do not stick to the main wall.
Now we will deal with the floor. Perhaps in your room there is a wax floor, the boards of which are in good condition. In this case, you will have to dismantle only the plinth. If the boards are bad or bend - tear such a floor and do not spare. Perhaps the linoleum is pack on the floor. Remove it and check the evenness of the screed. On 1, the gender meter of the floor should be no more than 1-2 mm drop. If the difference is greater, then you will have to or fill the screed, or use the floor alignment.
Pay attention to the state of the interior door. Maybe it is also better to dismantle it with the door box to set the other.
Window
If the room needs to replace the window, then do it now, at this stage of repair.
Electricity

Casting walls by wallpaper
The room definitely needs light and power supplies, that is, sockets. At this stage of the room repair, it is time to make wiring wiring. Determine immediately, where lamps will be (walls, ceiling) and move the wires to these places. Provide a sufficient number of outlets in the right places. All wires passing on the ceiling to grind into an electric corrugated hose.
On the wall, if necessary, make a shifts for wires. For the room of this purpose, a copper wire is required, a cross section of 2 square meters. mm. Lamps, sockets and switches Install the ceiling after painting the ceiling and beat the wallpaper.
Floor
If you decide to fill the screed, then pour it so that it is on the same level with the main floor of the apartment. More information about the pouring screed can be obtained here.
Maybe there is an old good screed on the floor, the drops of which do not exceed 2 cm. In this case, use the floor alignment. How to work with floor alignment can be read on our website.
Putty and slopes
Installation of sanitary ware
Putting the walls of the starting putty. Will you use lighthouses - depends on you and your walls. Perhaps the walls are smooth, or almost even that for wallpaper is not so substantial. It can be said that if 0.5 cm of the slope is observed on 1 m of the walls in one or another - it can be considered suitable for putty under the wallpaper. The angle of such a wall can be aligned with the help of the rule, without lighthouses. However, you can make a loaf putty. How to do it, you can see here.
Sucks, in addition to the starting putty, you will have to put out once again by SatentHipse or finishing putty. This can be done when you put the ceiling and the end.
After starting wall putty, set the door frame. The interior door is better to do without a threshold - it is more convenient in operation.
Plasterboard Tumba

Plasterboard Tumba
You can skip this part of the interior, but for those who want to have additional shelves in the room, we will tell you how it is done.
For the markup of the cabinet, we need a pencil, roulette, level, plumbing and construction kit. Bottches will make 60 × 60 cm along the outer perimeter. In the corner of the room, on the ceiling, with the help of a constructional carbon outline the perimeter of the couch. Using a plumb to transfer these sizes to the floor. We use UV and CV profiles 75 mm wide. We screw to the ceiling and to the floor on the side of the deaf wall slices of the slices of the UV profile.
Now set the four corner profiles of CV, and three of them screw to the wall, and one, external, screw only to the UV profile.
Now cut off the size of the pieces of CV profile and, trimming them in the right places, we make partitions for the shelves. For partitions, we use both types of profiles by installing not only side, but also intermediate fasteners. To screw the profiles among themselves, we use small screws, called flews. Sewing the frame with plasterboard sheets will be after installing the ceiling. You can put out and paint the tube simultaneously with the ceiling.
Ceiling

Repair results in the children's room
Now reached the ceiling. Mount the frame for a smooth ceiling and hang drywall sheets. The installation instructions for the ceilings are here. Before putting down the ceiling, we are wearing a tumb with shelves with plasterboard. Split ceiling and tumb. After the putty dries - we can paint the ceiling and the end. After painting the ceiling, the lamps can be installed, which are provided for the ceiling.
Wallpaper
Walls have already been dried. You can glue wallpaper. The wallpaper sticking instructions can be found on this page. After the wallpaper pasted, you can install sockets, switches and sconces.
Laminate and door
Stele laminate and hang the door. If you are difficult with laying a laminate, then read the ways of mounting the laminate on our website. Do not forget about door platbands. Now it remains to fasten the plinth around the perimeter of the room and the repair can be considered over.
remontmechty.ru.
How to make inexpensive residential repair
T.the repairs must become anything. For example, replacing the window block on the plastic. Further, you will find that everything is connected with each other as a garland of monkeys who hold each other's tail.
The new window requires the repair of slopes, slopes - wallpaper replacement. New fighters are not suitable for new wallpaper. Then it may turn out that linoleum does not interfere with changing, and the ceiling requires repair after changing wallpaper. Therefore, repair is better to do in the complex, if not high-quality apartment repairs, then at least a good one room.
However, with modern abundance of building materials for decent and inexpensive repair, only a desire is required, a small set of tools and diligence. And some time to read this article.

Economical room repair
Preparation for the repair of the residential room
The task of preparation is to turn the room into a "clean sheet" where nothing bothers further creativity.
First of all, we clean the furniture, lamps on the walls and on the ceiling. Instead of a chandelier, we hang a simple cartridge with a powerful lamp.
Go to the old finish. We remove all finish coatings to be replaced: old wallpapers, old floor covering, clean the ceiling from tiles, wallpaper and (or) raided.
At the same time, we clean everything that crepts and can be cleaned without much effort.
If the coating, as an archaeological pattern, has many layers - we remove everything, to putty or plaster.
After clearing the main arrays, we scrubly remove all sorts of dowels, nails and screws.
Black work - the basis of quality repairs
Repair start with draft works, the purpose of which the repair and preparation of grounds for the application of finishing coatings:

Good preparation of the foundation - a guarantee of high-quality repair
We separate large cracks that cover their plaster putty. By the same composition we close the potholes, holes from dowels, screws, etc.
Plastic plugs - dowels, easy to pull with a self-tapping screw and passage: Insert the screw in a dowel and tighten it just with your hand, it's enough effort, and then trust the screwdriver for a couple of revolutions. Pull the jar of passage, the plug will easily come out of the wall.
Clean old outlets:
- turn off the supply of electricity;
- we unscrew the lid, remove or weaken the fastening and strut screws, remove the outlet and turn off the wires;
- insulating the ends of the wires, and refuel them in the outlets box, fixing the scotch.
We clean the walls from roughness with the help of a shallow plaster grid. Apply the primer of deep penetration. She will solve three tasks at once:
- increase adhesion;
- will strengthen the top layer of structures;
- dust the surface.
Go to the finishing work in the room
We begin the finishing finish from the ceiling, it is covered with a white polystyrene tile. This option is economical and simple for an inexperienced repairman. Even without having experience, the ceiling of 15-18 m 2 can be saved for 6-8 hours.
Unlike painting or wallpaper, the tile does not require high-quality putty or other preparation, and it can be stuck even on the overlap panel.
Glue use acrylic. Unlike transparent polymer adhesives for foam, its adhesion allows you to work according to the principle: "inflicted, pressed, forgot."
For white tiles, such glue is better, also because they can be fixed as a putty right to correct small flaws.
Next Stage Finishing - Floors
The most simple solution of the floor covering is linoleum. For laying and fitting, it only requires roulette, marker, ruler and assembly knife. Linoleum we buy the width of the room and lay the solid carpet without gluing.
Roll over the roll and give the material a couple of days to cure to get rid of irregularities. Then they attach in size by following a simple rule: not sure - do not dir.
If you still doubt, cut off knowingly less than you need. Linoleum cuts easily, but correct if it cut off the line - the task is not out of simple.
Crow the usual stationery knife. A wide spatula is suitable as a ruler, and with its absence, the construction level.

Cut linoleum
Casting walls by wallpaper
Casting walls with wallpaper completes the main work of repair. Take paper wallpaper, as they are the most inexpensive.
Before the start of work, you need to make sure that the planes of the floor and the ceiling are parallel to each other. Either the drop of them horizontally does not exceed 5-7 mm. In this case, it is possible to cut the wallpaper from rolls at once five to six bands. One leave for fitting the drawing of the following canvases, the rest lubricate and glue.

Glue wallpaper
If the difference drop from the floor to the ceiling in different angles exceeds the centimeter, it is not necessary to cut two lanes. It is possible to make a mistake, and it turns out that, for example, the leaf is closed on the ceiling, and the bottom does not reach the plinth.
Greased the lane with glue, fold it. First we carry the edges to the middle, then in half, and once again in half (see Fig. 1). We put in a pack. After the last sheet is processed, we turn the bundle that the first of the lubricated sheets is from above, and begin to glue.
We begin the pasting from any of the corners of the room, better from the nearest to the window.
Sticking the harvested canvas, cut new ones and repeat everything first.
Do not regret glue for pre-primer wall. With a special care, we wrap it with its upper quarter, and the places where the jokes will be presumably.
Installation of floor plinths and ceiling. Completion of work
Installation of floor plinths The only operation for which the perforator is required with a bromide diameter of 6 mm.
The installation of plastic baseboards of the floor is better to start from the same corner, from where the wallpaper began to glue.
For fastening, we use nails "quick installation" with a length of 3-4 cm. We put them back 10-12 cm from the edge of the baseline strip and then approximately every forty centimeters.
Ceiling plinths made of foam glue straight on top of the wallpaper. We use all the same white acrylic glue. The exact cluster in the corners is difficult for a beginner, even under the stub, using the glue as a putty can be eliminated by most of the flaws.
We complete the repair of the installation of sockets, replacing the switch to return chandeliers and lamps.
Repair completed. It remains to rub dust and celebrate his ending.
"Yes, so that in your apartment repair did not end!" - Through the shoulder passerby and removes the ravis. And you stand and think: "What is he? The riches wished or, on the contrary, ... postponed? "
But indeed, the issue of repair is a matter for an average citizen unpleasant. With today's prices for materials and services of construction Jedi, token will have to be serious. And however time and nerves how much will have to spend, and even in the deductible apartment to live! The enemy does not wish. But repair is a vital necessity, and sooner or later it will still have to face it. Some craftsmen, even in crisis, still manage to make the apartment's repairs with their own hands quickly and cheap. But how do they manage it? Inexpensive is a cosmetic repair with your own hands and domestic materials. This repair does not require large cash investments, but the purity and freshness of your apartment are provided to you. Cheap - not always bad.
Where to begin?
Get a small notebook. You will record all the ideas, prices and phone numbers of stores or specialists. But the main thing - it will be the plan of your repair and consumable estimates. In the plan you need to reflect all your wishes: replacement of windows on plastic, suspended ceiling or just whitewashed, new tiles in the bathroom, shook wallpaper or a couple of new sockets in the kitchen. Write exactly what you want. Wallpaper decided - it means that wallpaper, you want decorative plaster - it means so to be. The pipes are buzzing - replace, the penetrate toilet - throw away. You might think that on the basis of your desires, the apartment repair is quickly and cheap to do with your own hands. But you probably do not know, but only drive yourself into the framework. It turns out - do if not - not a lot of loss, it's just a notebook entry. Next, take about the estimate: what exactly do you need and in what quantity. How many meters tile, grouting, sacking bags, wallpaper, chipboard and other things. You can always adjust these records.
To find out which materials, what quality and prices you will need, go for help in online stores and building forums. Carefully examine the characteristics and pricing policy, approximate the flow rate. And at the same time, clean how to replace the crane yourself, shove wallpaper or install plasterboard. Determine for yourself: This is me I myself, but here - the electrician or plumbing should be sought. Write down.
As you can save
Variants are set. To begin with, remember: the materials for the repair of the apartment is better to buy in the cold season - the price is significantly lower. But summer is the construction season. In winter, you can stumble in constructionarkets for a 50% discount or a share "Buy 2, and 3 - as a gift"! So you can buy the same wallpapers at a low price, but a much better view and quality. And if they break down a couple of months in a dry pantry or closet, then nothing will happen to them. Examine local forums, especially if you live in a big city. There you will probably find many people who have already done an inexpensive apartment repair with their own hands. Photo of the finishes, tips, addresses and phone numbers of specialists will probably find there. And also stumble upon the "Repair" header and "remnants of materials". Periodically view who and what is interesting sells or gives. People often remain after repair materials that no one will buy on the sales price, but it's a pity to throw out. So, you can buy for a ridiculous price a couple of bags of putty or even Spanish tiles. A person has an extra 2-3 meters left, there is nowhere to go, and you will quite fit into the toilet. There you can also find the remains of the cable or grouts "for chocolate." People are more moody, settling in the new building, often change the new plumbing or windows from PVC on more expensive, and these are given for a snot. Why? Because they want "Reheau" or "Only France", and you and such a window will quite fit. All better than old wooden. When you get rich, buy and "Reheau".Tools for repair
The building tool is worth a lot of money, therefore it is better not to spend on him. As an option - take on time, it is leased everywhere. And it will be even better if you lend it to familiar, friends or relatives. And be sure to thank the person for help. How? You better know. Taking this opportunity to ask if they can help you with an apartment decoration. Especially if your friends are well acquainted with a construction letter. It will also help make the apartment repairs with their own hands quickly and inexpensively, and even better. Yes, and probably your friend will make a significant discount on old memory.
You will need:
Step-by-step instruction
1. The concept of repair includes the following list:
4. The next stage is the repair of the ceiling. Draish all the cracks with a spatula, so that they become deeper. Strong soil, cover with putty and let me dry. After the ground is dry, sanding the ceiling and boil it again. Before painting the ceiling, make the wall repair. 5. After working with the ceiling, proceed to the removal of old wallpaper. To do this, wet the old wallpaper with water, let them be soaked for some time, and as soon as they get wedged, remove them with a spatula. The wall should be dry and clean before you start repairing it. Out all the cracks on the wall with a spatula, upload them with soil and make a putty. When those places that you put shit dried, sand them, and then cut the primer again. If you glue thick wallpapers, then do not apply the finish putty. 6. The next step is the painting of the ceiling or pasting wallpaper on the ceiling. Divide the water-making paint, as written on the bank and paint the ceiling 2 times. If you decide to glue the wallpaper for painting, then stick them and paint them also 2 times. Paints of the domestic producer cheaper, so your budget will not suffer. 7. Before you caught the walls with wallpaper, you need to paint the doors and windows paint. If you buy the paint "P" of Russian manufacturers, and not imported, it will cost you much cheaper. After the paint is dry, proceed to the wallpaper pasting. To save money on the purchase of wallpapers, choose the domestic manufacturer. In terms of quality and durability, the wallpaper of Russian manufacturers are not inferior to imported. 8. The final stage is the painting of the floor. If the furniture was not taken out, then flush the legs and the perimeter in the furniture with a painted adhesive tape, and after painting, remove - the furniture will remain clean. Paint the domestic - it will be cheaper, but it will not affect painting.
Walls
Walls are the first thing that is always striking. Of course, smooth walls and beautiful stylish wallpapers will like everyone, but if there is no money for alignment and expensive materials, you can simply be limited to the replacement of old wallpaper. Just overlapping wallpaper You are already transformed by an apartment. Choose inexpensive dense wallpaper on a paper or fliesline basis is quite real, and you can even stick them even for not very smooth walls. Especially well hide small irregularities wallpaper on a flieslinic basis.
There is another option. The past owners left a couple of rolls of wallpaper rolls, which they were not useful during repairs. For example, I simply changed several particularly dirty and torn wallpaper sections. It was enough to replace the wallpaper bands where they were noticeable to suffer. These are protruding corners, places near door jambs, in the hallway at the entrance, in the kitchen near the plate - all this will cost much cheaper of the full replacement, and look like housing will be much better.
Ceiling
If we are dealing with whitewash or layers of the removal, it is best to clean them first. Numerous lime deposits, peeling and shuffling, it is not only aesthetically ugly, but also harmful to health. To wash the lime is easy, you must first soften the layers, wasting small sections of the ceiling with water from the pulverizer, and then score with a rigid spatula or scraper. If the ceiling is old peeling wallpaper, they need to be removed.
After stripping the ceiling, you can additionally go ordinary grinding paper, that is, sandpaper, and primed. If the surface turned out to be smooth, without pits and cracks, the ceiling is cheaper to paint acrylic paint, it is better to use the matte paint of light clean tones. If there are small defects, they will hide them. Wallpapers for the ceiling should be chosen white or very light, without a pronounced drawing and with very small rifer. Another economical option to transform the ceiling is to punish foam plates.
Floors
If these are concrete floors, with them, as a rule, nothing additionally in the preparation plan does not need, they are quite smooth and durable. Scrolling wooden floors - this is a much more serious problem, and their repair, at least with time, can not be avoided here, but you can temporarily solve the problem of the screap. The creaking in wooden floors occurs when the neighboring boards rub each other. In particular "loud" places of the floor, you can drill a few holes with a regular drill and pour some mounting foam. Foam will fill and scrape emptiness between the boards and the floor will stop to creak. It is necessary to do it carefully, without fanaticism so that the floor does not swell.
Align the strong "waves" and the irregularities of wooden floors can be born on top of an organity, phaneer or OSB sheets. For the required strength, the thickness of plywood or OSB should be about 1 centimeter. As a finishing coating for the floor, the linoleum is still the most economical and durable. Fortunately, the choice of linoleum in stores is extensive.
Tile
If we have already figured out with wallpaper on the walls, what to do with tile coating? Replacing the tile, of course, can be an output, if the tile does not hold onto the wall, because there is no other output. In rare cases, when the tile easily moved away from the solution, and the solution itself holds well on the wall, the tile is easily restored, happier in the thin layer of PVA glue and tightly pressed on its place to the solution. Here, the main thing is to get the right side of the tile into its imprint on the solution, and PVA glue very firmly gluits ceramics with a solution - checked! But if the tile holds hard, and buy new expensive, you can work a little over what is. Tile, firstly, you can and need to wash it well. Since this is a tile, it will withstand much more aggressive cleaning products than a gel for the dishes, but also looks much better when it is sacrificed from limescale, rust and other traces of operation. It is also necessary to clean the seams between the tiles. No need to be afraid to damage the grout, on the contrary, you need to extort so much grouts as it can be possible. There is a mold between the tiles in the bathroom and remove it from there it is very difficult.
Removal as much wiped together with unwanted flora and fauna, seams can be treated with a special antiseptic agent. After that, they can be filled with fresh grout. The color of the grout is better to choose neutral or close to the color of the tile.
Plumbing
Carefully inspect plumbing devices. Cracks and chips no? Change plumbing is not necessary. Plumbing cleaning agents will help bring all the surfaces of Sanafayans to a more presentable look, and bright curtains for the soul trusts the case. By the way, refreshing with paint can also be a cast-iron bath. Not from the inside, of course, and outside. But shiny fresh bokes, the bath will immediately acquire a more elegant look. And if nevertheless, the inner surface of the bath is damaged and worn, it makes sense to contact the bath restoration professionals, which will cover the surface of the bath with a new enamel right at home.
As a rule, such a service costs cheaper shopping and installing a new bath. And here's another option: make a bath of a bath not only for the top, but also for the bottom (use the glue and tipper).
Electrician
Inspect all sockets. If you have seen plastic plastic around the holes for the fork or even just dark spots, such sockets need to be changed without thinking! Luminaires change as needed. If they are whole, not morally outdated and all the light bulbs are burning, they simply take them off, wash and hang back. Do not forget to turn off the stress in the apartment when you work with the electrician!10 ways to spend less, and get a real masterpiece
Designer Tips: 1. Silk from 100 percent polyester. Tile "Under Stone", Linoleum "Under Parquet", Laminate "Under Onyx", "Trigark" under Ralph Lauren. Cerambrants "under Python". "Artificially aged" something there ... It is even embarrassing about it. Alas, the room will not pass. Polyce good interior logs. There is a stone everywhere - it's a stone, a tile - nothing but a tile, and a tree - exactly what a tree. If there is no money for a parquet, and a simple laminate is below your dignity, look for a good engineering board. As a result, you will get the floor that looks much more expensive for money spent on it. A good alternative to porcelain stoneware for kitchens, bathrooms and hallways - cement tiles. The result will look more expensive than the stock edge. 2. Neighboring premises should contrast. If you have a bright living room, let the hallway be painted in a deep, relatively dark color. The cost of paint in any case will be the same, and the result may look really expensive. 3. If on good carpet no money, look for carpet from viscose or blended fibers, imitating a silk or woolen pile carpet.
4. Put the curtains on a dense lining. Even inexpensive curtain fabric from this will seriously win. Look for a three-meter width fabric. It gives significant savings. If you are not ready to spend a lot, refuse to adequate textiles (fabrics with a pattern). When laying tissues with a pattern, due to the need to properly docile the web, there are many trimming. The more rapport - the more waste. Do not use a curtain braid for the porter. Let the seamstress laid "manual" folds. It is not so expensive, but the folds collected on the braid look very cheap. five. Set headset set. The same things in the interior are permissible only in one case: if these are paired things forming a symmetric composition. Chandeliers, table lamps and sconce from one set, leave God for whom God did not give imagination. They are also the sets of upholstered furniture "sofa-two chairs" and the like tender sadness. Read more - see the next item. 6. Ready solutions. Bad news: they are not. At least for us. The shower room is erected by a construction method because it is a room. If you do not hold a student hostel or underground massage interior with a striptease, a shower (this is a sad construction of a yellow acrylic and a peasive door) you will not work. Do not shiver on the "designer" plumbing. Let the appearance of the plumbing equipment of the bathroom (kitchen, bathroom) will be dictated by the function. Buy washbasins and mixers of simple forms, without an inappropriate decor. The toilet must be inconspicuous and cope with its duties. Nobody will admire them, right? 7. Pictures, Mains, Engraving, Photos and Posters Frame into simple, but deep frames with glass and necessarily in the passecut. Even the picture, printed on a home inkjet printer (or naive child drawing), in such a framed looks very significant. Play with the sizes of the passe. Little work in a very wide client looks like a very "designer". And, by the way, the cardboard for the passecut can be almost any color. eight. Comfort Another collective fetish. According to my observations, the fact that in our Palestines is referred to as "comfort", in 99 percent of cases - poetted close. In many ways, this is the bodily memory of the past childhood, about the warm and gentle scarce Soviet life with carpets, sisite saprophites, a good grandmother, Czechoslovak Crystam and by anyone who is not a reader in the polished Polish wall "Gankka". The coziness will not yet add an expensive shaveless type of a round bed with music and a minibar, a bar counter with a built-in aquarium, etc. The same is true for such rich things as Lambreken, Garland and Svag. Do not worry: in a good, thoughtful interior, the comfort inevitably comes naturally. Therefore ... 9. ... Goodbye, Gypsy Sir! Duples from the Boszya in small Nefertiti, towels in scarlet roses, "outstanding" shades of pillowcases, nylon blankets with Shanghai leopards. All this is the attributes of collective farm chic, sorry for the directness. They will not add comfort. The painting is often necessary for these things solely in order to hide their exceptionally lousy quality. Let bed linen and bath towels will be simply white (options: ivory, extractive). But from Excellent Egyptian cotton. 10. However, the ivory is also important not to overdo it. Peach, beige, sandy ... The average nuance gamma is good for network hotels. As their screen interiors are obliged to like everyone. Your interior should like you. After all, he is the manifestation of your essence, right? Take in your hand fan palette of any manufacturer of paints. Do you feel pleasant severity? These are your features. Do not miss them!
 How to return the love of her husband to his wife - Tips of the psychologist
 Why you can not give icons