Instructions for installing flexible tile: labeling nuances, stages and cost of work. Installation of genuine tile: Main calculations and technology of laying ceramic roofing Ceramic and natural tiles
Makes the house stylish, sophisticated and charming. In addition, such a roof, without losing its beauty and shade. But this will be only subject to the correct installation.
It is worth remembering that this material is suitable for the roofs with a slope of more than eleven degrees (optimally - fifty degrees). And today we will look at the technology of installation of ceramic tiles, we will offer instructions for laying and the price of works and materials per M2.
Clay ceramics - material that is distinguished by solid weight. Therefore, in addition to the arrangement of a strong rafting system, it is necessary to think about how the tile will be delivered to the roof. That is, to provide suitable lifting equipment.
Tile transport is carried out with the help of special pallets (each weighs the order of nine hundred and fifty kilograms).
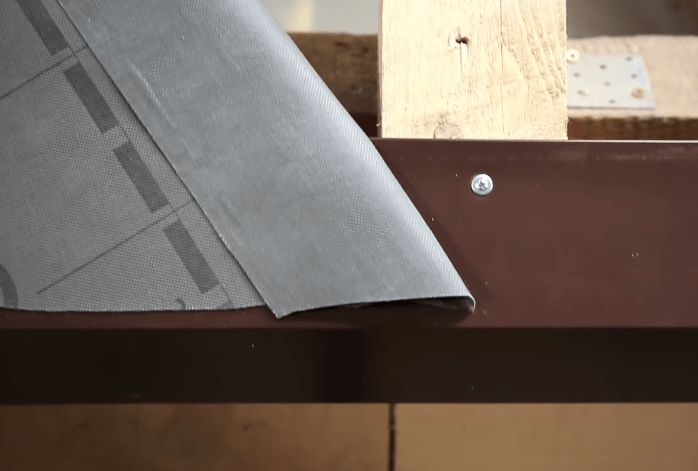
Galvanized (or made of stainless steel) screws are used to attach individual elements of the roof to the crate, as well as nails and wire. In tiled, as a rule, there are small holes in the form of a keyhole. Through these holes and fastening occurs. If you need to do additional holes, then use a special roofing tool - a hole panel for ceramic tiles.
And special steel cutters allow smoothly cut off pieces of ceramic roof. In addition, roofing ticks with lips of different length are produced to work with this material. They are made of durable steel, hardened by the induction method. The remaining tools are standard: screwdriver, hammer, screwdriver (for crate). In the absence of a cutter, it is possible to use a grinder.
About the device of the end of the ceramic tiled roof will tell this video:
Calculation of materials
From what kind of material is roofing, the whole design must be able to withstand loaded efforts up to two hundred kilograms per square meter. To correctly make calculations, add weight from ceramics to this value (about fifty kilograms per square meter).
We take into account that when installing it is worth providing a naval, depending on the roof slope. Its value is ten centimeters, if the slope is less than twenty-five degrees.
- If the slope is to increase (within from twenty-five to thirty degrees), then the magnitude of the adhesion seven and a half centimeters.
- And with the bias over forty-five degrees, this value decreases to four and a half centimeters.
It is possible to calculate the length of the material (useful) if you deduct from the total length of the ceramic part of the size of the segment that is necessary to create an adhesion. Well, a useful width is usually indicated in the instructions. Based on the numbers received, calculate how many tiles will need one square meter.
The number of individual roofing elements necessary to cover the entire length of the skate can be calculated based on their useful length. By dividing these two values \u200b\u200bone to another, we obtain the number of rows. We multiply this number by the number of parts in the row and get the total number of tiles for the skate. To determine how much waterproofing is needed, the total area of \u200b\u200bthe rod is multiplied by 1.4.
Another advice: you can use for accurate calculations of all materials online by the calculator. There are quite a lot of them in the network.
About the technology of the roofing device from ceramic tile Talk below.
Ceramic Tile Installation Technologies
The first steps
 Let's start with the crate. For her, there will be bars of their five to five centimeters (or six to four centimeters). Along the karnis sites we put wooden parts wider than two centimeters than where ordinary elements are located. The number of horizontal bars in such a crate will be equal to the number of roofing rows with the addition of another row - cornice.
For markings, templates cut in size (height) of tile tiles are used, as well as a melted cord. Horizontal rails are joined on rafters. The shap shave (optimal) is usually from thirty-one to thirty four centimeters.
Under the skate it is necessary to install an aeroelerant for ventilation. Over the entire length of the skate, the waterproof tape is placed. We should not forget about waterproofing and vaporizolation. There should be space between the shept and the roofing layer.
Before laying the tiles, it is distributed with stacks (about five pieces) over the entire roof surface. Then stacked the row from above - along the rod of the roof. After that, we proceed to fixing the lower row (along the sink). I fix the elements only after checking whether they were maintained correctly.
Installation instructions for ceramic tiles are presented in the video below:
Direct Laying
Installation We drive, starting from the bottom of the roof, moving up. And also to the right left. At the end, skate and frontal elements are attached. Moreover, the skate elements should touch the edged skiing board only where they are attached. Where the roofing horse and the fronton intersects, you will have to fit up, cutting the tile tiles.
The tile itself may be several species, each of which has their own fastening nuances.
- So, if it is a groove tile of a ribbon type, then it is placed with a number of rows on each other, connecting with the help of the available grooves.
- In the same way there is a stamped stamped tile (only for it there will be more wire).
- But the plane tile of the ribbon type of grooves is deprived. It is also put on the bottom of the bottom up, while in each odd row from the edge there is half a tiled tile (the principle of brickwork). The protrusions outside and inside, as well as roofing nails, help to make fastening.
 Several montage tips:
- Under the cornice necessarily make holes for ventilation.
- When waterproofing is placed, there are a small deflection between the rafters. The waterproofing layer is put on the allen fifteen centimeters, fastening it with cloves at a distance of twenty five centimeters.
- Under the endhouses are placed by a slightly more than a meter width. Fall on the endand tiled tiles is about twenty centimeters.
- The thickness of the skunk board (equipped with mandatory aerators) must be at least four centimeters.
- By placing a self-adhesive tape (bilateral) on end, it is possible to improve waterproofing.
- If the endow is longer than six meters, you must lay out the ventilation row.
The cost of mounting ceramic tiles is told below.
Cost of work
Having ordered the styling of a tiled natural roof, you will have to spend. It is worth the order of seven rubles per meter square.
This is if all the nodes of the roofing system are standard. But in the presence of complex roof shape, additional costs will be needed.
About how the installation of the skate and adjoints occurs when laying a ceramic tile, will tell a specialist in the video below:
Natural ceramic tiles is considered to be one of the oldest roofing coatings. During this time, she proved to consumes excellent performance characteristics, such roofs cost many decades, and even a century.
Modern technologies and materials allowed manufacturers to significantly improve the characteristics of ceramic tiles and eliminate traditional disadvantages. One of the disadvantages was considered a greater complexity and complexity of roofing work. Now this problem is not considered relevant, the designers have developed special locks, due to which the tiles are not only facilitated and accelerated, but significantly increases reliability, durability and tightness of the roof.

Ceramic tile refers to an elite coating, such roofs can be seen only in prestigious houses, historical or cult facilities. Ordinary consumers are not particularly interested in tile installation technology, but they all pay attention to the appearance. And it depends on the two components.
Prices for ceramic tiles
Ceramic tile
Geometry Tilekin
The more difficult geometry - the more expensive the material. The fact is that the productivity of industrial equipment largely depends on the geometry, and this factor has a decisive effect on the cost of production.
What profile may have a tile?
- Flat. The easiest profile and cheapest tile. It is manufactured on continuous pressing lines with further magic cutting. The disadvantage is the strength of the attachment causes doubts from some developers, and a large overlap area reduces the useful dimensions of each tile.


- Tray. Traditional European material has often been used on cult facilities and monasteries. Hence the second name "Monk-Monk Monk". Over all operational parameters exceeds flat.

- S-shaped. On the tightness of the coating occupies a leading position, the original form completely eliminates the wetting of the rainstream system due to oblique rain.


There are differences and between types of locks of fixation of individual tile, but they do not affect installation.

Ceramic tile is a piece roofing material that has a lot of advantages over other coatings. For example, the lifetime of the tiled roof is calculated by hundreds of years. Read more about the advantages of the tiles, its shortcomings and characteristics can
Features of processing external surfaces
In ancient times, the ceramic tile had only one color, which depended on the chemical composition of clay. Currently, technology has gone so far that they made it possible to change the manufacturers not only the color, but also the physical characteristics of the finish facial surfaces of the tile.
| Type of exterior coating | Short description |
|---|---|
| This is the natural color of clay, obtained after annealing. Depending on the annealing temperature and the chemical composition of clay may have several shades. On natural color indicates the surface of the tile - it is a little rough, in many respects it looks like a surface of a facing red brick. |
| Such a color is achieved due to the complication of the production technology of roofing material and allows you to achieve the most equal shades of different parts of the tile. The fact is that the insignificant differences of colors create difficulties during the laying. It has to be constantly mixed, otherwise large spots with multi-colored shades may appear on the roof. This significantly worsens the appearance of the structure. To eliminate such phenomena to the upper layer of tiles, a special clay milk with a stable chemical composition is accumulated. After firing, the surface of all the tile becomes completely the same. |
| The most complex treatment of the outer surface of the tile, significantly improves all the operational characteristics of the roof. The disadvantage is a significant increase in cost. The glazing tile is burned in two stages. On the first, only clay is burned on, the special composition and the tile is applied again to the oven for a repeated firing. |


Modern ceramic tile resembles traditional only two things: title and manufacturing material. All other characteristics: appearance, sizes and shape, physical and operational characteristics are significantly different. Significant changes and technology of laying, now work is made much easier and faster. But this does not mean to mount ceramic tiles just as simple as metal roofing coatings. As before, such works can only be performed by the most experienced, responsible and conscientious roofers.
Conditionally, the technology can be divided into two large and equivalent stages: preparatory and main.
Preparatory stage
At this stage of technology, the construction of a rafter system, crates, special layers of waterproofs, etc. Consider in more detail these works.

To mount the tiles, it is necessary to prepare measuring instruments, a grinder with a diamond disk for cutting a tiles, a screwdriver, ticks and pliers, a stapler and a woodcutter.

Important. During the stacking, be sure to follow safety regulations, work with safety systems, protect the respiratory and vision organs.

Step 1.

To do this, find out the number of columns (vertical rows) of the tiles. At the same time, it is necessary to take into account that the removal beyond the limits of extreme side rafalines should not exceed 33 cm.

Make calculations very carefully, the tile is expensive material, surplus have a negative impact on the overall estimate cost of the roof.

Each skate must be calculated separately, take into account the nomenclature and the number of special enough items and tillarces, the need for segments, the length of the skates and funds, the presence of chimneys, ventilation pipes and other engineering communications. Then the data is summed up and only after that the material is purchased. The elements of the water-feling system are purchased separately.
Step 2. Installing a dropper. It is needed to remove condensate falling on a protective membrane. The element is nailed along the entire length of the eaves with an overlap approximately 10 cm. When docking in the endowes, metal planks are cut under the appropriate angles, the total insert depends on the angle parameters.


Step 3. Installation of crate in endowes. These are very complex and most dangerous areas of the rafting system, it is here that leaks appear most often, wooden structures rot. In the endowes to the rafter feet, the bars of the diagonal counterbalaxseckers, the lower ends should be stolen with metal cornice planets. In Undova, hydraulic protection is mounted, any modern canvas can be used.


Step 4. Bear the membrane along the entire length of the row, the direction from the bottom up, the backstage is within 10-15 cm. The canvas is fixed to the rafter feet of the stapler. The drip of the eaves of the membrane is glued with bilateral scotch. Do not allow the appearance of folds.

Step 5. Bring the bars to the counterclaims, they are fixed to the rafters on top of the membrane.


Practical advice. Length of bars is not more than 1.5 m, leave the holes between them for the production of natural ventilation of the underpantle.
In order to be comfortably and safely to work on a skate, you can navigate the temporary counterclaim in several places, it is used only to move workers. In the future, as the main control panel, the brings are temporary removed.

Step 6. Stick Undov and the ridge from the second side of the skate. The filament of the material on the triangular slope should be about 5 cm. The upper row is always fitted to the lower, the nourishment in these places is at least ten centimeters.

Laying the material on the roofing ridge
Step 7. Mount the counterclaim on triangular and rectangular rods. If the roof is a complicated hip, then the ridges are nourished bars along the junction line of the skate, then the vertical bars are knocked out, between them and diagonal necessarily leave the gap for ventilation.

Step 8. On the perimeter of the roof along the cornese swell, it is necessary to fit the bottom bar of the crate, in the locations of the docking it should be written to a dense connection. Perforated ribbon Close the ventilation gap.

Installation of the lower bars

Step 9. Installing the bottom of the crate. This is a more complex and very responsible technological operation, requires very attentive marking. Initially, it is necessary to accurately find out the position of the bracket for fixing the drainage gutter and the tiles of the first row.

Do not forget that the sink tiles in the chute should not exceed the third of its diameter. Specific values \u200b\u200bare additionally adjusted depending on the distance between the gutter and the tiles vertically.
After the fitting is made several times, finally tick the position of the rack of the crate under the top of the tile. Brussia Controls are only under the level, they must be strictly in a horizontal position.
Step 10. Sweep the top skate bars. Controls. Position them at a distance of 3 cm from the line of the skate. The final markup of the position of the bars along the entire slope is better to do a special retrain rope.

Step 11. Installing the crate on the skates. Initially, the calculation of the distance and markup is made. Delive to these operations very seriously, all further work on the installation of the roof depends.

Important. The calculation of the counterclaim should be done with such a condition so that whole tile rows are placed on the skate. Such work can only be performed by professional roofers, the amateurs should not try to make them. The effects of errors are the need for a complete dismantling not only the roof, but also a counter test.
Prices for insurement belt from various manufacturers
Insurance belt
How to make calculation and markup?
- Measure the distance between the lower support bar and the last of the skate.
- Remember that the distance in the sink must be within 32-39 cm, on the rest of the sections of the shape of 31.2-34.5 cm. The parameters may vary depending on the manufacturer, the exact data is always spelled out in the instructions.
- Divide the resulting length permissible step with such a calculation so that the whole number of rows is.
- Roulette Make marks on the first and last vertical rails. Controls.
- Marking of the series must be made with a special marking cord. Remove your lines for each row.

Please note that during the manufacture of the controls, the roofers never use templates, and place the position of each bar separately. Such an actions algorithm significantly reduces the likelihood of errors. At this, the first stage is completed, you can start the second.

Tile laying technology
Installation of tiles begins after installing the drainage system, in extreme cases after screwing the hooks of the gutters. Each manufacturer of drainage systems recommends its technology, you should read the instructions and fulfill its requirements.


Step 1. Works should be started with Yandov's gutters, they disseminate water to waters. The elements are fixed to the crate with special brackets in increments of ≈30 cm.


Step 2. Install the first frontal tipper on the front-bottom swell.

Important. On the back of the tiles there is a special reference spike, its presence is caused by the technological features of production. This spike is not needed for the first row, it should be gently knocked down with a hammer. Work carefully, do not split the surface of the tile. If the spike is left in place, it will interfere with the proper coating.
Step 3. Mark from the edge of the fronton tiles left 90 cm. This is the distance between the three vertical tile columns. Do such labels along the entire length of the skate, then apply markup through the entire height of the roof. The lines will help constantly control the correctness of the tile position, which simplifies the installation of the roof and makes unlikely various technological errors.
Step 4.. Put the first lower row, attach each tile to the rake of the crates with nails or self-drawing. For this it is necessary to drill holes in the ridge.

Step 5. Put the vertical pillar of the frontal row. All frontal tile also needs to be fixed, but at least two self-pressing.


Tiles laying scheme, proper trimming. Pink color shown tiles, painted in half along
Carefully check the position of the rows made. Everything is normal - excellent. The tile is laid out on the right left below. In these areas, nothing is nailed, which is much accelerating the roof coating process. In places of endands and in the skate, it is necessary to screw the tiles again. The skate elements are fixed by special devices.


Fastening a ridge bar and tiles near Enda


Laying first tiles on the ridge


Laying the tiles on the skate. Fastening the lower extreme tile ridge
Prices for popular models of screwdrivers
Screwdrivers
Video - Ceramic Tile Stacking Technology
The use to close the roof of modern ceramic tiles involves accounting for a number of requirements associated with a significant weight of the roofing material used. With all the undoubted advantages of this type of coatings (such as, for example, reliability, durability and originality), the installation of ceramic tiles can only be carried out on pre-reinforced rafting structures.
Due to the large weight of natural material, putting ceramic tile is allowed only on roofing, the angle of inclination does not exceed the values \u200b\u200branged from 12 to 50 degrees. At large angles of inclination, there is a need to enhance the rafter system due to the use of additional elements that increase the rigidity of the entire structure as a whole.
Preparation of the foundation
After strengthening the system of rafters and immediately before laying ceramic tiles, you will have to perform a number of standard operations related to the arrangement of the so-called "roofing cake".
The list of these measures traditionally includes the following standard operations:
- preparation of waterproofing that allows you to protect the entire design from moisture and avoid fungal lesion of wood;
- the arrangement of the heat insulation coating, which additionally protects the roof from heat leaks through the "cold bridges";
- building a layer of vaporizolation, thanks to which the roof will be reliably protected from condensate.
Waterproofing protection is necessary at the angles of the roof of the roof to 22 degrees. When calculating the needs of the material (taking into account all the necessary points), the total area of \u200b\u200bthe skates should simply multiply by 1.4.
To fix the layer of waterproofing on rafal beams, it will be possible to use a special stapler used to fix the rolled materials. In this case, the magnitude of the flask of each subsequent layer to the previous one should be at least 10-15 cm.
In order to avoid heat loss through the roofing construction, it will be necessary to lay a layer of insulation, which can use mineral wool or plate of foam. When forming this layer of "Roofing Pie" will necessarily need to provide ventilation gaps created by artificially. Such gaps can be formed in the intervals between thermal insulation and waterproofing (by increasing the elements of the crate) or due to the installation of the so-called counterclaim.
When preparing the lap itself, it should always be remembered that it is in the future that the tile blanks will be laid, so that the distance between the individual bars should be selected taking into account the size of the tile sheet.
When arranging the roofing should not be overlooked by the question of its vapor barrier, since the presence of condensate in the region of the insulation significantly reduces the effectiveness of thermal protection. For reliable protection of the heat-insulating layer from the destruction of the condensate, it will be enough for an adhesive of a vapor barrier film within 10-15 cm.

Before starting installation work, first of all, you will need to raise all the cooked roof tiles; At the same time, due to the large weight of the material, assisted assistance will be required. Upon completion of the lifting of the tiled sheets, it is necessary to decompose them with small stacks (3-4 sheets) evenly on the surface of the roof, which avoids the deformations of the drying under the weight of the temporarily stored material.
In accordance with the generally accepted rules, the tiled sheets are stacked on all roofing rods simultaneously with alternation every two or three rows.
One-sided laying of sheets on any of the pitched structures can lead to uneven distribution of loads on the elements of turning, which creates a risk of damage to the latter.

Construction instructions for the installation of natural tile contains typical requirements for the order of its laying, produced in the direction of the roof from the sink to its skit and from left to right. Such an order involves the formation of the lower row of the tiles, laid out along the roof eaves, without its fixing on the rapid base (inches). A similar admission allows you to adjust the position of the elements of the cornice strip when laying the subsequent row.

When forming separate parts of roofing, we advise you to pay attention to the following details:
- To fix the first and second series it is best to use special galvanized screws.
- Do not forget to leave a small ventilation gap in the cornice area (about 1.5-2 cm) used to ventilate the underpants spaces.
- To reliably fix the carnice and skate rows of the tiled coating, it is desirable to provide several additional attachment points for them.
Adjunction to chimneys

Even at the stage of placement of waterproofing, the material used is gently cut and starts on the chimney wall adjacent to the laying plane. After that, it can be fixed on the wall in any way convenient for you.

Directly near the chimney of the tile lays with a small gap (about 2-3 cm). To obtain a reliable adjustment, it will be possible to use a special corrugated aluminum or copper ribbon, painted under the color of the tiles. At the same time, using the segment of the required length of the required length, the facial part of the pipe (with a small nasky) is closed, after which the same operations are repeated for its side.

Experts believe that for the protection of the back of the pipe will be more reliable to use two strips, combined into one with a small overlap. Strengthening the protective layer on the back of the chimney will allow you to get a very reliable adjoining, excluding the possibility of rain moisture and snow inwards.
For details on the order of laying below:
Arrangement of roofing skate

When a tiled coating device in the roofing area, the main attention should be paid to the literate placement of the material in the location zone of the skate bar. For registration of the skunk zone, special tiled blanks (railings) are applied, which allow you to round up the upper edge of the roof, thereby ensuring the reliable pairing of all the coating elements.
Separate billets of the skunk zone are fixed on the elements of the root with the help of screws (self-samples) of the appropriate size.
The position of each skunk rail is selected with such a calculation so that there remains a gap of the value between it and the sheets of the roofing tiles approximately.

Note that such skate blanks should be mounted on top of a special sealing tape, allowing to form a small gap needed for ventilation of underpants spaces. At the same time, each individual rack is attached to the supporting structure with a small staple included in the range of the skate coating. At the end of their installation, special chapels are installed, covering the end of the skate.
Video
Read more Ceramic tile installation rules are discussed below:
If you have ever considered a good-quality roof from the clay tile, then probably wondered: what are all the shards hold on? Do not fly around? How many people need to make the installation of genuine tiles at such a height, and is it really able to cope with one-two? And does skill and experience playing in such a process?
Such questions always appear in those who are solved on this beautiful and weathered roofing coating. After all, with fragile modern counterparts, everything is more or less understandable: cut, stick, secure the self-tapping screw - and everything is ready. And what to do with such heavy elements in weight, like ceramic tiles, for which they are fixed and how to ensure the safety of people below?
Yes, of course, from a century in the century, the weller wizard was transferred and improved their experience, but also the shards, they also joined the piece and manually. And modern manufacturers not only set up large-scale production, but also completely changed the approach from the installation of the tiles, for which they showed ingenuity and added special accessories.
Where to start? We will try to illustrate the entire process as in detail as possible.
Let's start with the most important design. In addition to the tile itself for the skates, you will need waterproofing substrates, carnome sinks and bitch with endune:

Think out in advance which of these items you will need how many tiles will go on the skates (count on the area, and for 1 square meter, usually consumption of 9-15 shards).
And also decide right at this stage, whether you will use the attic room as a residential in the future, because it depends on the device of roofing cake:

Stage II. Assembling a rafter system
Competently and high-quality installation is one of the most important conditions for the durability of the tiled roof. Let's look at its main stages. Let's start with the preparatory work.
Before laying the tiles, be sure to check the geometry of the rafter design, measure the diagonal and compare their length. All irregularities must be aligned, because the roofing locks have an extremely small range of motion.
Those. Correct the flaws with the help of the roofing coating you can not at all, unlike a soft roof, which is able to overtake any radius.
Therefore, arrow with a two-meter rail or lace, and check out all the planes. The deviation should not be more than 5 mm in length in 2 m. Now for convenience, lay off the tile with stacks of five to six pieces on opposite skates to create a uniform load on the rafter.
If you are determined with roofing pie, proceed to the solving system. The optimal step of the rafter - up to 75 cm, because in natural roofing weight is quite significant.
The lamp is the basis for which the tile is based on, so it is important to correctly calculate the shaft step so that the whole number of tiles on the roof is. Therefore, with the help of the level, make sure that the timber is located strictly on the horizontal surface. Use bars coniferous rocks, without passing bitch and obol. For rafters, which are installed in increments:
- no more than 75 cm, take the bars with a cross section of 30 mm;
- exceed 90 cm, the bars are needed 40 by 50 mm;
- if the step of the rafter reaches 110 cm, then the bars must be 40 mm or 50 to 50 sizes.
To make the correct marking of the rows, a marking cord is used. It is tensioned on the marks made.
Especially carefully consider the location of the counterclaim where the mansard window will be located:

Now proceed to the installation of a carnice bar or a dropper, whose task is to delete condensate and prevent wetting of wooden structures.
Installation of drippers - in general, the simplest of all installation:

Stage III. Waterproofing and crate
As soon as the base is ready, go to the waterproofing device:
- Step 1. On both sides of the funds to the rafter feet to bring bars.
- Step 2. Explore the waterproofing membrane on top of the counterclaim, be sure to appear and the front surface up.
- Step 3. Cut it along the edge of the cornice with a margin of at least 15 cm. Place it, starting at the right bottom corner, and fix with the help of a stapler, aligning the dropper. This will help you bilateral scotch.
This is how it all looks in practice:

Now recreate the counterclaim directly to the rafters, on top of the membrane, nails with a step of about 30 cm. Ventilation gap under the eaves light. Close the perforated ventilation tape.
To find out the optimal position of the lower support crate, you need to try on the tile from the lower row and the bracket of the drainage gutter. The base of the support crate should be fixed at a distance from 32 to 39 cm from the bottom edge:


At this stage, it is very important to properly hydroize the frontal skes:

By the way, the frontal overhangs are beautiful, special side tiles are fixed on them.
You can also resort to a traditional way, setting up the front with carved boards, which are also called whites. They only need to be treated with antiseptic and protect the metal apron.
Stage IV. Installation of drainage gutter
Now install the drainage chute, on the pre-mounted mount. To the wall of the building, secure the chomst of the drain pipe and collect the knees with the connecting elements.
The ends of the drainage gutter on the frontows are closely close by a universal tip-plug so that the gutter does not interfere with the installation of the lower fronton tile.
And the straight elements of the gutter connect the docking element and close from the inside with the help of curls that are attached to the additional crate:


Stage V. Working with Endova
Nendova lay, starting from the cornese sweep, bottom up. After laying it can be trimmed by 3-4 cm to prevent the groove of the groove at the top.
If you need to choose the exact amount of Enda, then guide such a simple principle:
- in case the length of the end is not more than 4 meters, the width of each half must be 20 cm, and in the deployed form about 55 cm.
- if the endowa is long enough, more than 4 meters, then in the expanded state of the steel sheet should be a width of at least 66 cm.
Fix the end to the crate of two screws. Cut the paws on both sides for a dense pairing, fasten with self-drawing, and their joints are punctured by a sealing ribbon.

From each edge of the Yandov's groove, install a self-adhesive foam strip with water-repellent impregnation.
On both sides of the endands along the entire cornice sweep, the air element is mounted, which should not go to Endahu further than 10 cm from the edge of the groove, otherwise it will delay garbage there, palm leaves and a snow gathering.
Make sure that the visible part of the endand is at least 13 and 15 cm. The fact is that if the grooves turns out to be completely closed with tiled, then rainwater will accumulate in it.
Step VI. Laying the tiles on the skates
So, now, when everything is ready, on the frontal sink, try on the frontal tile, which should lie with a gap 1 cm from the frontal board.
On the crate, mark the left edge of the fronton tile, and to the left of it, mark the position of future columns 90 cm, at the rate of 30 cm on the column.
With the cords, apply this markup to the crate. Now freely lay out the lower first row, while the position of each third tile is carefully checking the marks applied earlier.
Supported spike that will rely on the windshield, you need to knock down the hammer, like on this photo master class:

Now, each tile of the lower row fasten the screw through the holes drilled in the crest, and lay out the first column of the frontal tiles along the pre-marked vertical line. At the same time, each tile is creating at the top of two screws.
After that, lay off the tile on the skate, from the bottom up the vertical markup applied to the crate:

To move along the tiled roof, you will need only a safety belt - you can occur everywhere. Stacking and marking tiles on tent and hip roofs start from the middle of the row. To do this, you will need to find the middle of the triangle: just lay out the vertical row from the tile, right in the center, and now put the lower row.
After that, make the markup of the vertical rows where you succeed, and lay so tiles from the bottom up, along the rows, ranging from the middle of the ridge towards the ridges.
Stage VII. Fixation of the tiles with different methods
Now let's talk about fastening the tiles. Up to 60 degrees most of the tiles do not need a fastening at all, only the lower row is fixed on the sink, the upper skate rows and side frontal.
And also fasten all the cropped tiles, which is usually located on the endand, ridges and adjacent to the walls of the attic windows and hatch. In regions with strong winds, the shards are additionally fixed with wire.
But separately the grocery tile is produced, which is also called the castle. It has the largest area and profiled form, and there is such a tile from other presence of locks.
The locks are two edges, the upper and side, which are superimposed on the adjacent, are snapped and ensure reliable tightness of the coating. In addition, at the bottom, such a tile has protrusions, which when installing clings for the bars of the crate.
The most popular models of such tile are a double S-shaped, Holland and S-shaped Marseille. Most of them are sliding locks, so that periods of the tiles can be made broader or narrow, as far as it turns out. Due to the presence of such sliding locks, the tile is ideal for the existing group of bars, and it does not need to be trimmed:

In addition, mostly the entire tile today is produced with two made holes for screws. They are not through, it is worth noting.
Therefore, if you decide to fix the tile, then these holes need to be drilled in 6 mm drill and fix at the top to the crate using two anti-corrosion screws of 4.5 to 50 mm, and at the bottom of the countermammers.
Also, if the skate has a length of more than 4.5 m, it is further needed to install ventilation tiles. Such is positioned in the third row, with a step of 1 meter. If the skate is more than 7 m, then the ventilation tile is put in two rows:

Also, the ventilation tile is needed where there are flue pipes or mansard windows, because these are the obstacles on the way of circulating air under cover.
Stage VIII. Crawling of the window and waterproofing
There, natural tile bypass windows in the roof, you will most likely need half the tile (if only you did not calculate perfectly). Stay it next to the rest and try to close the joints.
We have prepared for you a detailed master class of waterproofing of natural tiles to windows and chimney pipes so that you can deal with all the subtleties of such work:

Here is another example, how to "enter" the window into the tiled roof:

Stage IX. Trim roof tiles for junction in end
In order to properly put the tile in the end, with the help of a lace on the groove, mark the suspension line so that the tiles on the groove make up 8-10 cm. After that, cut the tile at an angle of the marked line. Just do not take small triangular roof fragments that hard to fix.
To move the column and provide high-quality mount, you will need half the tile. Approximate consumption - 1 piece for 2 rows:

For convenience, first numb the crop tiles and remove them from the crate. For cutting tiles, we advise you to take an angular cutting saw, with a capacity of 2 kW and a diamond disk with a diameter of 22.23 cm, which is specifically designed for dry cutting of heavy concrete. Protect your eyes with glasses or face with a respirator.
By the way, accuracy will be achieved on a water-cooled machine. Rinse the tile to rinse with dust and let it dry. Since you will not close the edges, you will not close anything, cover them with a cold Angoba under the color of the roof - such a sale immediately with tiles.
To correctly fasten the cropped tile on the ridges, take special stainless steel beammers. Such beammers produce two types:
- anti-conflict, which attract the tile to the crate;
- universal, which support tile on weight.
Wire fasteners are screwed to the nail, which is clogged into the nearest reshet. And sometimes the wire is used so thick that it is scored himself directly into the crate instead of a nail.
Stage H. Installation of Konkown Tiles
To install the roof of the roof from the natural tile, follow our detailed master classes. Here is how the installation of the skate on the roof of the ceramic tiles is happening:

If there will be a residential attic under such a roof, then use the aeroelement, which has the greatest section for ventilation - this is "Figigro". If only a cold attic will be in the underfloor space, then any other aero element will provide ventilation.
To install the skate tile, bend the bars holders so that when installing a bar, the distance from the top face of the bar to the upper face of the rafter legs coincided with the fact that you are measured in advance.
Cut the tile so that the gap remains 2-3 cm. Secure the cropped tiles to the cutting of corrosion-resistant screws 4.5 and 50 mm, or directly to the sprinkled ridge with copper wire. Also suitable stainless steel beammers.
You will need to put one holder at the end and beginning. After that, pull the lace and set the intermediate fastening right on it.
Stage xi. Fixation of the ridge tile

The device ridges of the holmic roof start from the installation of the ridge bars. To calculate their height, you need to put two skate tiles on the top of ordinary. Start measurement from a narrow end. The ridge bar must be below the skating tile, so that it relies on the waves nearby. Between the ridge of the Bru and the inner surface of the skunk tiles, leave at least 1 cm.
Now be careful! Metal fastenings of the ridge bar need to be bent and installed at the beginning and at the end of the ridge. Start the intermediate brackets in the lace with a step of no more than 60 cm.
Directly in the mount, install the ridge bar and secure nails or screws. To ensure the ventilation of the roof, cut the tile on the ridges diagonally with a gap 1-3 cm from the ridge bar and secure them with the clips that fix with screws on the opposite side:

On the triangular skate, mark the middle of the skate at the lowest and the highest crate, and from this mark to the right and left to the direction to the ridges, lay out the lower row. All the following ranks also post, ranging from the center.
For ventilation of the underpants, the rolled material "Figigro" can apply. Roll it on the axial ribbon for the ridge bar and secure the usual construction stapler, in a step of 30 cm.
With rubber bands, remove the protective tapes, press the roller material on the sides (just do not press the central part). At the top of the Walm "Figarol" stacked with overlap to another skate.
 Start the installation of the initial ridge tile with a small release, and fasten two screws with plastic washers through the drilled holes in the upper and middle part of the tile.
All the upper ridge tiles must be trimmed at the top point of the hip over the joint line. Walm tile just put on top, and its contour should be noted on the skate tiles to cut them with 6 cm above this line. And finally, final work. Spread the skate tile on the skate according to the same scheme as on Valma, the only thing - the tile, which goes to Endaé, needs to be cut off both sides.

To beautifully arrange the roof ridge, use the starting rack tile. It should be installed with a small allowance, and fasten with galvanized screws 5x70 or 5x100 mm.
Stage xi. Additional roofing elements
Pay attention to the correct organization of the eaves, which must comply with all specifications: collect water and give air access to the underpants space for high-quality roof ventilation. And also not to be devoid of aesthetic attractiveness.
Additionally, the ventilation ribbon and aeroelement eaves are stacked:


At the finish stage, the ends of the skates are closed by a protective bar from the steel sheet. Next, an aeroelement from birds is fixed along the length of the rafted on the edge of the cornice, if the rafter is less than 8 meters, and the hard profile with perforation, the length of the rafter exceeds 8 meters. At the same time, it supports the bottom row.
As you have already seen, old and modern technologies are perfectly combined with each other, and allow you to build at home without losing the spirit of your history, while taking from centuries-old experience only the best.
Installation of ceramic tiles is a complex process for a person without experience, requiring the strengthening of the lifting roof design. Weigh ceramic tiles times in ten more metal tiles, as its base is clay. Any errors when laying roofing material may entail serious problems, so trusted all work is better than professionals. But if you are confident in yourself and your strength, you first read the installation instructions for the ceramic tile given in this article.
Montaja rules
Remember the main rules for the installation of ceramic tiles, which will simplify you work:
- Installation is carried out on the right - left, bottom - up
- Before laying plates, they raise 5-6 pieces on the roof and evenly distribute over it
- Compared to metal roofs for the roof of ceramic tile, it is necessary to enhance the lifting construction by 15-20 percent
- The optimal bias of the roof for the installation of ceramic tiles is 50 degrees. Minimum bias - 11 degrees
- STEP CHAIRS AND PROBLEXES - 30 SATMERS
- Deliver the tile to the construction object better immediately before the start of the work
- Transportation of ceramic tiles is carried out on cargo transport on pallets. Weight of one element from 2 to 4 kilograms
Calculation of Tiles
Use the table to determine the number of roof tiles. Useful width and length - sizes of tile tiles. Measure the area of \u200b\u200bthe roof and make the appropriate calculations.
Should I use ceramic tile?
Many people have a question: "Do I need to cover with ceramic tiled roof?". After all, it is mounted difficult, and the process of this time consuming, because it is necessary to lay one element. It is much easier and faster to climb the roof of ondulin or metal tile. Let's try to answer this question.
These are the advantages of ceramic tiles forcing some household owners to use it as roofing material:
- Environmental purity. Ceramic tile is made of clay for all requirements. Thanks to the burning at a temperature of 1000 degrees, the material acquires a brown-red shade
- Duration of operation. Ceramic tile can last up to 100 years! And with no corrosion. This material is durable and reliable, non-combustible and noise absorbing
- Uniqueness. The roof covered with ceramic equipment is radically different from others. But this, again, the case of taste
- High resistance to ultraviolet radiation, atmospheric precipitation
- Easy to replace the damaged roof sections
Disadvantages:
- Big weight
- High price
- Mounting complexity
- Fragility at high mechanical loads
Use ceramic tile or not - the choice is yours. Relate all the advantages and disadvantages, deposit them with other roofing materials and make the right choice!
Video Pro Installation of Ceramic Tiles
 Why you can not postpone the pregnancy
 Effect from regular use of home recipes
 Features of the structure of the neck