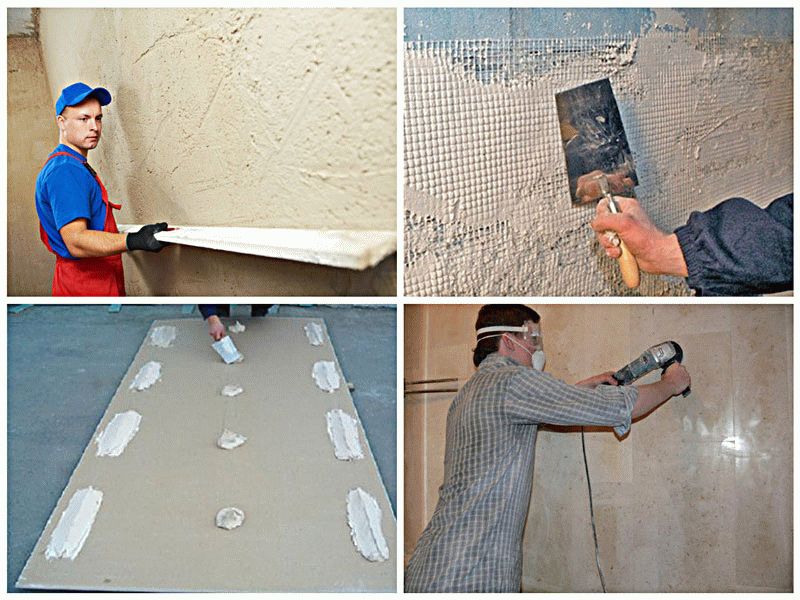
Basic ways to level walls
During repairs in an apartment or house, it often becomes necessary to level the walls with your own hands. This manipulation can be carried out in various ways: using plaster mixtures, putty or drywall sheets. The choice of method depends on the humidity of the room, the degree of unevenness of the surfaces, and so on.
Plastering is considered a classic surface leveling option that can be used for residential and industrial premises. The use of drywall is appropriate when the walls are very curved, and the use of plaster mixes will cost a decent amount. Drywall also needs further finishing, so this method is popularly called dry plaster. Leveling the walls with putty is the final stage of finishing work. It is necessary to remove minor defects before applying paint or wallpaper to the surface. These wall alignment methods are quite simple, so each master will cope with them on their own.
 Modern materials allow you to choose the most affordable way to level the walls
 Plastering
To carry out these finishing works, it is necessary to prepare the following materials and tools for leveling the walls:
- Brushes, floats, perforator and drill, hammer and solvent to remove the old coating.
- Mixing container, nozzle-mixer for preparing the solution.
- Primer and paint brush or roller.
- Plaster, lighthouses, self-tapping screws, spatula, trowel, trowel, as a rule, trowel, building level.
Preparation
The technology for leveling walls in this way implies the presence of a preparatory stage, which includes the following steps:
- Removing the old coating, tapping the wall to identify weak fragments.
- Extraction of these fragments, sealing potholes with putty.
- Removal of any contaminants from the surface, including dust.
- Application of a primer in 2 layers with an interval of 3-4 hours (the exact time is indicated by the manufacturer on the package).
 Preliminary preparation of walls before plastering
 Marking walls for lighthouses
For high-quality alignment of the walls, it is necessary first. These are metal or plastic perforated profiles that serve as guides during the stretching of the plaster as a rule. For home craftsmen, it is recommended to use T-shaped galvanized profiles; more experienced craftsmen can do without them at all. Previously, it was customary to use improvised means for these purposes, for example, wooden slats, metal pipes, and so on, but such elements are unlikely to help achieve perfect evenness.
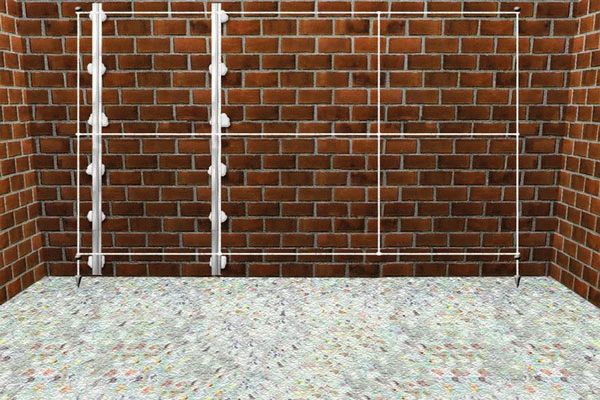 The use of plaster beacons allows you to make the walls perfectly even
 To mark up for beacons, you need to do the following:
- Step back from the corner of 30 cm, from the ceiling and floor by 15 cm, draw a strictly vertical line with a marker and a building level. Repeat the operation for the second corner.
- At the upper and lower points of the lines, drill through the hole, into which insert the dowels and tighten the self-tapping screws.
- Draw the entire wall with similar lines, retreating from each 130-160 cm.
- Pull two horizontal threads between the fasteners.
- Mark the intersections of lines and threads with a marker. Drill holes there and insert self-tapping screws.
- Screw the fasteners to a depth that is equal to the blockage of the wall, plus the beacon thickness of 0.6 cm, plus a margin of 0.5 cm.
- Pull the diagonal threads and draw a beacon under them. If the product barely touches the threads, then the markup was done correctly.
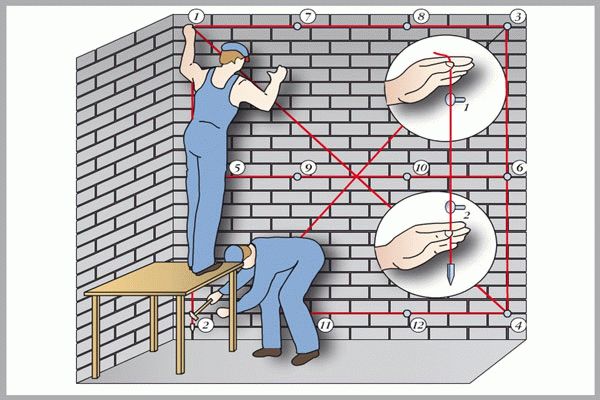
Important! At this stage, it is better to regularly check with the building level.
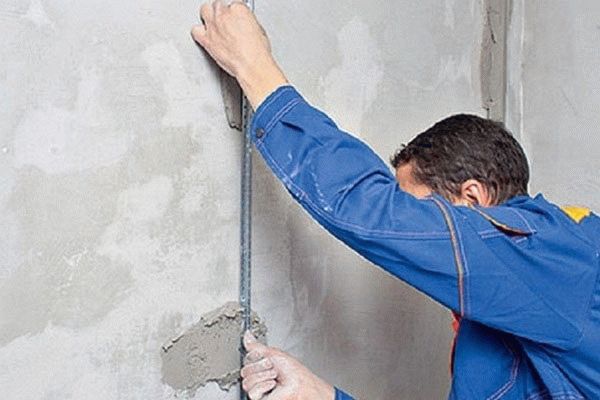
Installation of beacons
Lighthouses are installed on the walls using the same plaster that will be used for the main work. Although the fastest way is to use additional plastic or metal fasteners, but in this case the thickness of the structure increases, which leads to unnecessary expenses.
 For the installation of plaster beacons, a solution or special fasteners are used.
 So, to fix the beacon profiles, you need the following:
- Apply the solution along the drawn line in small portions with an interval of 15-20 cm.
- Take the beacon and press it with the rule to the solution.
- Make it so that it goes to the level with the exposed screws.
- Remove excess solution with a spatula. They are used to seal beacon surfaces that are not completely recessed into the material.
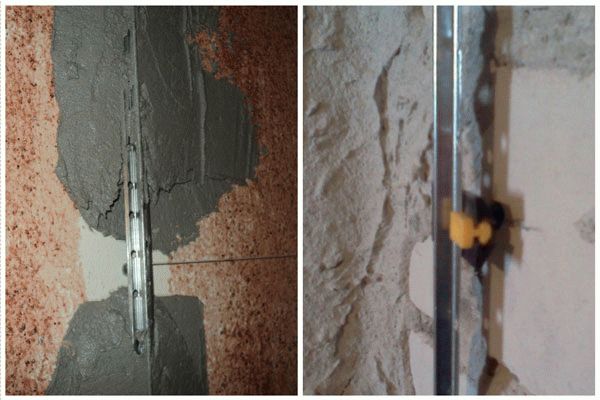
 Lighthouse profile should be drowned in a solution
 Plastering technology
Leveling the surface of the walls begins with the preparation of the mortar. At this stage, it is important to strictly follow the manufacturer's recommendations so that the dried coating has the necessary performance. According to the technology, it is necessary to apply 3 layers.
The first of them is a splash. Its thickness should not exceed 3 mm, it is used to increase the adhesion of the plaster to the wall. A prepared solution is collected on a spatula and simply thrown onto a section of the wall separated by beacons. While the entire surface has been processed, the first fragment will already dry out a little, so you can not wait, but immediately proceed to further work on leveling the walls in the apartment.
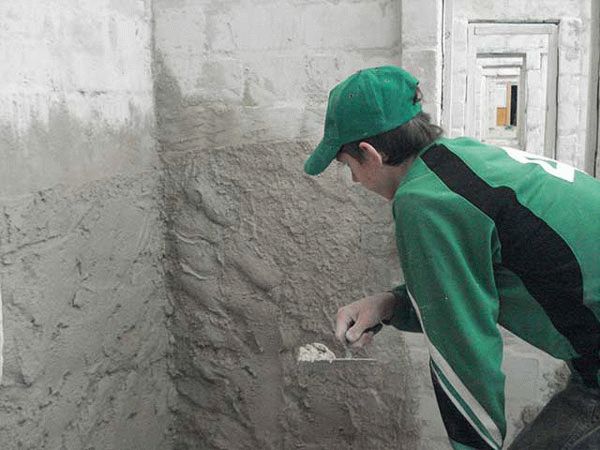 Spray - the first layer of plaster, used to improve the adhesion of the main plaster layer to the wall
The next leveling layer is soil. Its thickness can be 50 mm, depending on the curvature of the walls. With a wide spatula, the solution is applied to a fragment of the wall, moving from top to bottom, after which they take the rule, press it to the lower border and lead it up, while making zigzag movements to the sides. The solution that remains on the blade of the tool is thrown up. The procedure is repeated. This is how the entire wall is treated, after which the beacons are removed and the strobes are sealed with a solution. Then the wall must be allowed to dry - up to 14 days.
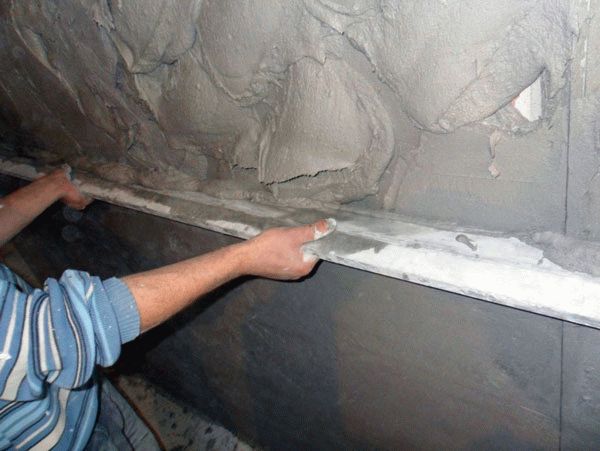 Soil - the second layer of plaster, which bears the main load
 After this period, an intermediate stage is carried out, during which corners and zones are formed near the floor and ceiling. The work is quite simple, because instead of a level there is a finished surface that you can navigate to. Due to the small area for processing, it is recommended to use narrow spatulas.
The last layer of material is the covering. This is a decorative layer that will smooth out all the small bumps. Its thickness is 3 mm. After setting, the surface is rubbed with graters and trowels with sandpaper of different grain sizes installed in them.
 Nakryvka - the third layer of plaster, allowing you to get a perfectly even coating
 Plaster is a rather heavy material that gives an additional load on the walls, so its use is only advisable in rooms with surfaces that are slightly deviated from the vertical.
Plasterboard leveling
Leveling the surface with drywall sheets is used when conventional plastering is too expensive due to the strong curvature of the walls. Among the positive aspects of this method are:
- Ease of installation. Even an inexperienced home master can install the frame and fix the plates. In this case, a large amount of dust and dirt will not form, and you can always correct a mistake, which cannot be said about plaster or putty.
- Versatility. This material can be mounted on any base with any blockage.
- It is easy to level very curved walls with absolutely any irregularities and differences.
- The possibility of additional insulation and sound insulation, since there is free space between the wall and the drywall sheet.
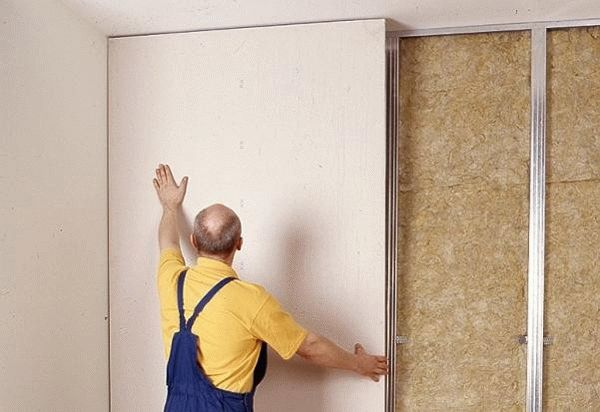 Plasterboard sheathing is the easiest option for leveling walls.
 The main disadvantage is the fact that it significantly reduces the usable area, which is highly undesirable in small apartments. In addition, it is not recommended to use this material for finishing wet rooms. The modern market offers moisture-resistant sheets, but they will last only 3-5 years. The drywall surface is very smooth, which complicates further finishing.
Frame mounting method
To create a crate with your own hands, you need to stock up on metal profiles, the length of which must correspond to the height of the ceilings, a drill and self-tapping screws. Previously, a wooden beam was used for the same purposes, but it is prone to decay, and it is more difficult to install it, so now wooden guides are practically not used.
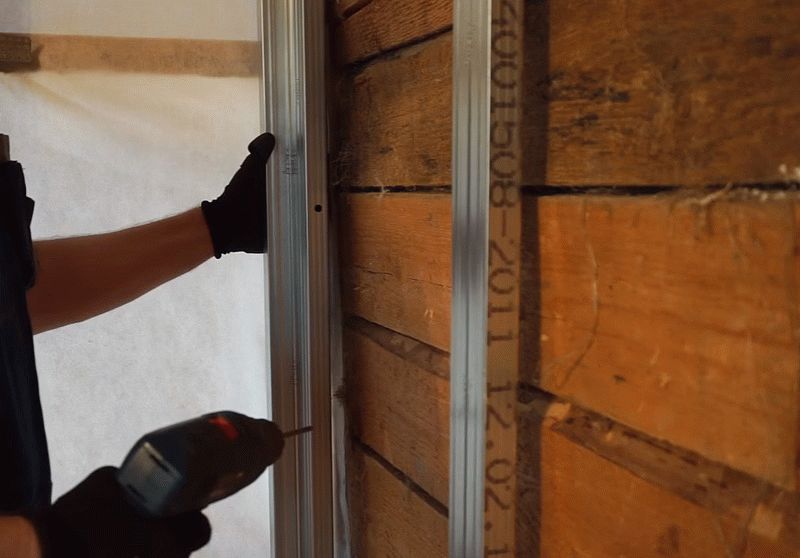
First of all, markup is applied. To do this, the walls are drawn with vertical lines at intervals of 40-60 cm. A frame is attached along these lines and checked with a building level. Fastening is carried out on dowels with self-tapping screws.
On a note! Insulation with mineral wool or any other selected insulation must be carried out after the installation of the frame.
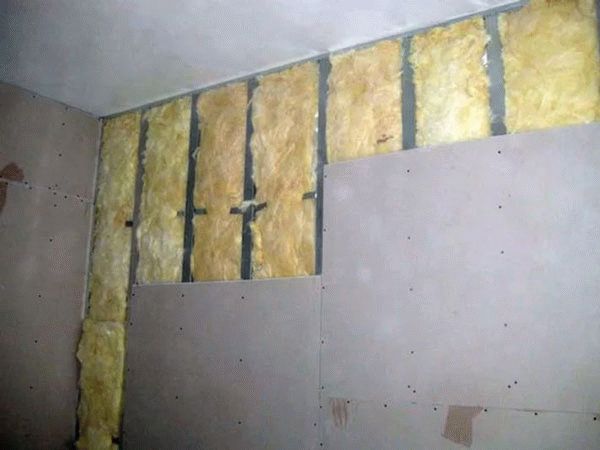 Wall insulation is carried out after the installation of the frame
 After that, you need to take a sheet of drywall and place it in the center of the structure. It is attached to oxidized fasteners every 40-60 cm. The screw head should sink a little into the surface of the plate. From the center, you should move to the edges, and to finish the surface near the corners, you will most likely need to cut sheets of material.
Installation of drywall without crates
It is a bit like installing tiles. For drywall sheets, a special solution is diluted, after which it is applied to the walls and the sheet is fixed. Level check its evenness and proceed to the second. The thickness of the coating depends on the curvature of the walls, the larger the defects, the thicker the adhesive layer is needed.
Finishing the walls with drywall is perfect in cases where, in addition to correcting irregularities, it is necessary to conduct insulation, soundproofing and hide utilities. The method is much cheaper than plastering, but leads to a decrease in usable area.
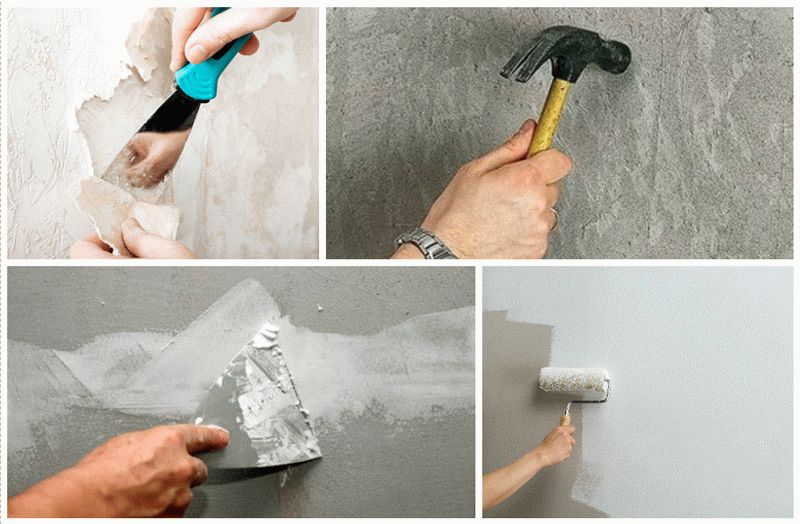
Using putty to level walls
To level the walls with putty with your own hands, you will need the following tools and materials:
- putty;
- mounting foam;
- primer;
- a set of spatulas;
- construction dryer.
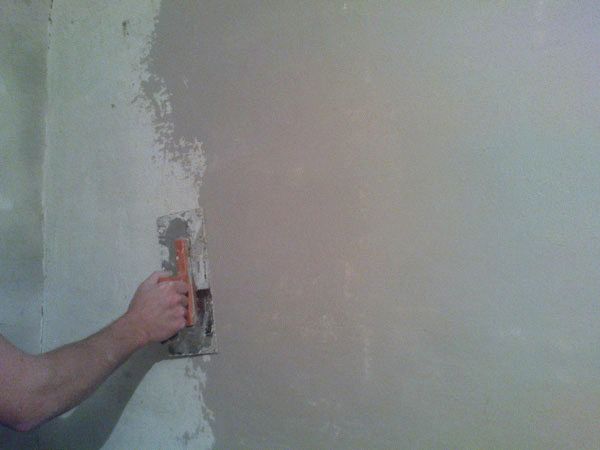
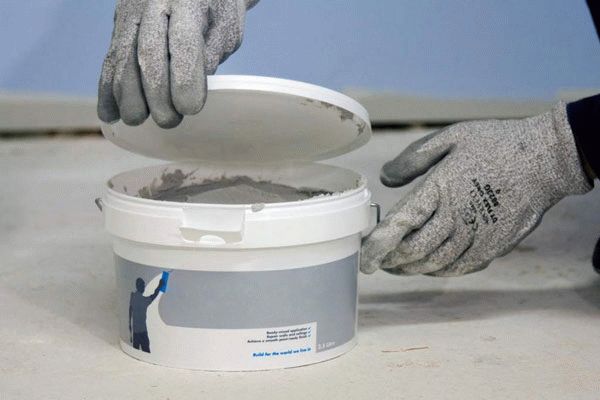 Putty is used to apply a finishing leveling layer
 Putty is a finishing material that is used to finish the surface. The quality of the resulting coating is quite high, so it is not advisable to use puttying for rough work. This operation is carried out when preparing walls for tiling, painting or wallpapering. Often the material is used as a finishing layer after plastering. Putty can be used on almost any substrate, but it adheres best to concrete and wood.
Material Handling
Before you level the walls with putty, you need to prepare the surface. This is done in the same way as in the case of plastering.
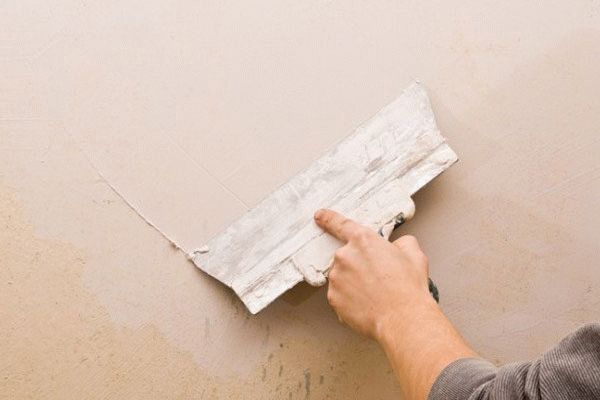 Putty is applied using a special tool - a spatula
 Then the first layer of material is applied, its thickness should be 2-3 mm, but with strong deviations it is permissible to increase it to 5 mm. At this stage, the work goes only with a spatula. With this tool, the material is applied and leveled. At the end, the putty is left to dry.
After the leveled surface has dried, a primer is applied, and then the last layer. Its thickness should be 1 mm. You can dry the material with a building hair dryer, but you need to keep it away so as not to overheat the surface.
At the end, the surface is treated with fine-grained sandpaper. The resulting result can be used as a base for tiles or wallpaper, but the quality of the surface allows you to completely abandon further finishing work.
In conclusion, it should be noted that one should not be limited to one way of leveling surfaces. You can combine them, for example, eliminate significant curvature with drywall, and then finish it with decorative plaster. Or use an inexpensive cement plaster mixture for basic work, and at the end apply a high-quality coating with putty.
 Facade design of a country house: a variety of stylistic trends
 Wooden ceilings - 25 interior examples
 How to make a children's playhouse with your own hands