We make a table lamp with your own hands. Original table lamp on your own. Abazhur - Case Crown
If you are tired of boring and monotonous things in your apartment that you see every day, then it's time to diversify the design with Hand Made. Table lamp with your own hands is an excellent option to start. It does not require special skills and trouble, and the result often exceeds expectations. In this article we will tell you how to make a desk lamp with our own hands than to decorate it and how to connect it. We also prepared an excellent photo selection for your inspiration for creativity.


Table lamp do it yourself: the main elements of the design
The most popular and simple materials for creating a desk lamp do it yourself, it is: cardboard, paper, glass bottles, banks, plastic containers, pipes from water supply and cement. We will tell how from all this material to make a lamp.
The main elements of the design in the desk lamp of any type:
- Electromechanical - Provides stability to a homemade desktop lamp and a safe supply of power supply directly to the lamp.
- The support is supported by a reflector or illuminator.
- Illuminator - Light bulb in the lampshar.
The desktop lamp electromochem is quite simple: network plug, cable, switch, bulb cartridge. Sometimes add voltage regulator. The cartridge for a narrow minion-base E14 is also attached to the thread or on the lamella in the form of a steel strip. For the desktop lamp, do it yourself the best option - chandelier cartridges with threaded flanges: between them you can hold the steel plank with the lampshar frame or the clamp for fastening on the hinge.
The table lamp must necessarily be electrically safe. This is especially true for lamps on hinges and consoles. Create desktop safety can be created using a simple scheme:
- The cable must be round, in double isolation
- Conductive cable veins are flexible, from numerous wires.
The cross section lived from 0.35 square meters. mm. - Cable wiring locations must be protected by dense dielectrics.
- The cable before entering from the inside is tied with a nodule or pull through the holes of the dielectric locking washer so that it cannot be broken. Next, it follows decoration and decoration.
Original lamp lamp lamp do it yourself
A lampshade must be manufactured taking into account not only aesthetic aspect, but also practical. It is important to fix it correctly, as well as make a comfortable opening for a light bulb. Paper, plastic and threads - materials that are most often used for the manufacture of homemade lampshar.
The simplest and most convenient material is paper. To create such a lamp, except paper, you will need: threads, PVA glue, sewing needle and scissors. There are many ways to make lamp lamp with your own paper hand. The simplest method is to dial the ball with paper stripes, while gluing them between themselves and on the poles. The form in the form of a sphere will further strengthen the continuing lampshade of paper.
Also elementary is the lampshade of disposable plastic cups, which are fastened by the stapler. This lampshade has sufficiently good lighting characteristics, but the appearance is quite utilitated. Such a lampshade is well suitable for premises in which high-quality lighting is needed, but an aesthetic appearance is not required.
In the manufacture of lampshar of the threads, you will need at least 100 m. It makes no sense to use inflatable balls, like mandrels, because after 10-20 turns, the ball will begin to stretch in different directions and ruptures the shape. It is best for the mandrel to use tight-inflated, durable ball. The mandrel must be lubricated with vaseline. Further, pre-lubricate with glue, wind the thread on the ball. When winding, do not forget to leave the cable and cartridge hole. After a day, you need to blow away the mandrel, which, thanks to Vaseline, does not stick to threads. Also, threads can be replaced with jute, sisal or propylene twine.
Data lampshades form smooth soft light and so perfectly suitable for any room.


How to update lamp lamp lamp with your own hands
Old, boring, shabby and burnt lampshades can easily be updated with the help of healthy tools or create a new one at all. We will tell how to make it right and beautiful. As materials you can take any textile. Using fabrics and threads, you can sew or associate lamp shade in the form of a dress. Easy to decorate lamp lamp lamp with your own hands using: buttons, stickers, butterflies, beads, colors and various braids.
If you want to create an original label lamp tools, then here is a lot of ways. To create such a lamp, it will be suitable: lids from tin, disposable dishes, your favorite pictures from the photo of the album, paper with drawings or just a lampshade, disgraced by your hands.
It is enough to turn on the fantasy and you will get the original lamp in the interior of your home or apartment. In the photo below, see the selection of lamps for the table lamp with their own hands.

Original desktop lamps are unusual products with a design that rushes into the eyes and emphasizes the interior, makes it more comfortable as well as interesting. But self-made devices may well possess the same characteristics.
They are quite simple to make out of the girlfriend, decorate to their taste, and the design will be unique. If it is planned to use a rather time-consuming manufacturing technology, it is better to take the master class as the basis.
Glass Bottle Design
Homemade desktop luminaires of this kind are made using a wine bottle. Materials will also require greater tape. The drill will be used in the paper, and as an original idea for the light source, you can use a New Year's garland with small light bulbs (LED). Glass of bottles should be dark enough to protect against bright radiation of the light source.
Master class on the manufacture of a table lamp:
- The bottom of the bottle is carefully wrapped by a painted scotch, it is better to make multi-layer glass protection so that it does not crack when drilling.
- It is necessary to work with a wet drill, and the drilling speed should not be maximum. On the scotch, which covers the bottom of the bottle, the mark is made in the center. Here will be a hole, through which the garland will be passed.
- So that the homemade lamp does not imagine danger, the edges of the hole are processed by sandpaper. To do this, you can wrap it with a pencil.
- In the last stage, the garland is stretched inside the bottle, and this should be done as evenly possible.

There are various ideas how to decorate such a lamp, and the master class to their implementation. For example, a bottle painting can be made. Another original option is the use of girlfriend, for example, crocheted coating for a glass chassis of the lighting device.
Soft toy lamp
To implement such an idea, you need to use diagrams and master classes. The basis of a soft toy - pattern. The type of materials used is selected any, at its discretion.
However, it is recommended to pay attention to such features: not too thin or dense fabric. As an option - Len. You can bind all the elements of the scheme. The main thing is that in this case the binding was an openwork, not too dense.
First, all available parts are sewn, the base of the toy lamp remains open. The filler is styled inside. Then it is recommended to treat the tissue or a crocheted toy with a special makeup, which is used to seal the matter.

Soft toy night light
The product must dry well (1 day). Further, the filler is cleaned, which is easy to perform with a pencil-wounded bilateral tape.

At the bottom you need to cut out a small hole for the output of the wire and place LEDs.
The bottom edge of the product suits the base to be as smooth as possible. A small hole is cut on the side for a convenient location of the cord. Inside the hook or stitched toy laid the LED cord.
Lamp made from flower pot
Another master class allows you to create a lightweight device from undergraduate materials that will surely find most users: a pot for flowers or a ceramic vase.

You will need a flower pot or ceramic vase.
In the work it is useful: a wired connector, a cartridge, a metal cutting tube, the length of which slightly exceeds the height of the pot. Also required plaster and spatula. To install a rod, a disk and two nuts will be required. Recent elements will enable the disc. This side of the bar is lowered to the bottom of the vase.

Attach the disk and the puck to one end of the carving pipe
So that the homemade lamp was stable and durable, the bottom of the vase is laid out a gypsum solution, which must be prepared in accordance with the manufacturer's recommendations.
Gypsum dries very quickly, which means that you need to act quickly and accurately. Before the fill at the bottom of the vase, a rod with a disk should already be installed.
A sufficient thickness of the layer of a gypsum solution is up to 1/4 of a vase height. Full pouring of the gypsum occurs after an hour.

Leave the disc on the bottom, and fill the pots in the pot.
Next, the camera is attached to the cartridge. It remains only to install the lampshade. If you wish, it can be bought in the store, however, there are more original ideas: a crochet-bound lampshade, a product of fabric, etc. The feed cable is stuck through the upper edge of the vase.

Secure the lampshade on top of the cartridge
To hide it, the lampshade must be located at or just below the edge of the vase. It is recommended to choose the plastic materials in accordance with the tint and style of the lamp stand, as well as taking into account the interior design.
The more transparent material is used (crochet, fabric, etc.), the more intense will be lighting from the lamp. For the manufacture of lampshar, the finished framework from the old lighting device will also be required, and the homemade analogue uses the wire.

As you know, the thing created by your own hands can become a decent decoration of any interior. Moreover, the more such designer and cozy items, the more interesting and color looks color. For each room of your home or apartment you can create desktops that will become an excellent decoration. And for this, you can use the fir-handed materials and very often those that are initially difficult to submit to the role of this functional and necessary instrument.
Where to begin?
Of course, first you need to think about the design, but we will return to this issue a little later. In the meantime, we define how to make a desk lamp from what we have at hand. We will use the following elements and devices:
The basis for the lamp (it can be a piece of plywood or DVD drive);
Frame from old lampshar;
Tube (it can be any);
Various adhesive compositions;
A piece of cable;
Jewelry for the base;
Switch, fork, cartridge;
Material from which we will prepare lampshade;
Aerosol paint.

Desktop Lamp Scheme
The classic desktop lamp consists of several parts. First, it is a base, a column and in this capacity, it is quite possible to use a glass or lamp chill, for example, from the fabric. It has a switch that is located on the power cord or on the basis, sometimes they are mounted on the base. Depending on the purpose of the lamp, it can have a different design:
- A classic lamp that is used to illuminate the workplace. The diffuser here is a glass ceiling or textile lampshade.
- The device on the clamp is attached to the table. The column of such a lamp is flexible, that is, you can tilt it as you like. Plafond - opaque fool, which focuses light in one direction. An ordinary or LED is used as a light source.
- The dimmer lamp is the ability to adjust the brightness of the light source.

Implement ideas
So, the details of which are made the simplest hand, we have prepared. Now we take glue, base and tube and glue them with each other, for example, with the help of paper or the old newspaper. Yes, do not forget to do the hole at the heart - the cord will go through it later. We give the design to dry, after which we start to decorate our tube.
To do this, we use anything: beads, buttons, beads, bows, figures from kinder surprises and much more. Thanks to this original and at the same time, simple decorations, your lamp will look very non-standard, and therefore it will be possible to transform the interior. The most recent task is to cover the paint lamp. It is best to choose compounds in which there will be no toxins, as well as those that quickly dry. After the device is dry, you can do the manufacture of lampshar.
Lamp from the old vase - fresh ideas
To create your own hands, it is not necessary to look at some designer ideas or strive for effect. It is enough just to take an old vase and make a lighting device based on it. So you will immediately kill two hares: on the one hand, give a new life of an old thing, and on the other, decorate your house something unusual.
So, we will need the following components of the future instrument: the old vase, the cartridge from the old lamp with the holder or holder, for example, from the traffic jam. As the basis, a piece of foam, which inserts the reinforcement is completely comes. It must be thicker to pour epoxy resin, not forgetting about compliance with the safety rules, since this composition allocates harmful substances. Of the prepared materials, a design is created, which is inserted into the old vase. Now it's small - to make a lampshade.

Abazhur - Case Crown
Probably the basis for creating a lamp can be any. But with the help of the lamp, you can change the appearance of the lighting device at least every day. In addition, this element is created easily and easily and again of the materials available at hand. You can perform the design in a variety of stylized directions, but it is important that the table lamps are made, with their own hands, harmonized with the surrounding space. What is the way to create a lampshar choose?
First, the most optimal option is to make a ceiling of the same wallpaper that is saved room. To do this, we take the wallpaper and cut off from them a strip of a wide slightly larger than the label. Then you need to gently glue it to the lamp to the lamp, while it is important not to break it and not to remember. We give time to dry, after which you can safely put on the product on the lamp.
Secondly, the tissue lampshade is popular. It is very simple to make it, and if he wants, it can always be removed and replaced with another type. It is created such a lampshade for the same scheme that is given above.
Children - all the best
As you already understood, to create a desk lamp, it is not necessary to be a generator of ideas and thoughts. It is enough just to show a fantasy. Modern children's desktop lamps are characterized by the brightness of the design, but you can slightly change their appearance and make them more interesting. For example, those who know how to handle cloth can make the original lampshade lamp in the style of Patchwork. In addition, this technique can be implemented somewhat differently, for example, to make the basis for a lamp from children's toys - cubes, puzzle, or decorate the lamp toy toys from kinder surprises.

For the Girl, you can use more romantic drawings and decorative elements. For example, lampshade, richly decorated with satin ribbons, bows, beautiful buttons or an interesting applique, accurately will like to taste cheerful fashionmented.
Original designs
And now let's look at how unusual can be a table lamp. With your own hands (the photo confirms) you can make it very and very throwing, spectacular and memorable. For example, if you have an old globe, it can be safely adjusted under the original shape of the lamp. By the way, this one can safely be given to avid travelers - it is accurate to appreciate.
But the needlewomen probably stores a huge number of balls of threads of many different colors. You can connect a beautiful and bright case and put it on the lampshade. And you can simply add the tissue dome using original related ornaments. Such a lamp will give the room with the facilities and create a favorable situation for the pastime.

Many are laughing, but in the help of originality, almost everything can be used. Suppose, plastic dishes in the form of forks, cups, spoons, wand-umbrellas for cocktails. To create a non-standard lamp lamp, we need a balloon to which we glue all this plastic and cheap good. By the way, on request, you can paint it with acrylic compositions - so your lamp will shine new paints and will look very original!
What is the result?
Thus, ideas for creating a desk lamp at home is very and very much. Choose the way that most suits you in terms of style and constructive solution. After all, fresh ideas in the interior are the easiest way to update it. And this method is profitable, since it is possible to create original lighting devices from what is in your storage room.
Reading time ≈ 8 minutes
Everyone wants to decorate their house with stunning lamps made by their own hands from healthy materials according to individual unique design. These original products are able to transform not only a separate room, but also the entire apartment. To have an exclusive thing in the form of a sconium or a lamp of an unusual form, it will not be necessary to buy expensive materials. Here we need only scribe funds, your fantasy and a little creativity. Consider the best ideas and options for homemade decor.
Original pendant lamps-mugs
Masterpieces from simple materials
Plafones and other lighting devices can be made almost from any material capable of changing the shape or separated into several parts. It can be a tree, plastic, metal, paper, glass and even individual household items. Old bottles, plates, dishes, toys or musical instruments can go into move, but the main component is the light bulb.
That is why it is important to envisage that the lamp is strongly heated and safe for others. Otherwise, it all depends on your imagination and opportunities.

Room light in textile lampshade on marine topics
What criteria are taken into account when choosing a model of the lamp:
- overall room design;
- interior design style;
- the size of the room and the height of the ceilings;
- the level of illumination and the number of window openings.
But not always the creation of the product can be scheduled in advance. Sometimes the materials found at home or in the garage can push the idea of \u200b\u200bcreating a real masterpiece, as in the photo.

Wall and table lamps from old utensils and equipment
Consider some unusual options:
- from tin cans - an excellent idea for arranging the workplace, you can put both in the office and in the student's room. The bank, if desired, can be decorated with paint, threads and even draw a beautiful print;

- from the hangers - it is better to use wooden, Okrive each and subsidence under the desired size. At the same time, you can create any shape, as well as to cover such a lamp to the paint;

- from wood sections - wood will always be relevant and fashionable for interior design. To create a unique designer thing, sleep needs to be well treated, dried, coat with a protective solution and install the top of the old lamp. As a last resort, the base under the lamp shade from the store is used;

- from glass bottles - the time spent on the work cannot be considered spent in empty. After all, as a result, such beauty is obtained;

- of the old drums or sports equipment - products look very unusual, suitable for decorating a teenager room, a working office or a country house. Drum installation and old skiing - also a great solution for your own restaurant or office, as in the photo;

- from small bicycle parts - the first such idea came to the designers from Texas. Artists built balls from small spare parts of old bicycles;

- pumpkin lampshares - beautiful patterns are cut on the peel, the pumpkin itself will dry, and the bulb is placed inside. This will become a real masterpiece and will delight households for a long time;

- from paper molds from under cupcakes - consolidating them in a circle, around the main lamp, you can make a beautiful night light for children or bedrooms;

- from a set of terk - kitchen utensils can be useful and beautifully sparkling over his head, creating a special charm in the interior, as in the photo;

- the lace lamp is products from openwork napkins and knitted handkerchiefs. The fabric at the same time is covered with adhesive composition for fixation;

- in the canteen devices - if many spoons, forks and knives accumulated, and throw out a pity, create stunning compositions for designing kitchen sheds and chandeliers. Cutlery can be fixed with wire, rope and glue;

- suspended sconces in cups - will be by the way in the cozy evenings behind the tea party in the kitchen or summer;

- from the colander is an excellent option for any. It is better if the product is covered with enamel, but such a lamp can be painted in any bright color;

- wires are the most simple idea for handmade, because to cope with the manufacture of any newcomer. It will take only the wire of bright shades, a can with paint and steel wire;

- from the veneer - the material can be splashing into a round ceiling, and parts to be made with adhesive mortar. You can use veneer remaining from repair;

- from the rope - in the conditions of the modern city with the help of such a lamp, you can create houses a cozy atmosphere of the present province and rustic comfort;

- from the branches is an extreme design, suitable for Eco style, country and loft. Things can be collected together with a jute rope, giving them almost any shape. Compositions are created different sizes, varnished or left unchanged;

- from large beads and stones - similar gorgeous design transforms any interior. Bust lamps are an excellent decoration of any bedroom, living room or;

- from the old wheel - even he can be used, clearing with rust and covering the paint of the desired shade. Light bulbs are placed around the perimeter in any order;

- handmade lamp shade from old photos can decorate a desk lamp or outdoor, as seen in the photo;

- from the tongues from cans - for this, tin cans from soda, beer and just canned food. Some time will have to save the rings, keys and tongues so that there is enough to create a lamphateer or a ceiling.

All lamps or lamps made by their own hands from girlfriend can have a different configuration. Optionally, it is possible to make it possible both outdoor, desktop and suspended model.
Chandelier from spanings
Not always to create the original interior it is necessary to buy expensive designer furniture and accessories. Decor and other items can be made independently from simple means. Consider a master class on the manufacture of a room chandelier of plastic spoons - with work you can manage in just 30 minutes.
Required materials and tools:
- a large number of disposable plastic spoons;
- empty plastic bottle;
- glue;
- chandelier cartridge;
- scissors and knife.
From the surface of the bottle or any other plastic container, you need to remove all labels using a soap solution. Then the blanks are made from spoons, the handles are cut off. Details are fixed with glue to the bottle surface, it is important here to observe a certain order or a conceived combination of rows and colors. Capacity should be covered in a circle, following the transcends and visible excess glue.

Plastic chandelier of white spoons
Glowing ball of threads
This is the perfect solution for children's or bedroom in Shebbi-Chic style. To create a chandelier-ball in gentle performance, you will need to be purchased:
- glue;
- threads or harness of any suitable shade;
- balloon;
- petrolatum;
- needle;
- plafof.

First you need to prepare, inflated and knitting the ball, and then covering it with vaseline. In a tube with glue, we make a hole through which we will lend the threads and glued to the surface of the ball. When the ball is completely covered with ropes, and only small lumens remained, we leave the product for a day so that it dries.
The next day, the ball skeins the needle to be blown away or burst. The circumference of the ceiling to supply a felt-tip pen on the surface of the circle, then we make a breakdown of the desired size. Hole is needed to insert the cartridge and connect the lamp. The cartridge is well fixed with glue and additional threads.

Paper Bedroom Lamp
To get a beautiful table lamp of thick paper in the style of minimalism, you will need:
- lamp set or lamp;
- glue solution;
- putty;
- paint;
- dense cardboard to create a template;
- scissors;
- art ribbons;
- block for grinding;
- wooden weight loss;
- construction knife or drill;
- line.

Room lamp made of tight cardboard
First you need to reprint the template or simply transfer it to paper, with each triangular shape should be 6 pieces from each 6-square.
Manufacturing technology:

If you have inspiration, you will definitely make your own lamp - the product can be made from any girlfriend. The video master class is shown below how to make a design lamp of wood using drawings and schemes.
Objects made with their own hands fill the house with special warmth and comfort. In addition, they are obtained exclusive. We offer an overview of the lamps that will completely change the atmosphere in the room, turning into an object envy from the moant of friends and relatives. Especially since they are made from everyday items, which are usually thrown away.


A cardboard package for juices or other beverages is a completely ordinary thing in most homes. Most often it is thrown away. But the Malay design Edward Chu spent a lot of time to cut them on hundreds of strips and build amazing lamps without drop of glue, simple origami principle.

Yaroslav Olenev offered to make lamps from disposable plastic spoons and became the winner in the nomination "Ecology and Design" from the magazine "Future now."


No less original application has found and Natalie Simpson for ordinary wooden hangers. It looks like they are amazing in the form of a chandelier.
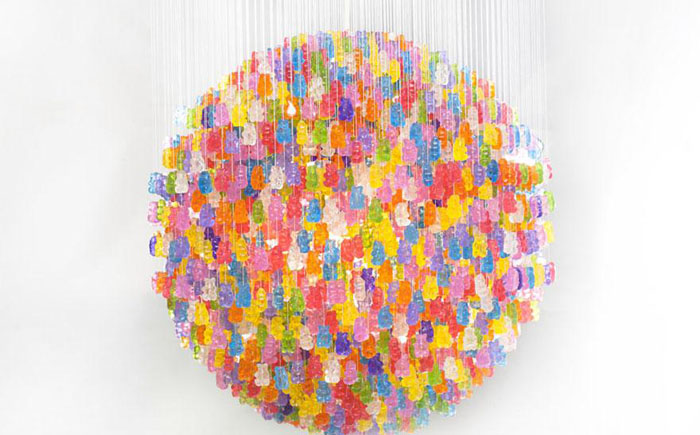

Kevin Champions need to pay tribute, not everyone has enough strength and patience to ride 14 thousand bears to get a chandelier.

His vision on the problem of housing lighting in the Tire Hilden and Pio Diaz. Thanks to their lamps, the room becomes like a forest. All walls come to life and turn into trees.

Matt Ludwig Talented Welder turned out to be an excellent designer. For the JJ "S Red Hots restaurant, it made an incredibly original chandelier from the old drum unit.

Texan artists Joe O'Connel and Blinding Henkok from spare parts of old bicycles built stunning lamps and hanged them in a tunnel under the track.

It will probably be difficult to find a more original chandelier than the pumpkin from the Polish artist. It cuts stunning patterns on the peel, which are not repeated.

Original and stylish looks lagging with felt hats from Jeeves & Wooster.

One day Heather Jennings saw an amazing chandelier "Rhododendron" in the store, just cost more than 800 dollars. Then the designer decided that with his own hands it can be done at all worse. To do this, she needed paper molds for cupcakes.
11. Chandelier in the kitchen

Incredibly beautiful will look a chandelier made from ordinary metal four-headed twirl.

Still fresh in the memory of vases and cannons made from openwork napkins. Now it's time to knit chandeliers.

The strange option offers Fans Lego, he believes that the best way to store cutlery is a chandelier.

The big tucker is cut out of the tree, but the remaining and switch from the cardboard.

From several globes there may be a wonderful cascade chandelier, a great way to illuminate the staircase.
 Why you can not postpone the pregnancy
 Effect from regular use of home recipes
 Features of the structure of the neck