Do-it-yourself highchair - drawings, dimensions of the scheme. Children's highchair with their own hands: drawings, dimensions, diagrams Highchair children's wooden dimensions
The kid grows by leaps and bounds, and all the time he really wants to be like adults. A table and a chair are one of those things that are not only “like in adults”, but also have great functionality. Most of these products in stores are either sold at a very high price, or are made of low-quality plastic with a specific smell and short-lived chipboard. But there is a good way out for parents - these pieces of furniture are easy to make yourself.

Necessary materials and tools
There are not so few materials for self-made children's table and high chair made of wood, they are available, they can be bought at any building supermarket. As the main material, you can use not only natural wood, but also plywood or chipboard. But, of course, a much more durable and durable material is wood. It is environmentally friendly and does not emit toxic fumes, does not cause various allergic reactions.

The list of necessary materials for the table includes a very affordable range.
- Tabletop. You can work out its dimensions yourself. The tabletop, like some other details, is best made to order. A classic square or rectangular shape is welcome. The round children's table is not a common practice.
- Four wooden legs. They are also recommended to be ordered. Now such goods can be ordered in carpentry workshops and even in some hardware stores.
- Boards for the power building. They must be purchased in quantities of 4 pieces.
- Screws, nails or spikes with glue of your choice.


You also need to purchase material for a hand-assembled chair.
- Boards for the back and seat.
- Bars for handles. They are purchased at will, depending on whether you plan to make armrest handles or not.
- Four legs. They should be small, but carefully crafted with sandpaper.
- Screws or nails of suitable sizes.


In addition to these things, you will need tools that will be needed for both the chair and the table:
- electric drill;
- wood glue;
- sandpaper;
- roulette;
- ruler;
- pencil;
- hammer.

Design schemes
When purchasing materials made of wood, it is imperative to check their quality. Bars and boards should be free of notches, cracks or small protruding burrs. The wood must not be damp, rotten or infested with pests. Table. The design of the table itself is not complicated, therefore, the absence of drawings is allowed, the main thing is to carefully connect and “fit” the parts of the future product to each other. Initially, you need to rely on the fact that the height of the table will be no more than 50 cm. This height will be the most optimal for the child. It is important to consider that the dimensions of the table and chair must be commensurate.

The design of the table itself may be different, but we will focus on the classic square version with 4 legs. The design feature of the table are its legs. They should be fairly thick and stable. The cross section of each leg should be within 5x5 cm. Chair. As a rule, the design of all chairs with a back (which is what we are considering in this article) is identical, the differences can only be in the shape and size of the back. You can also experiment with the shape of the seat. It can be classic square, polygonal, round, carved or upholstered.

Not so popular in self-manufacturing, but quite real in execution, tables and chairs, assembled without the use of screws, nails or other fastening materials. Parts are fastened using a special technique for fastening wooden bars at the joints. Such work requires experience and skills, therefore it is not entirely suitable for non-professionals. With regard to fastening the structure, there are a large number of options - various screws, nails, types of glue and even spikes.

Upon completion of the design process of the table and chair, it is imperative, as at the beginning, to check them for protruding pieces of wood, cracks. All sharp corners and uneven surfaces should be smoothed as much as possible. But more on that below.
How to do it yourself?
Let's take a closer look at the process of making furniture.
Chair
- Leg preparation. Since the highchair is furniture with small dimensions, then, accordingly, its details should be small. In particular, the length of the legs should not exceed 30 cm for a 70 cm chair. All legs need to be cut and adjusted with sandpaper to the same length. Of course, plank boards must also be sanded.
- Prepare the slats for the legs and jumpers for the seat. This is done for the subsequent stable and strong construction of the chair.
- Connect the entire structure. At this stage, you need to carefully check all the joints of the parts.
- Glue the design. Furniture glue is best for this, but superglue from the hardware store is fine.
- Fixing the seat and legs. This can be done with self-tapping screws or with a simple hammer and nails. Recently, spikes have gained relative popularity. The part is “mounted” on the spikes and all this is fastened with glue. It makes for a pretty solid mount.
- Sandpaper processing. This process is necessary in order to remove all potentially dangerous notches on the tree for the child and give the highchair a pleasant look.


Table
- First of all, you need to measure the length of all legs with a tape measure. If there is a difference in their length, then you need to correct them. Children's wobbly table can bring a lot of inconvenience, especially while feeding a child. This is done with a hacksaw.
- Drill grooves in each of the legs with an electric drill. You need to make a groove at the end of the part, and then make it a rectangular shape.
- Groove depth measurement. Next, you need to measure a distance equal to the depth of the grooves on each of the bars.
- Correction. To do this, you need to file each of the wooden bars on all sides, and remove the excess with a knife or sandpaper.
- Connecting parts. At this stage, it is important to check the accuracy of the corners, they must all be straight.
- Structural bonding. The final stage, in which all parts, if they are tightly connected to each other, are glued together with wood glue. For greater durability of the structure, you can use a hammer and nails.


Furniture decoration
The main thing when decorating children's furniture is the safety of coatings. Paints and varnish should be purchased from a reliable manufacturer and tested in advance on a piece of wood. Relatively recently, a special varnish for children's furniture was released for sale by domestic and Western manufacturers. According to the manufacturers, it is safe to apply and does not emit harmful fumes after drying. The most common option for decorating a chair after painting is stencil drawings. They can be applied with a regular small brush from an art supply store. The same applies to a variety of stickers on furniture.

The colors of the paints should be bright, but not poisonous. The main colors are blue, red and yellow. As drawings, you can choose various folk ornaments, simplified drawings of animals, symbolic designations such as stars, a heart (for a girl), cars (for a boy), and even letters and inscriptions. The kid can please and inspire the opportunity to decorate his future furniture on his own. A good option in this case are the prints of his hands. Special craftsmen with golden hands can experiment with carving. It can decorate the back of the chair. To do this, you first need to draw a drawing with a pencil, and then start working directly with a jigsaw. If you plan to carve the carving initially, it is best to do it before you assemble the chair.

Children's things are very often exposed to various mechanical and other influences, so it will be better to protect the surface and apply several layers of varnish. In extreme cases and when there is an urgent need to protect the surface of the table, you can use epoxy, which, when cured, forms a thick film similar to a glass surface. But this is only worth doing if the table will be used for drawing or will often be subjected to wet cleaning with chemicals.
Many modern parents are trying to make a highchair for feeding with their own hands. Made at home, it will meet all high requirements and completely eliminate allergens and components harmful to the child. In addition, given the high cost of furniture for a child, this will be a good way to save money.
A person who knows how to work with wood can easily make a good, and most importantly, safe transformer chair with his own hands. Before assembling a high chair, you should carefully select the materials for it.
Experts advise using softwood, such as spruce or pine. They should be chosen because they are easy to process, long-lasting and relatively inexpensive. Nevertheless, professional carpenters are used to assembling children's furniture from linden. It costs a little more, but will last much longer.
Since a highchair is being made, it is imperative to rid it of splinters and irregularities. You can use sandpaper for this, but the work will go faster with the use of a grinder. For a child, comfort and safety are important, so these items are the main ones in this work.
Prepare in advance all the necessary tools: nails, bolts, nuts, hinges, and as a result, take care of painting the finished product. The mobile high chair must be painted with acrylic paint. It is less toxic, as well as acrylic-based varnishes. The child will not only breathe harmful fumes every day, but also taste them by mouth, so parents should take care of his safety.
Types of chairs
Feeding chairs with their own hands come in different types. Before starting work, you should decide on one option, this will allow you to more accurately determine the amount of option spent. You also need to know from what and until what age the child should eat in a place specially prepared for him.
Starting from six months, the baby is able to visit the children's chair for feeding. The design must be made in such a way that the child cannot fall from it. A high chair for feeding a child should have high legs so that the child sits at the same level as adults. By knowing how to choose a high chair, your child will feel comfortable with every feeding.
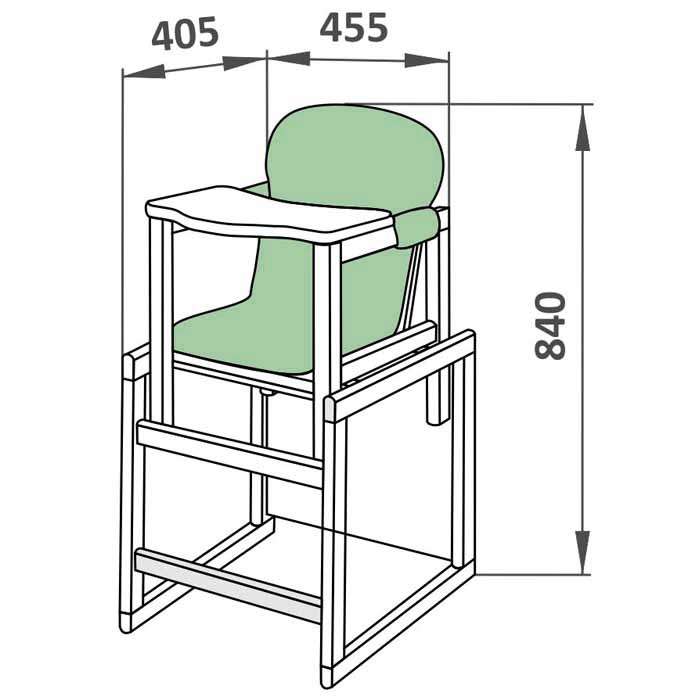
High chair (option 1) High chair (option 2) High chair (option 3)
High chair (option 4) High chair (option 5) High chair (option 6)
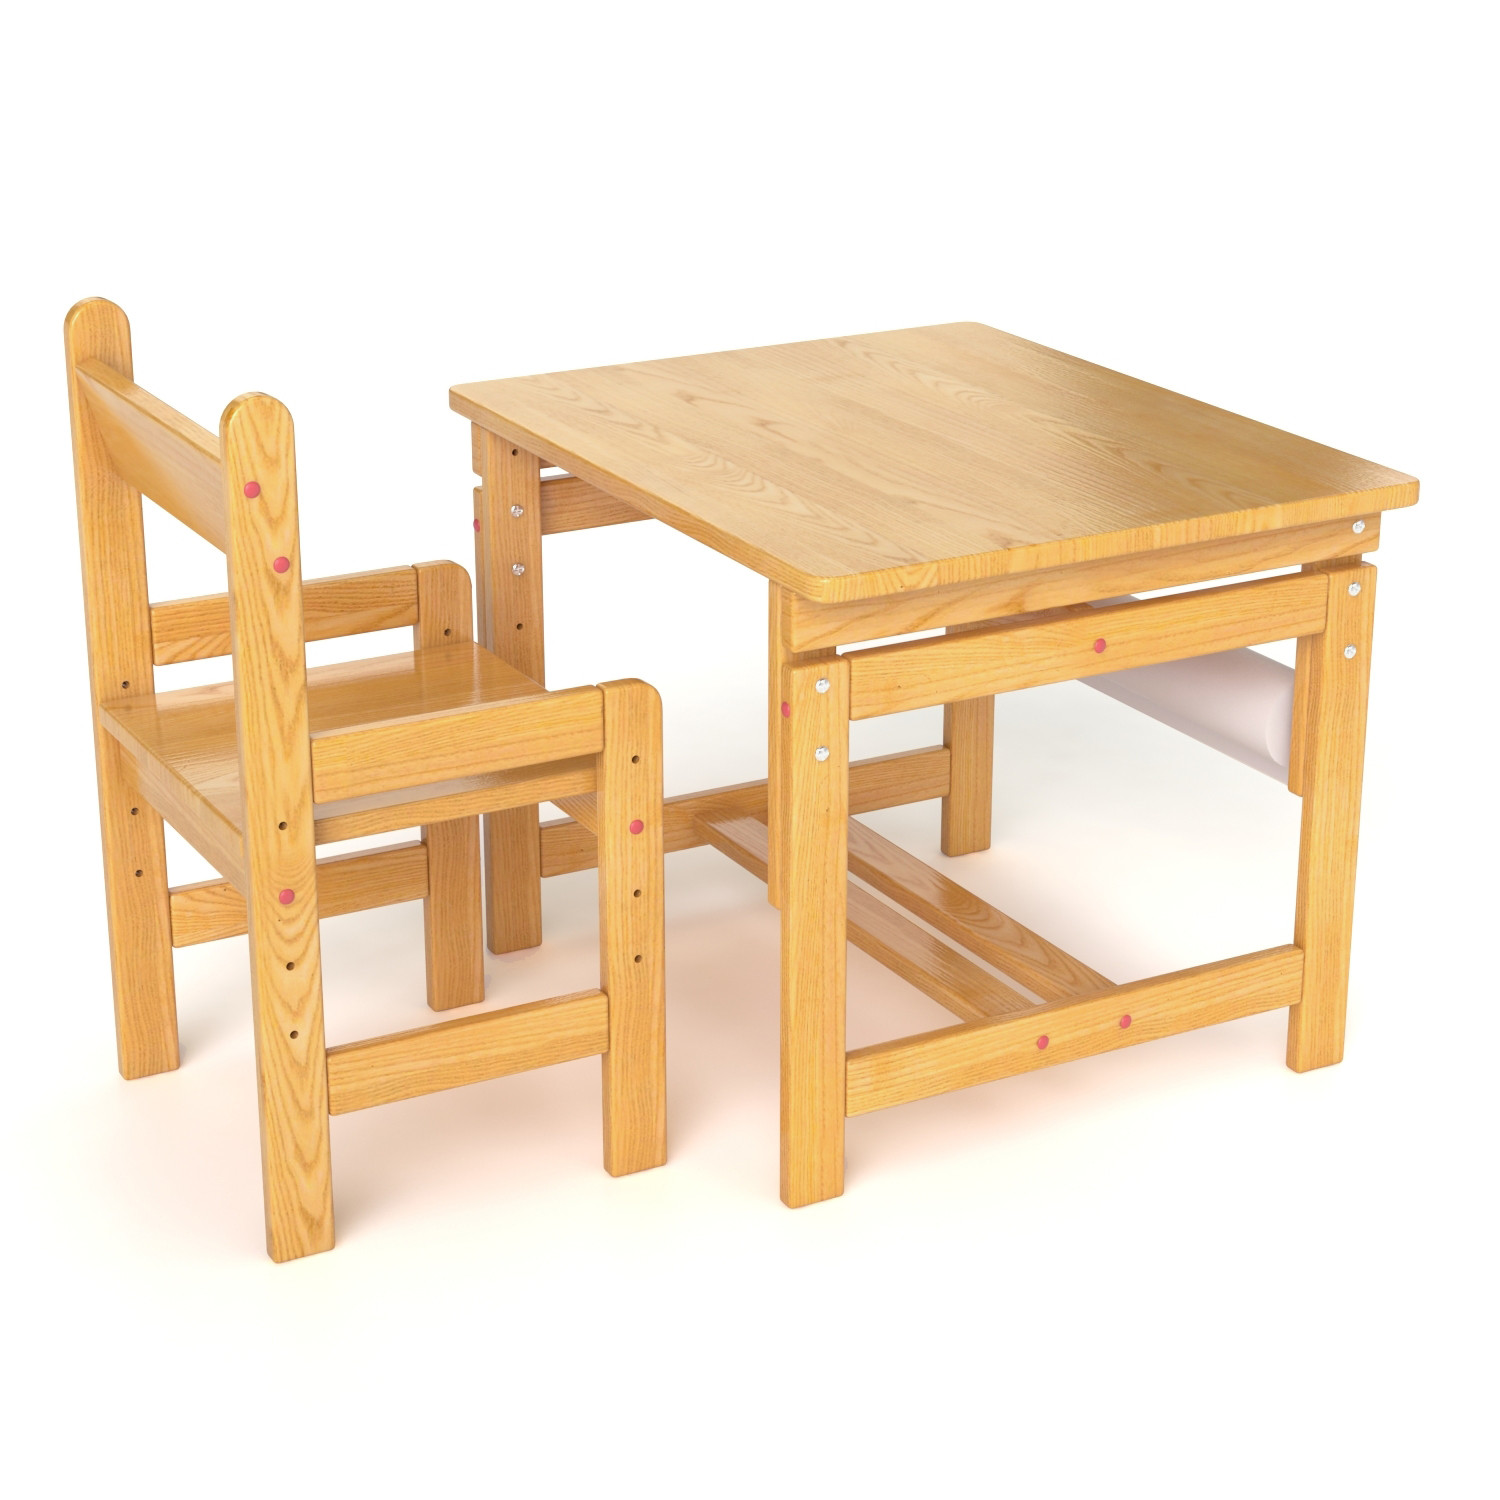
The standard option for a high chair is a seat with long legs, to which a small table is already attached. This option can be placed anywhere, and the child pollutes only a certain area that is allowed to him. The combined children's chair for feeding is a small chair, qualitatively installed on a table-desk. When the baby grows up, the wooden chair can be removed and turned into a play desk.
Work process
Drawings, dimensions, diagrams - all this is available on the Internet. Also there you can find photos and videos of the process itself. After creating a schematic drawing, you can proceed to the very cutting of a chair for a child:
- Each piece of wood is processed with sandpaper before attaching them to each other.
- The dimensions must exactly match the drawings, otherwise the feeding chair will be uneven.
- You need to connect from the bottom to the top in order to properly secure the seat.

We cut out the details for the chair. It is advisable to use a router with a copy cutter.
The base to which the seat will be attached The back and sides are ready
Baby highchair - transformer, it can be folded and hidden Baby highchair is ready
Before work, check at what age you need a high chair. It should not be made too small or too large - this will bring inconvenience when feeding. All edges that come into contact with the child are made smooth and varnished in several layers.
In some cases, it is better to wrap the highchair with foam rubber. This will provide additional security, and the rules say that you need to make a high chair at the highest level. Experts advise sewing a cover on the chair, which can be washed more often, that is, kept clean. The main thing is not even what kind of chair, but how comfortable it will be for the baby to sit in it.
Knowing how to choose the right model and how to assemble a highchair, you will provide your child with high-quality and safe furniture. These necessary interior items will come in handy in any case, and buying them in the store is not always safe. And saving money always has a positive effect on future parents. Instructions on how to make a highchair will help you deal with all the subtleties and achieve an amazing result that will surprise all your loved ones.
A highchair, as a rule, is oriented only for its owner, since, unlike an adult, such furniture belongs to a baby who has his own characteristics and is constantly growing. Manufacturers offer a large number of different options for children's chairs, among which it is easy to choose the right one. If there is a desire and opportunity, then creating a wooden highchair with your own hands is also not difficult.
Assortment of chairs
Among the variety of different chairs for preschoolers, there is a certain classification that divides all models according to certain qualities.
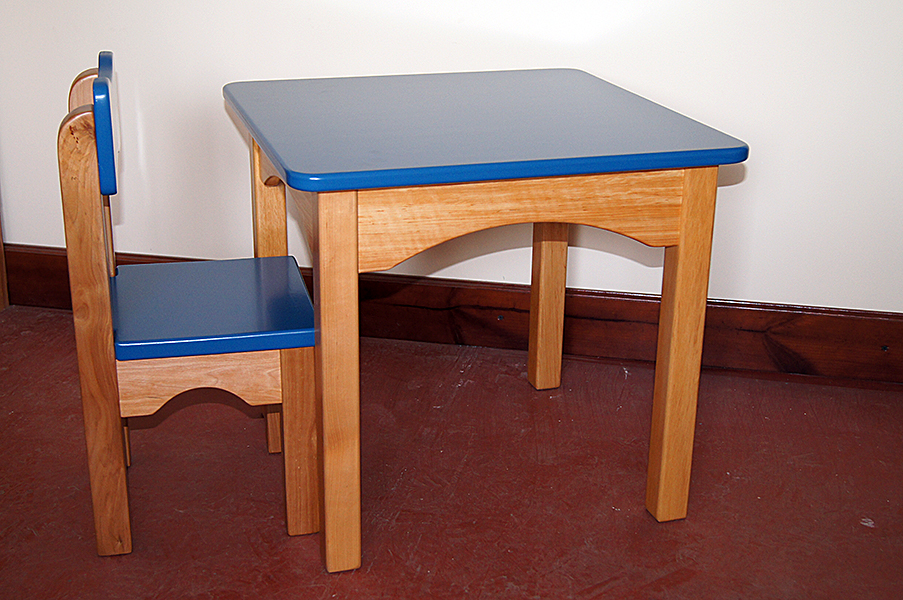
Classic baby chair
This version of children's products is no different from ordinary adults. All the same elements are used in their design. The only thing that makes the highchair different is the dimensions that are adapted to children's growth. Most often, such models are made of wood.
Folding high chair
The convenient design of this piece of furniture allows you to store it compactly in any closet and disassemble it as needed. This is a very valuable quality for small apartments, where there is not enough space for full-fledged chairs for children. Such children's models are characterized by a simple configuration and most often folded like a book. For their manufacture, wood or metal is used in combination with plastic. It is very convenient that this type of highchair can be taken with you to the country house or to the park, and it will practically not take up space in the car.

growing chair
This version of the highchair involves the presence of a variety of adjustment mechanisms. Thanks to them, you can set the desired height of the seat on the chair or adjust the position of the back. This approach helps, having bought a high chair while the child is small, adjust it in size as the baby grows. These chairs are used all the way to school and even during first grade.

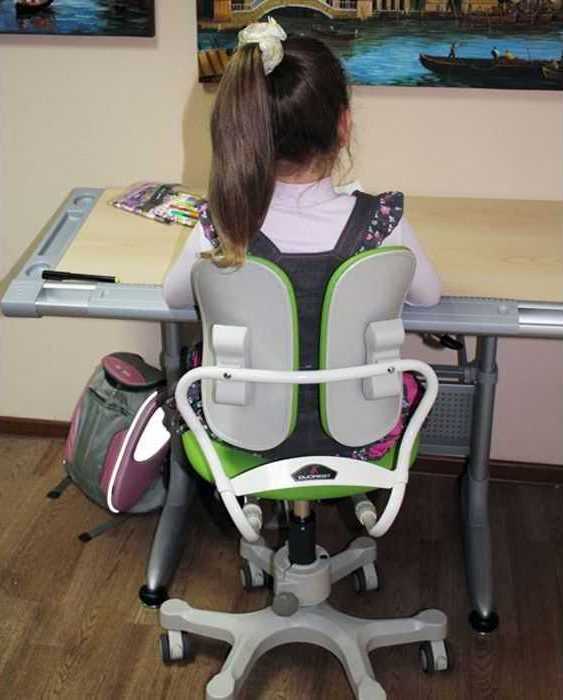
Orthopedic model
These chairs are like office chairs, where the baby can sit at the table and be creative. But they are already designed for older preschool children who are preparing for school and schoolchildren. Their design is made in such a way that allows the child not to get tired during long sitting. Most often, the back of a highchair of this type consists of two parts, which adjust to the position of the baby's body and allow him to feel comfortable.
There are also separate varieties, which are represented by high chairs and rocking baby structures, which, although they are considered chairs, still stand out in a separate group.
Variety by material
Depending on the material used, highchairs can also be different. Consider the most popular at the moment.
Children's highchair plastic
Many parents choose this particular version of the highchair due to:


But it is worth noting that some plastic can still be toxic. Such products are supplied by unverified manufacturers. You can distinguish such a highchair by a sharp chemical smell.
Children's wooden high chair
The use of wooden children's chairs is no less common. This is a more familiar model, which is known to everyone since childhood. Now manufacturers use MDF, chipboard or solid wood for such chairs, which show themselves perfectly during operation and are completely safe for the child.
Children's wooden chairs, especially those made of solid wood, fill the children's room with an incredibly clean and bright atmosphere, and the smell of wood gives a feeling of calm and peace. Those essential oils that are released from wood have a beneficial effect on human well-being, creating a favorable indoor climate.

The cost of such wooden children's furniture, of course, is higher than plastic, but the difference in quality is significant.

Criteria for choosing a chair
Children's furniture needs to be selected much more carefully than adult furniture, this also applies to high chairs. Here are a few factors to consider when buying a highchair for a preschooler:


Simple do-it-yourself highchair
Although there is now a significant selection of furniture items for babies in stores, their cost is high. If dad or grandfather has primary woodworking skills, then you can create a wooden children's chair with your own hands, which will delight the child and give him the love of a loved one that was invested in the process of work.
The easiest way is to make a wooden highchair due to the availability of the material and the ease of its processing.
Materials and tools
To make a full-fledged wooden highchair, you will need some materials. First of all, these are bars, boards, plywood, from which the structure as a whole will be made. For fastening, you will need screws or self-tapping screws. It is better to take more of them so as not to be distracted in the process of assembling the chair. Sandpaper is needed to make the surface of the chair smooth. Also, do not forget about decorating the finished wooden highchair, which is done at the discretion of the master. You can leave it unprocessed.

To create the simplest wooden children's chair, you will need bars of the following sizes:
- for 2 supporting rear legs - 3 * 3 * 55 cm;
- for 2 front legs - 3 * 3 * 30.5 cm;
- for 1 upper crossbar - 1.9 * 4.1 * 16.5 cm;
- for 1 seat of two boards - 1.4 * 10.5 * 26.3 cm.
To carry out the work, you will need a jigsaw or saw, a screwdriver or a screwdriver and a drill.
Algorithm for making and decorating
The first step is to make a drawing on paper indicating the exact dimensions of the future wooden chair. This is the only way to end up with the piece of furniture that was conceived in advance. After that, the work goes according to the following algorithm:


After the wooden chair is completely ready, it can be used. If desired, the design can be decorated.
Important! If it is supposed to carve a chair, then do it before varnishing.
In order for a piece of furniture to look brighter and more interesting, a drawing can be applied to its back and seat. This is done if you have drawing skills on your own or, in their absence, using a stencil. In this case, any color scheme is selected, but it is better to focus on bright and cheerful, since the furniture is still for children.

Now there are many adhesive films on sale, which can also be used to decorate a children's chair. Due to the fact that the highchair is small enough, and the image on it will be larger, the child's attention will be focused on this fact.
When decorating the seat and back, you should not use voluminous decorations that will prevent the baby from sitting on a high chair. As a result, such furniture will be uncomfortable and the child will not use it.
Folding plywood highchair
If you don’t want to make a simple wooden chair and fantasy requires something unusual, then you can try your hand at making a folding plywood chair. Its design implies the possibility of folding the chair into a compact sheet, which is very convenient for storage and transportation.

The manufacture of such a chair is simple, only in advance you should make a drawing on a scale of 1: 1 on millimeter paper and prepare the necessary materials and tools:
- moisture-resistant plywood with a thickness of at least 2 cm and sheet dimensions of at least 90 * 600 mm;
- bolts with sleeves for use as hinges;
- epoxy adhesive;
- jigsaw;
- pencil;
- roulette;
- sandpaper or grinder.
Work performance technology
The drawing of a wooden chair made of plywood is made according to certain sizes. They must match the height of the child, so it is best to use the dimensions for highchairs from the table above. After the drawing is completed, all actions go according to the following algorithm:


Transforming chair
Often, parents try to use the furniture for the child as rationally as possible. For this, transforming highchairs were invented, which first act as pieces of furniture for feeding the baby, and later become a separate table and seat for creative work.

Required Parts
To make such a kit, you will need separate parts for the table and chair. So, to make a wooden seat, you will need:
- legs with a length of 39 cm in the amount of 4 pieces;
- rounded corners, cut from a board with a thickness of 2 cm - 4 pieces;
- 2 top bars with a length of 22 cm;
- 3 crossbars of 30 cm;
- 1 base for sitting with dimensions of 20 * 30 cm.
For the table you will need:
- 4 legs with a length of 50 cm;
- 4 strips of 41 cm;
- 4 crossbars of 34 cm;
- 1 tabletop with dimensions 4*38 cm.
Legs, planks and crossbars are made of timber with a cross section of 2 * 4 cm, plywood with a thickness of 1.8 cm can be used for seating and countertops.
Important! Wood is selected only of high quality, well dried and free of cracks and knots.

Carcass execution
All wooden parts are attached to each other with glue, but wooden dowels 2 * 5 cm are also used for tight fixation. For them, you need to make special grooves in the places where the parts are fixed. To do this, first a hole is drilled with a 6 mm drill, and then the groove itself is made with a chisel with a cross section of 8 mm.
Thus, all side structural elements are fixed. It is important to fix the elements during installation with clamps, maintaining an angle of 90 degrees. After the glue dries, all wooden joints are processed with sandpaper.
Chair and table installation
The back and seat of a children's product of such a plan are made of plywood sheets with overall dimensions of 25 * 30 cm, which are glued together. All corners must be rounded, and foam rubber is glued on top of the seat and back, which is covered with the selected fabric. It must be attached to the construction stapler on the back of the product. In some cases, the filler and fabric are not attached directly to the plywood, but a removable cover is made from them for a children's wooden transformer chair.

The assembly of the product is carried out as follows:
- Connection of finished sidewalls with slats.
- Installing the seat based on the slats and securing it with dowels.
- Installation of lower and rear trims.
To mount the table, it is also necessary to connect the side parts to the cross bars and carefully sand. Then you can install the countertop.
The finished children's wooden transformer chair is covered with several layers of varnish and left for 2-3 days until completely dry. After that, it can be used as a high chair for feeding or as a separate chair and desk for the baby.
Conclusion
A high chair is a piece of furniture that every child needs. With it, the baby can comfortably engage in creativity, play and even eat at his own small table. If necessary, the product can be made independently. In addition, there are many options for wooden models, among which parents can find one that suits them and the child. Using the installation technologies and tips from this article, it will not be as difficult to complete the work as it seems at first glance.
A small wooden stool will find its use in every home. With such high chairs, children rush with great joy. Sitting on such a stool, it is convenient to peel potatoes and perform other "sedentary" work. However, not many people decide to buy a small stool due to the fact that there is always a more important waste of financial resources. But, almost everyone can make a small wooden chair with their own hands. To make it, you need a jigsaw and a little imagination.
Training.
Parts manufacturing, grinding.
Painting.
Training.
The preparation of the material and the necessary tools plays an important role and saves time in the future. To make a stool we need:
- hewn board 800x200x25 mm in size (approximate dimensions, you can proceed from what is available),
- 8 shiny screws (50-60 mm),
- sandpaper,
- electric jigsaw,
- screwdriver or screwdriver
- paint and varnish on wood,
- tape measure, pencil and corner.
You need to start by marking the board. First of all, with the help of a corner, a pencil and a tape measure, we mark a rectangular segment without knots 32-33 cm long. This will be the upper part of our chair. Next, we mark two segments of 23 cm each - these will be the sides. Now it is desirable to give them some curly pattern. You can use any objects that have a circle for this, simply by outlining them with a pencil. But, this method involves an irrational waste of time. After all, you will have to mark the center and other dimensions in each sidewall. Therefore, for the sides it is better to use a pattern previously cut out of thick cardboard or other material. It will allow you to easily and quickly mark a large number of sidewalls. It is enough to attach a pattern and circle with a pencil.
By the way, the use of a figured pattern on the sidewall not only gives them a beautiful look, but also allows you to cut off all unwanted knots.
And immediately mark the jumper. It should have the shape of a trapezoid and have sides of 230 and 220 mm. The width of the jumper is not critical - from 80 to 120 mm.

So, it has a marked board.

Important! Do not draw too thick lines - this affects the evenness of the crop. Yes, and the pencil is not erased so easily.
Using an electric jigsaw, we cut out all our details. Equity is important here. For even trimming of the cut, it is better to lead the tool blade not along the line, but to the side of it.

You can learn how to cut evenly on unnecessary waste. So, cut out all the details.


This will give the product not only a beautiful look, but also hide all possible irregularities in the cut.
Further, all these details are carefully polished with fine sandpaper. It is most rational to carry out this procedure at this stage, since a number of inconveniences may arise when grinding the finished structure. It is convenient to grind even planes by putting sandpaper on a wooden block, or on a manual machine for grouting putty. The main thing is quality, since after painting all the flaws will appear and be visible.
This is what the sanded and unsanded sides look like.

So, it has the same parts, but already ready for assembly.

It is desirable to assemble in the following order:
- we connect the sides with a jumper (1 screw on each side);
- we expose this design on a flat surface and screw the top cover (2 screws on each side);
- We strengthen the connection of the sides with the jumper (1 more screw each).

The chair is assembled! We check it again on a flat plane. If the stool staggers a little, then we trim the legs until the product is completely stable.

Painting.
Before painting, we once again check the product for defects, if necessary, erase them and the remains of the pencil. Using a brush, we clean the stool from wood dust and proceed to painting.
There is already “there is no friend for the taste and color”! You can leave the natural color of the tree by opening it with a colorless varnish. You can give the product a certain color using a variety of wood paints, which are full in all hardware stores. In principle, one layer is enough for painting. But, if, after the first layer has completely dried, the surfaces are again lightly sanded with fine sandpaper and a new layer of varnish is applied, then the gloss of the product will noticeably increase.
Important! Poorly sanded ends absorb more paint and become darker.

It looks like a finished, varnished chair.

One of the positive things that goes in favor of wooden furniture is that it is possible to make a wooden highchair with your own hands. Naturally, in the case of twins, you will have to make two chairs at once. Note that usually home-made children's highchairs made of wood are different - classic folding, transformers and growing ones.
In this article, in the “for dummies” style, we will tell you how to make a highchair for feeding with your own hands using the example of a wooden transformer highchair. We will show two working options for a do-it-yourself feeding table-chair with drawings and dimensions, and also make some considerations about them.
ATTENTION!!! The article turned out to be long, as we write not only for experienced craftsmen, but also for beginners, as well as people who rarely do anything with their own hands. If you don't want to read everything, use the table of contents. Pop-up heading tips will help you understand what is there, and choose the right one.
If you want to make a high chair with your own hands, but not a transformer, or you know everything how to do it and love brevity, it doesn’t matter either. Over time, a link to the entry will appear at this place, where information about homemade highchairs for feeding will be collected in one heap. In the meantime, we are looking at the site map and the rubric, there are articles there.
The content of the article:
Do-it-yourself highchair - why a children's wooden highchair TRANSFORMER. MOTIVATION
![]() One of the big advantages of children's wooden transformers for feeding is that the design of high chairs is extremely simple, so even a beginner can build them on their own. You can make such a highchair for feeding with your own hands either from improvised materials, or you can easily purchase material at a low price.
One of the big advantages of children's wooden transformers for feeding is that the design of high chairs is extremely simple, so even a beginner can build them on their own. You can make such a highchair for feeding with your own hands either from improvised materials, or you can easily purchase material at a low price.
In the article do-it-yourself children's highchair, we examined in detail how a folding highchair is made. It turned out that it is done quite simply. But its relevance is very doubtful - wooden furniture is always bulky and heavy, and in two years such a high chair will have to be disassembled into spare parts and made separately for a children's table and chair.
But the chair - transformer immediately "kills" two birds with one stone: it is both a chair and a table - a desk. First, the high chair is used for its intended purpose, together with a small table, and then, after 1.5 years, it is disassembled, and the child gets a separate desk and high chair. Convenient and practical. Perhaps this is precisely what causes constant interest in a wooden highchair transformer for feeding made by oneself.
It remains only to figure out how to make such a miracle of technology on your own. And in the beginning, let's see the video of one of the craftsmen.
Do-it-yourself feeding chair or wooden high chair do-it-yourself transformer for feeding a baby getting started
 Searching on the Internet on the topic of a do-it-yourself feeding chair, it will become clear that there are two options for a transforming chair.
The first option is more complicated, but for some reason it is the one that is popular on the Internet. Most likely, once someone made a wooden transformer chair for feeding with their own hands in this way, and then articles on how to make it yourself miraculously mindlessly multiplied. Because where to take the correct option is not clear. We give here the most understandable (for the author) description and sane drawings.
The second version of the do-it-yourself feeding chair is simpler and more logical, it is according to it that factory wooden transformers are made. And we also bring it here, with our own measurements.
If everything is clear with the material and you are only interested in drawings and dimensions for a do-it-yourself high chair, then immediately proceed below to the parts of how to make a do-it-yourself high chair - Option 1, and How to make a do-it-yourself wooden high chair - Option 2. A for now, since we decided to write a story in the “for dummies” style, let’s talk about the materials used.
DIY high chair - Materials
 To make a highchair for feeding with your own hands, you will need wooden blocks. A board with a thickness equal to the thickness of the bar used can be added. Plywood or chipboard, self-tapping screws, glue, fabric washable upholstery and any soft filler. Well, more staples for a construction (furniture) stapler.
You can use any timber that is sold or available. It would be better if he was trimmed. So with him less fuss. Otherwise, you will have to plan it yourself and make it smooth. It is most convenient to take the size of the beam 20x30 mm.
Chipboard or thick plywood - from 10 to 15 mm thick - will be used as a table top for a desk table and a small removable table for a high chair.
The hard parts of the back and seat of the do-it-yourself feeding chair can be made from fiberboard or plywood. It is not necessary to use thick plywood, from 5 to 10 mm thick is enough. In general, plywood will be stronger, but stapler staples are easier to enter into fiberboard.
Some parts are glued together. To do this, you can use wood glue or just PVA glue.
To make a soft back and seat on a high chair with your own hands, you will need an external upholstery - a durable, easy-to-wash fabric, such as raincoat fabric or bologna, or just oilcloth, and inside a soft filler - foam rubber, batting, synthetic winterizer or something else. See for yourself how much you need. Soft filler can be glued to the hard parts of the back and seat, or simply fastened with a construction stapler, or you can combine both options. Upholstery is easier to immediately fasten with a stapler. So it will be more reliable. The size of the staple depends on the stapler and the chosen thickness of the upholstery.
It's also a good idea to have a medium sandpaper to sand the parts and make them smooth.
In the first version of the do-it-yourself highchair, only 4 wood screws are used: for attaching the tabletop to the desk-table. All other wooden parts will be interconnected with homemade dowels, also made of wood. You can put the rest of the bars on the dowels.
In the second version of the do-it-yourself feeding chair, there are practically no dowels, but there are many self-tapping screws for fastening all the parts together. Factory transformers are made on euro self-tapping screws, and a do-it-yourself wooden highchair transformer for feeding can be assembled on any. The main thing is to assemble correctly. Dowels are used only if you decide to make rounded parts that are conveniently attached to the bars with their help.
![]() Both the wooden table and the do-it-yourself feeding chair have rounded elements, although you can do without them. These elements can be made either from a board with a thickness corresponding to the thickness of the bar used. If the beam is taken, as here, 20x30 mm, then we take a board 20 mm thick, but 30 mm is also possible, this depends on how you put the bars, joke F). If there is no board, then the same bars are perfect. You just need to glue them together.
Both the wooden table and the do-it-yourself feeding chair have rounded elements, although you can do without them. These elements can be made either from a board with a thickness corresponding to the thickness of the bar used. If the beam is taken, as here, 20x30 mm, then we take a board 20 mm thick, but 30 mm is also possible, this depends on how you put the bars, joke F). If there is no board, then the same bars are perfect. You just need to glue them together.
Depending on how much and how you arrange the rounded elements for cutting on the board or glued bars, this is the length of them (boards, bars) and you need to take. On glued bars or a board, 4 elements must be laid at once. Therefore, the length will be from 0.5 to 1 m, and maybe 2 m is not enough.
Do-it-yourself feeding chair - separate words about wood and paintwork
 I propose to pay attention to the wood material of the high chair. We note right away that a children's wooden chair for feeding with their own hands is best made from linden. However, like any other children's furniture for kids. Since conifers often used in the manufacture of wooden furniture may not be suitable here: pine emits resin, which is very toxic. And it is better not to risk children's health. However, pine is often found in hardware stores, so we try to take it as dry as possible and without interspersing resin. Believe me, the child will be better, and it will be easier for you to do it yourself.
To give shine, color and environmental protection, it is better to use ACRYLIC varnish, or paint. It is not as harmful to the baby as the rest. Why exactly him? The answer is - what if the baby tries a table or a chair for feeding, which you yourself made with your own hands? You are responsible for the consequences. Although if it doesn’t matter or it’s not possible to get them, then you can cover the feeding chair with your own hands with whatever you want.
Do-it-yourself wooden transformer highchair - Option 1
![]() To understand what a do-it-yourself highchair will be in the form of components of option 1, we present the drawings and dimensions.
To understand what a do-it-yourself highchair will be in the form of components of option 1, we present the drawings and dimensions.
To make parts of a children's high chair for feeding a wooden transformer with our own hands, we take a bar with a section, for example, 20x30mm. From it we will make the following details. Specify the length and quantity.
- Legs - 390 mm, 4 pcs.
- Rounded parts - 4 pcs.
- Armrests, they are also the upper crossbars of the chair - 195 mm, 2 pcs.
- Planks running parallel to the armrests, they are also crossbars, 335 mm, 2 pcs. On these crossbars we will then attach the seat with the crossbars of the feeding chair
- Planks on which the seat and back are attached, they are also crossbars - 300 mm, 3 pcs. Two for the seat and one for the back
- Small table on a chair (H x W) 340x340 mm. It lies on the armrests of the chair 340 mm = 300 (length of the chair crossbar) + 20 + 20 mm.
- The seat and back have the same dimensions (H x W) 250x290 mm. Width 290 mm \u003d 300 (length of the cross bar) - 5 - 5 (gaps on both sides for upholstery and soft filler), mm.
- Legs 500 mm 4 pcs.
- Planks for the lower and upper part 410 mm 4 pcs. On the lower slats there is a table for feeding, on the upper slats a tabletop is attached.
- Cross bars 340 mm 4 pcs. To fasten the sides of the table. Length 340 (mm) = 300 (length of chair crossbar) + 20 + 20 (mm). This is done so that the chair gets up between the sidewalls of the table.
- Tabletop (H x W) - 440 × 380 mm. 1 PC. The tabletop rests on the upper slats and does not protrude beyond the sidewalls. Width 380 (mm) = 340 (cross bar length) + 20 + 20 (mm). Length 440 (mm) = 410 (top bar length) + 30 mm
How to make a high chair with your own hands
Work begins with a chair. To do this, according to the size, the bars are cut to the desired length. Separately, you need to make rounded parts - they connect the legs and armrests in front and behind. Naturally, all sawn parts must be made smooth, lint-free and treated with sandpaper with special care - small children are always an increased risk of injury. Therefore, to the question of how to make a highchair for feeding with your own hands, we give a pretentious answer - we work conscientiously.
 Roundings for a wooden highchair transformer for feeding do-it-yourself are cut out separately - according to the drawing. For rounded parts, there is one IMPORTANT point. If you glue the bars and place the part with wood fibers in a different way than shown in the figure, then such a part may break in the most unexpected way during sawing or further operation. Therefore, the bars must be glued with wood fibers parallel to each other. And you need to place the rounded part of the highchair for feeding with your own hands along these parallels. The same applies to the board - we place the part for sawing parallel to the wood fibers of the board.
 To successfully glue the bars, we use wood glue or PVA. Additionally, the bars do not need to be jointed and leveled. At the bars, you need to choose fairly flat planes, position them correctly and simply press them harder with clamps. It will dry out in a day for sure.
 Then, from the waste bars for the highchair for feeding with your own hands, you can make rectangular panties. Dimensions - 8x20x50 mm. In general, the length of the dowel should be 4-5 mm less than the total depth of the groove of the two fastened parts. The edges of the dowels can be slightly rounded.
 On all parts, mark places for planting dowels. To do this, mark the contours of the groove, for example, with a pencil. Rectangular grooves for dowels should be made approximately 30 mm deep. To do this, drill 4-5 holes with a drill with a diameter of 6 mm. Next, using a chisel, align the walls of the groove and fit it to your own, individual, home-made dowel. And if there is a router, then we make the grooves with a router, it’s easier.
When all the details are ready, there are dowels and grooves for fastening, you can start assembling a children's high chair for feeding a wooden transformer with your own hands.
Do-it-yourself wooden highchair transformer for feeding a child - assembly
![]() We begin to assemble a wooden high chair transformer for feeding with our own hands from the sidewalls. First one is done, then the second. On the dowels, draw a line in the middle of the length. Using a light hammer, install to the marked line. Then we take the part to be connected and insert the dowel into it. We connect the parts first dry, i.e. without glue. After all the details of the sidewalls are connected, we check for cracks. If everything is fine, then carefully separate the parts and glue the dowels, and then assemble them again, as indicated above. Then you need to pull off the parts and let dry, about 1 day. You can tighten it with clamps, or tightly wrap it on both sides with a rope. But at the same time, make sure that nothing is warped, and no gaps are obtained. It is less reliable to tighten with a rope than with a clamp, but not everyone has clamps of this size.
We begin to assemble a wooden high chair transformer for feeding with our own hands from the sidewalls. First one is done, then the second. On the dowels, draw a line in the middle of the length. Using a light hammer, install to the marked line. Then we take the part to be connected and insert the dowel into it. We connect the parts first dry, i.e. without glue. After all the details of the sidewalls are connected, we check for cracks. If everything is fine, then carefully separate the parts and glue the dowels, and then assemble them again, as indicated above. Then you need to pull off the parts and let dry, about 1 day. You can tighten it with clamps, or tightly wrap it on both sides with a rope. But at the same time, make sure that nothing is warped, and no gaps are obtained. It is less reliable to tighten with a rope than with a clamp, but not everyone has clamps of this size.
![]() While the sides of the transformer highchair for feeding the child are drying, you can do the seat and backrest with your own hands. They are cut out of plywood or fiberboard, according to the drawing. If the plywood is not thick or fiberboard is used, then to give strength, it is better to cut out 3 parts of the seat and back and glue them together. Lubricate with glue and clamp with clamps. It also dries overnight.
While the sides of the transformer highchair for feeding the child are drying, you can do the seat and backrest with your own hands. They are cut out of plywood or fiberboard, according to the drawing. If the plywood is not thick or fiberboard is used, then to give strength, it is better to cut out 3 parts of the seat and back and glue them together. Lubricate with glue and clamp with clamps. It also dries overnight.
After the sidewalls, seat and back are assembled and cut out, we assemble everything completely. On the seat and backrest from the planned reverse side of the wooden highchair of the transformer for feeding the child with your own hands, you can immediately attach the crossbar strips. To do this, use either dowels, or, which will be even easier, small self-tapping screws. To get it right, the slats must be fastened with gaps of 5 mm on each side along the width of the seat and back. The back and seat can be connected to each other with a metal corner, or a metal strip bent along.
 If we do it on dowels, then we drill holes in the seat for fastening to the crossbars of the chair. Mount better on 4 pcs. standard cylindrical dowels. For the back of such dowels - 2 pcs. We connect the sidewalls with crossbars on which the seat will then lie. We do it without glue to check and see the positions of the seat and back. Also, without glue, we put the seat on the crossbars on the dowels. Bending and bending the back, mark the position of the bar for fixing the back, and then disassemble. If you wish, you can cut off the side of the backrest according to the picture. No desire - everything will be fine too.
![]() At the children's highchair for feeding a wooden transformer, we sheathe the seat and back with a soft filler with our own hands: we glue it to the hard part or nail it with a stapler. Then, again with the help of a stapler, we stretch the upholstery. It is better not to save, and do not try to fasten the upholstery and the soft part with the same bracket. Something might be skewed, and it will not be good.
At the children's highchair for feeding a wooden transformer, we sheathe the seat and back with a soft filler with our own hands: we glue it to the hard part or nail it with a stapler. Then, again with the help of a stapler, we stretch the upholstery. It is better not to save, and do not try to fasten the upholstery and the soft part with the same bracket. Something might be skewed, and it will not be good.
Then we collect all the parts on dowels smeared with glue. We put in place, check the corners. We fasten the back bar to the back on 2 cylindrical dowels. We check the gaps and tighten with clamps or a rope. We are waiting for it to dry. That's it, a chair from a wooden transformer highchair for feeding with your own hands is ready ![]() .
.
We repeat. If there is no desire to mess with dowels, all parts can really be connected using ordinary self-tapping screws. It may not be as strong, but it is easier to assemble. To decide, of course, the master. And the roundings are most convenient and most durable to fasten with the help of dowels, and then carefully coat them with glue. After that, leave the finished sidewall to dry for a day.
 The last stage: we cut out, according to the size, a small table on a high chair with our own hands. It can be left rectangular, it can be rounded in the part closest to the child. It's not essential. Only a matter of aesthetics and fuss. This table is attached to the edges of the armrests. It is possible on cylindrical dowels, it is possible on self-tapping screws. And when the child grows up, he just takes off and that's it, he is no longer needed.
 A table for a do-it-yourself highchair is assembled in the same way as a chair. First dry, then with glue. Either self-made dowels or self-tapping screws are used. We start with the sides. We attach the upper and lower strips to the legs, we get two rectangles. When the sides are assembled, they, like the chair, must be pulled off and wait a day until they dry.
Next, the transverse bars are attached - with their help, the sidewalls are connected. We fix the crossbars for the feeding table with our own hands according to the drawing. The general idea is that they should be at unequal distances from the edges of the sidewalls. On the lower ones, which will be closer to the edge, there are chair legs in the high chair position. And the upper ones serve as spacers for the legs of the chair, so that the chair stands firmly.
A tabletop cut from plywood or chipboard is mounted on top of the upper parts of the sidewalls and screwed on with self-tapping screws. Everything is gathered together and pulled together as usual, waiting for it to dry.
When the table and chair for feeding with your own hands are ready, we will turn it into a transformer chair for feeding the baby. To do this, we will connect them. The table is turned over, the tabletop is at the back, and the chair is placed on the transverse bars of the table.
Wooden do-it-yourself transformer table for feeding a baby - finishing touches
![]() Finally, when the chair and table are ready, we check for roughness for the last time and sand it if we find one.
Finally, when the chair and table are ready, we check for roughness for the last time and sand it if we find one.
When a wooden chair and a transformer table for feeding a child are made with your own hands, they should be completely worked through - use exclusively non-toxic varnishes, or paint with acrylic paint. Beforehand, to give the desired color, you can wash and dry.
Everything, the first option is ready. The most adequate description was found on http://mebelsam.com, from this site material was taken for a note on the first option.
Do-it-yourself wooden transformer highchair - Option 2
![]() To understand what a do-it-yourself highchair will be in the form of components of option 2, we present the drawings and dimensions.
To understand what a do-it-yourself highchair will be in the form of components of option 2, we present the drawings and dimensions.
To make parts of a children's highchair for feeding a wooden transformer with our own hands, we take a beam with a section, for example, 20x30 mm. From it will need to do the following details: specify the length and quantity.
DIY feeding chair dimensions of spare parts, length and quantity
If there are no rounded parts
- Legs 450 mm 4 pcs.
- Armrests - 365 mm 2 pcs.
If there are rounded parts
- Front legs 450 mm - 2 pcs., Rear 390 mm - 2 pcs.
- Armrests - 290 mm 2 pcs.
- Rounded detail according to the scheme - 2 pcs
General
- Bottom strips on the sidewalls 365 mm 2 pcs.
- Cross bars 350 mm 4 pcs. They are attached to the seat and back.
- Seat (H x W) 290x330 mm
- Backrest (H x W) 450x330 mm
DIY feeding table dimensions of spare parts, length and quantity
- Legs - 450 mm 4 pcs. The legs are located in the middle of the table, and are the lower slats of the sidewalls.
- The lower and upper crossbars, on which the table for feeding is in the position of a table-desk, and to which the tabletop is attached - 500 mm 4 pcs.
- Cross bars 410 mm 3 pcs.
- Tabletop (H x W) 500x510 mm
- Fastening straps for chair legs length 230 mm. ATTENTION - in the diagram, the thickness of the bars is 15x15 mm, but you can use any. For example, the same 20x30 mm.
Do-it-yourself wooden highchair transformer for feeding a child - The main differences from option 1
The previous part about a wooden highchair transformer for feeding a child with your own hands turned out to be too voluminous. Therefore, in order not to write a sheet again, let's say that everything is done according to the drawing and dimensions similarly to the first option.
Dowels are not used, with the exception of the rounded parts of the high chair. They are made, as well as in option 1, only they have different sizes. Everything else is fastened with screws. It can be ordinary on wood, it can be euro. If you use euro self-tapping screws, then mark the places where they should go. And in a place with a smaller diameter, we drill a hole for them.
Do-it-yourself highchair - we make parts and assemble
 The bars are cut to size. Carefully processed with sandpaper. The cardinal difference from the first version of the do-it-yourself highchair is the absence of special round parts. But since sharp corners are an increased danger for a small child, they must be rounded. It is the upper parts of the chair legs that are slightly rounded on one side. And the two lower crossbars of the table are also rounded - the legs on which it stands.
You can also insert a few bars, rectangular or round, in the sidewalls between the armrest and the bottom bar to which the seat is attached, it does not matter. You can place them anywhere at any distance, most importantly in the seating area. This is so that the baby does not crawl away through the sidewall, and it will go for beauty.
One more stroke.  How to make a do-it-yourself high chair with a movable back? You can make the back of a do-it-yourself feeding chair take several positions. This will have to be dealt with.
To do this, the rear legs and armrests are fastened together using a round part, as was the case in the first version. In this case, the size of the armrest and back leg will be different (see the description of the dimensions of the chair). In the rounding, you need to make a hole where, as a result, a screw will be inserted, with a handle - a fixer at the end. The screw is attached to the back of the chair with one side, the other goes through this hole. The handle is screwed on the edge and secures it in the desired position. The back is fixed.
The hole can be made either with a milling cutter, or several small holes can be made with a drill and then modified with a chisel. The size of the hole depends on the screw used. The handle can be whatever you like. In the handle, carefully select the groove for the nut, which will actually be screwed onto the screw and fix the back of the chair. The screw itself is conveniently fixed not in the back of the chair, but in the upper crossbar.
Once again, we note that the rounding of the highchair for feeding with your own hands is more convenient and better fastened with glued dowels. On self-tapping screws it will be uncomfortable and clumsy.
Specifically for the baby, this version of the chair is very convenient, but to make it, you will have to make some efforts. If there is no desire, then it is realistic to do without a movable back, then it makes no sense to make a separate rounding. Just tilt the back as you and the baby are comfortable. We mark the place where the upper transverse bar touches the backrest and the sidewall. We drill a hole there. We fasten the sidewall and back with a self-tapping screw. So on each side.
![]() When the sidewalls for the do-it-yourself highchair for feeding are assembled, two transverse fastening strips for sitting and one on a movable cylindrical dowel for fastening the back are screwed to the lower strips of the sidewall. A movable dowel means that one of the grooves is several (mm) larger than the diameter of the dowel.
When the sidewalls for the do-it-yourself highchair for feeding are assembled, two transverse fastening strips for sitting and one on a movable cylindrical dowel for fastening the back are screwed to the lower strips of the sidewall. A movable dowel means that one of the grooves is several (mm) larger than the diameter of the dowel.
The back and seat is done in the same way as in the first version. Only the dimensions here are slightly different - a longer back. It's more convenient for the baby. It is also not necessary to fasten the seat and back together, it is enough to attach them to the transverse slats, and subsequently make them soft and upholstered, for example, with oilcloth. Before upholstery, as usual, skin and paint.
![]() That's it, the do-it-yourself highchair for a children's wooden transformer is ready.
That's it, the do-it-yourself highchair for a children's wooden transformer is ready.
DIY high chair table
 A do-it-yourself table for a highchair for feeding is assembled in the same way as in the first version. Sidewalls first. When the sidewalls are assembled, they are fastened together by transverse strips located below - they also serve as supports on which the assembled chair stands. This is important as the high chair is mounted on them and plays a role in its solid installation.
This is the difference from the previous version - there is no additional crossbar in the middle at the bottom of the table, which makes the table not closed, and it is more convenient for an older child to sit at it. At the same time, two crossbars go only from below, where the tabletop is attached - there is only one crossbar. When everything is assembled, it remains to screw the countertop.
There is one moment. ![]() How to make a table top for a transformer highchair for feeding with your own hands? The figure shows the diagram and dimensions of the variant with grooves. For simplicity, the table top for feeding with your own hands can, as in the first version, simply be put on the bars, or you can, as they do at the factory, clamp between the bars. The first option is simpler, but the screws will be visible in the most inappropriate place. The second will require more fuss, but more beautiful. To clamp between the bars, you need to make grooves in them. This is done without problems with a milling cutter, or just a chisel, but it takes longer. Accordingly, the dimensions of the tabletop will be different. The groove is washed away to make the thickness of the table top and a depth of 5 mm.
How to make a table top for a transformer highchair for feeding with your own hands? The figure shows the diagram and dimensions of the variant with grooves. For simplicity, the table top for feeding with your own hands can, as in the first version, simply be put on the bars, or you can, as they do at the factory, clamp between the bars. The first option is simpler, but the screws will be visible in the most inappropriate place. The second will require more fuss, but more beautiful. To clamp between the bars, you need to make grooves in them. This is done without problems with a milling cutter, or just a chisel, but it takes longer. Accordingly, the dimensions of the tabletop will be different. The groove is washed away to make the thickness of the table top and a depth of 5 mm.
![]() For greater stability of the highchair standing on the table, in the assembled form of a do-it-yourself highchair for feeding a wooden transformer, you can additionally make four small bars - two on each side. They are located under the countertop, it is better to put them on the "fact". Those. when the table and chair are ready, we put a chair on top of the table, as it should be in the end. We mark from the inside on the sidewalls of the table, where the chair legs closest to the table top pass. On the sides, parallel to the markings, we attach these bars to the sidewalls of the table, one on each side. As a result, it should turn out so that the legs of the chair closest to the countertop pass between these bars, and they, in turn, do not allow the chair to move in different directions. This gives the chair extra stability.
For greater stability of the highchair standing on the table, in the assembled form of a do-it-yourself highchair for feeding a wooden transformer, you can additionally make four small bars - two on each side. They are located under the countertop, it is better to put them on the "fact". Those. when the table and chair are ready, we put a chair on top of the table, as it should be in the end. We mark from the inside on the sidewalls of the table, where the chair legs closest to the table top pass. On the sides, parallel to the markings, we attach these bars to the sidewalls of the table, one on each side. As a result, it should turn out so that the legs of the chair closest to the countertop pass between these bars, and they, in turn, do not allow the chair to move in different directions. This gives the chair extra stability.
 The do-it-yourself feeding table is ready.
DIY highchair - summary and some conclusions
 As usual, summing up, we talk about what is easier - to make a highchair for feeding with your own hands, or to buy? The answer is clear - buy. Moreover, wooden transformers are very common today and are inexpensive. But there are people who want to make their own efforts and imagination, or maybe someone has not sorted out the rubble of their building materials for a long time. Then go - creativity has been valued at all times.
The first option, of course, is the most common on the Internet, but it is not the easiest. There you have to fiddle with dowels, make grooves, glue parts. It's great if there is a special large clamp, as an ordinary rope can warp the part. And the details, if you do not compress at all, then maybe nothing will work out at all. In short, take a lot. In addition, over time, such a product will definitely dry out, remember the old swinging chairs. And your child will definitely rock a ready-made highchair for feeding with your own hands.
The second option is not common on the network. But this do-it-yourself high chair looks like a factory transformer high chair. Assembled on self-tapping screws. The main thing is to ensure that during assembly the mating parts of the parts stand at 90 degrees to each other and do not warp. Take a little. Only if you want to make a movable back with a rounded element, then you have to sweat.
At one time, when they wanted to make a wooden transformer for feeding with their own hands, we knew the first option. But he seemed complicated. And then, when they bought a factory one, they found its dimensions and realized that it was no worse, and maybe even better than the first option. If I had to do it myself another time, I would choose the second option.
How to make a do-it-yourself high chair video craftsmen
In principle, every craftsman makes his own transformer chair for feeding with his own hands. So to speak, according to your needs and with your capabilities. Here are the most understandable and popular videos. From them it will become clear that the beam can be of any size. The dimensions of the chair-table for feeding can also be any. The main thing is to capture the essence of the design and sequence - how to make a highchair for feeding with your own hands.
 How to build a profitable business selling shawarma
 The right advertisement for a hundred
 Own business: cosmetics and perfumery