Convenient do-it-yourself wardrobe. Making a cabinet with your own hands: a guide to action Sliding wardrobe drawings and diagrams with dimensions
have recently become one of the most common pieces of furniture. This design provides a comfortable experience. Most often, they are not purchased ready-made, but made to order. But if there is an opportunity and the necessary materials, you can make a furniture set yourself. Before starting work, you need to decide on the number / location of shelves and drawers. It is also important to plan the structure, taking into account the dimensions of the room. In any case, all these points need to be studied before making a wardrobe with your own hands. Drawings in this case are a kind of starting point, and our today's review will help to cope with this rather difficult task with a minimum of errors.
A feature of this type of furniture structures are that they allow you to save usable space in the room. At the same time, sliding doors for a wardrobe can be glass, mirrored, rattan, plastic or bamboo.

So, let's consider the main advantages of furniture sets:
- a variety of designs: built-in, rectilinear, hull and;
- furniture sets allow you to effectively use even a small space. This is the ideal solution for small spaces. At the same time, mirror surfaces allow you to visually increase the space;
- conciseness of designs;
- filling wardrobes. Such furniture sets allow you to hide all unnecessary things. They are used not only for clothes, but also for various household accessories and small-sized appliances;
- models can be built-in, cabinet and mezzanine;
- the wall of the room, as well as the floor or ceiling, can be used as the walls of the cabinet;
- sliding wardrobes are made to order;
- the possibility of self-design.

Some disadvantages are worth noting:
- quick wear of the sliding system;
- high-quality internal filling of the cabinet is required;
- aluminum profile can be deformed;
- Careful maintenance is required: cleaning of all surfaces and guides.
For your information! To prevent the door from leaving the rail, a schlegel for sliding wardrobes is used at the joints and ends. It needs to be glued, which will create shock absorption when the doors are suddenly opened.
Types of wardrobes
Consider the main types of wardrobe:
- embedded models that do not have a floor, back wall and ceiling. These headsets cannot be moved or repositioned. They consist of side walls, shelves and internal partitions. Built-in models are made to order, but you can also purchase individual items for self-assembly;
- freestanding sliding wardrobes are equipped with doors that move on a rail. This structure has a floor, a back wall and a ceiling;
- corner headsets are suitable for small spaces. It is compact but very spacious inside. Corner design is suitable for a small rectangular room or a square hallway;
- diagonal angular take up the entire corner. Such designs are more spacious and look stylish. Inside, you can hide not only a wardrobe, but also bed linen, as well as blankets.


Materials for the wardrobe
Before you start making a corner cabinet or any other with your own hands, decide on the material.
Wood
For durable headsets, choose solid wood. It is a prestigious material for furniture. It should be borne in mind that wood is not the best option for a built-in wardrobe. The humidity level is higher in the niche. For a cabinet made of wood, it is necessary to carefully select wood without cracks and knots. The sash frames are also made of wood. In this case, it is necessary to glue together.
Wood headsets have the following advantages:
- environmental friendliness of the material. The tree does not contain toxic components;
- increased level of wear resistance;
- aesthetics of products. Wood furniture is distinguished by natural colors and unique patterns;
- naturalness of the material;
- the possibility of performing restoration work;
- ergonomic use of space;
- variety of styles.
Drywall

One of the popular materials is that made from pressed wood shavings. A thermosetting synthetic resin is used to create a dense composition. This material is easy to process.

When working with plywood, the softness of the material must be taken into account. Products can deform when twisted. It is recommended to use washer-shaped gaskets for such connections.
Film faced plywood is also popular. At the same time, plastic reduces the effect of formaldehyde in resins.

Furniture panels
The best material for homemade designs is furniture boards. This material is known for its durability, environmental friendliness and reliability.
It is worth noting the following advantages of using this material:
- significant funds are not required;
- you can bring to life unusual design ideas;
- the product can have various shapes and designs;
- for a furniture set, you can choose functional fittings.

The location of the wardrobe in the room
Before you start creating a wardrobe with your own hands in the hallway or in another room, it is worth considering its location.
If you put the headset along a solid wall, then the furniture itself will be perceived as a wall. Better if the cabinet is up to the ceiling. Doors can be mirrored, which allows you to visually enlarge the room.

If you place two identical cabinets along the wall and leave a distance between them, you get an alcove. You can put or in the resulting niche. In the living room, an alcove can be used to create an area with a false fireplace.

A practical solution would be to install the headset along the edges of door and window openings. A mezzanine can be installed above the opening. The cabinet can be recessed into specially created niches. If the size of the room allows, then it can be small.
Depending on the particular style of decoration of the room, it is not necessary to make built-in wardrobes or mask them. For a retro or glam vintage style, bulky furniture will only complement the colorful design.

It is also necessary to choose the right sliding mechanism for the wardrobe. It shouldn't be noisy.
Hallway

Children
A lot of things need to be placed in the children's room. These are seasonal clothing and footwear, children's toys, board games and sports equipment. In addition, you need to find a place for books, notebooks and bedding.
The sliding wardrobe is a spacious set in which you can place all things and objects. The doors of this piece of furniture move apart, which does not take up much space.
Keep in mind that cabinet furniture is selected for children, so the shelves should be at the required height. It is important that there are no sharp corners at the ends of the shelves and racks. For each thing, it is necessary to take a certain place, so the child will quickly get used to order.
Note! When ordering from outside, as a rule, it is not possible to control material consumption.
It is important to choose high-quality fittings, the correct adjustment of the doors of the wardrobe depends on it. Doors should not jam and slide out. Sliding systems consist of a profile and a sliding support. Roller mechanisms can be axial or bearing.

Choice of cabinet filling
The internal content helps to decide what the layout will be. Do not place the outerwear section in the center, as moisture from it can spread to the sides. It is better to place this compartment on the side. Bedding boxes are not recommended to be placed directly above the floor.

How to properly arrange the elements and how to assemble a wardrobe with your own hands can be seen in the video below:
The number and dimensions of doors, guides, rollers for wardrobes
When choosing guides for a wardrobe, pay special attention to the material of their manufacture. The lowest cost has a plastic profile, but it is notable for its low reliability and short service life. The best solution would be to use combined rail guides, in which the bearing surface for the rollers is made of metal.

Steel profile for sliding doors has increased reliability. Aluminum is used to make rail supports for famous brands of furniture.
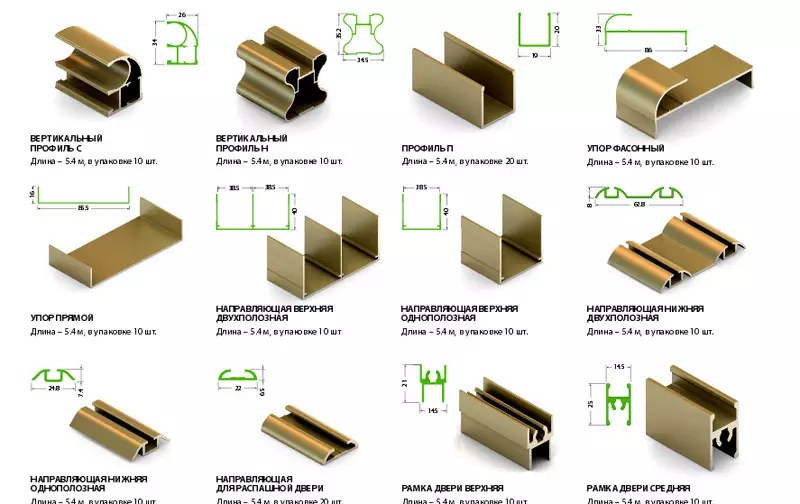
The rollers are made of metal, since plastic is not durable. The roller contains a ball-bearing internal mechanism that allows the doors to move freely in the horizontal direction.
Do-it-yourself wardrobe and compartment door assembly
We invite you to familiarize yourself with the process of assembling a wardrobe with your own hands in the table below:
| Photo | Description of work |
 | To assemble the wardrobe, it is necessary to apply the markings. It should be noted the dimensions of the cabinet in width and the location of the vertical rack. The heights at which the shelves will be fixed are marked. |
 | We drill holes for dowels. |
 | The profile is put on before installation. |
 | We install a vertical stand. |
 | We apply the markings for the mezzanine shelf and install it. |
 | A side wall is installed. |
 | The markup for the shelves and their installation are performed. |
 | Marked by size and installed a bar for clothes. |
 | False panels are installed. |
 | One panel is fixed at the bottom. |
 | The supporting upper part is attached. |
 | The lower guide is fixed with a screw. |
 | The upper rail is attached in the same way. |
 | Doors are being mounted. |
The process is presented more clearly in this video:
Interesting solutions for sliding wardrobes: photo examples
Do not forget about the decor of the furniture set. Pilasters can be used as decoration. These elements are made from solid wood or MDF. A furniture cornice can be installed on the roof. An interior baguette is used for decoration. You can choose a baguette of different shades. Furniture with photo printing also looks stylish.
Article
A sliding wardrobe is an extremely useful and convenient thing in an apartment. With the help of it, the space of an apartment or house is saved, it can contain various types of clothes and shoes. Therefore, sliding wardrobes have found widespread use. Very often specialized firms and enterprises are engaged in its manufacture. But many people take the creation of a wardrobe into their own hands and they do it just as well. But before touching on the issue of assembling the wardrobe, consider the varieties of the compartment. Yes, sliding wardrobes located in different rooms carry different functional loads, although in appearance they may not differ from each other in any way. So what goal will you pursue if you are going to make a wardrobe in a particular room of your apartment (house)?
Sliding wardrobe located in the hallway
A compartment located in the hallway is designed to store outerwear and shoes that are used at a given time of the year. This immediately determines that there should be sections for outerwear in the compartment. In this case, there should be two sections. One section contains clothes that you are currently using, and the second section contains clothes of other seasons that you are not currently using.
Also, in this cabinet it is necessary to provide shelves on which various small things will be stored - umbrellas, bags and handbags and other things.
Since you will be leaving the house from the hallway, it never hurts to look yourself in the mirror. Well, since we have three sections in the closet, then we need to make three doors, of which one will be mirrored.
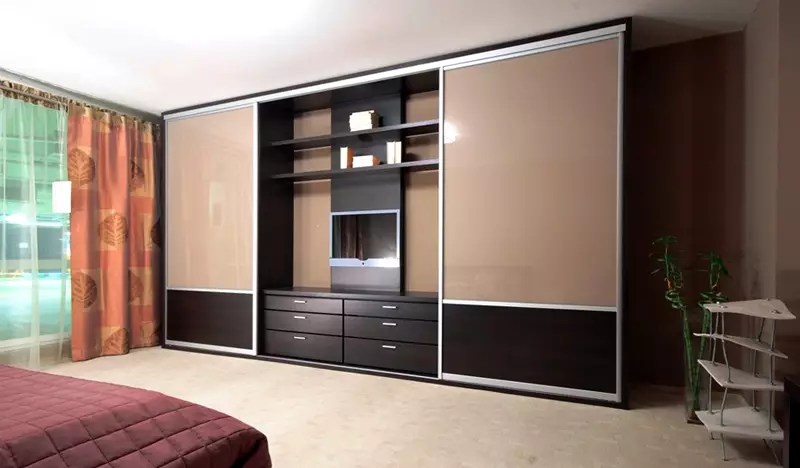
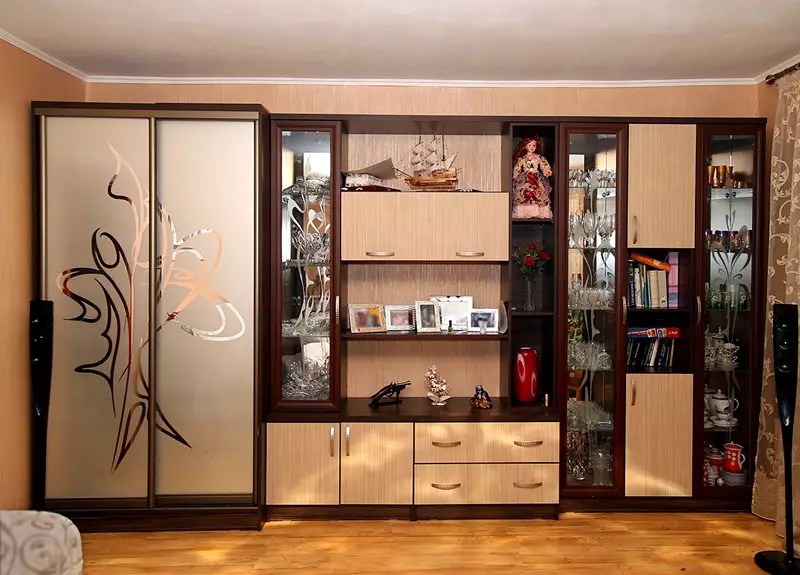
Sliding wardrobe located in the living room
The main purpose of this compartment is to store light clothes, household appliances, dishes, personal items. One of the sections of the cabinet can be made open and placed there, a TV, a stereo system, a DVD-player. As a rule, an open section is made in the middle of the wardrobe, thereby breaking the wardrobe into two halves. The side sections are decorated with rounded open shelves. Sliding wardrobe located in the bedroom
Bed linen and underwear are stored in this wardrobe. An open section is not implied. Doors can also be made with mirror inserts.
Sliding wardrobe located in the nursery
Children's accessories and clothes are kept here. The open section is for storing books and toys. In some cases, a sliding wardrobe can replace a furniture wall or a wall to combine a sliding wardrobe. In this case, a TV set with a player can also be installed in the cabinet for watching children's programs and cartoons.
Tools for making a wardrobe
Well, what is the manufacture of furniture without tools. If you want your corners to be straight where needed, the gaps are minimal, and the holes are perpendicular to the surfaces to be drilled, then purchase the following tool.
Mallet
- confirmation drill
- wood drill
- Euro screws (confirmations)
- screw caps
- square
- level 400 mm
- 2 corner clamps
- dowels
- roller guides for boxes
- saw on wood
- metal furniture corners
- decorative furniture corners
- jig for perpendicular drilling
If you save on the much needed, then the quality of your closet will definitely "fall ill".
Calculation of the dimensions of the wardrobe
The most difficult thing when creating a sliding wardrobe is to correctly remove the dimensions of the cabinet and cut out a chipboard sheet and edging them along them. Cutting and edging of wardrobe parts are usually made by companies selling chipboard and other similar materials. We will consider an example of creating a wardrobe with parameters 2020x625x2320 mm.

The cabinet consists of the following parts: - vertically standing parts - 1,2,3,4,5; - the top of the cabinet - 6; - the bottom of the cabinet - 7; - shelves - 8, 9 10.
The size of the outer racks (1.4) is 2288mm = 2320mm - 32mm (32 mm is the thickness of the chipboard sheets in the lower and upper parts of the cabinet). This is the height of the posts. And the depth is 625 mm. Total 2288x625 mm. The size of the upper and lower parts of the wardrobe, these are positions 6 and 7 - 2020x625 mm. Positions 2 and 3 represent the center pillars. Their size depends on the height at which the bar for outerwear will be installed. It is usually located at a height of 1900 mm. So we will count. The height of the racks is 1900 mm, the width is 525 mm. We give 100 mm to the door opening system.

A small rack at position 5, 372 mm in size (we subtract the height of the central pillars from the total height of the cabinet), by 525 mm (we also subtract 100 for the door opening system.). The mezzanine shelf, this is position 9, size 1988x525 mm (the length of the cabinets minus the total thickness of the chipboard sheets, and the depth of the cabinet minus the spaces for the sliding system. Side shelves, position 8: 450 mm x 525 mm.
Shelf number 10: 1056 mm. The back wall is made of fiberboard and its size, as the parameters of the cabinet, is 2020x2320 mm. Note. The back wall can be made not from a single sheet of fiberboard, but divided into two parts, according to the size of the central pillars. For example, one sheet 466x2320 mm and one 1088x2320 mm.
Choosing a sliding door system
Systems are made either of aluminum or steel. Whichever you prefer, both buy, and one and the other are a worthy option. The system size for our cabinet is 1988 mm by 2288 mm. This size is obtained as follows. From the total length and depth of the cabinet, we subtract 32 mm from the total thickness of the chipboard sheets. In general, there are chipboard sheets with a different thickness, but, from our point of view, chipboard sheets with a thickness of 16 mm are quite suitable for the manufacture of a wardrobe.
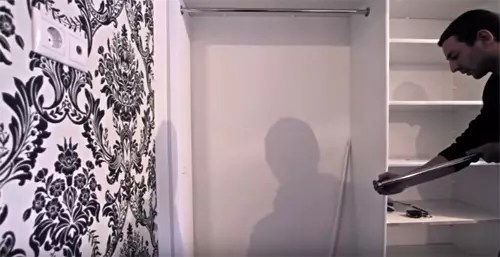
DIY wardrobe installation
To prepare all the elements of the cabinet, we proceed to its installation. It is assumed that you constantly use a level and a corner to accurately install the details of the wardrobe. Very often, cabinet parts are connected using confirmations (pictured) and closed with plastic plugs.

But, sometimes fasteners are used on furniture corners. Assembling at confirmations is a somewhat more complicated process, but when mounted on corners, they will interfere with the further operation of the wardrobe.

Then the installation process itself begins. Carefully, with a pencil, mark the location of the shelves on the side and center racks, drill the mounting holes, both in the racks and in the shelves (from the end). We fix the fiberboard with a stapler or nails, and do not forget about the corner, especially when fixing the fiberboard sheet. Sliding wardrobes can be installed on legs. We then take their height into account when calculating the height of the cabinet. The legs are attached from the inside of the cabinet and are adjusted with a hexagon. Then the legs are closed with a chipboard false panel.
Installing a sliding door system
The top guide rails fit flush with the column (top).

The bottom rail is attached to the bottom of the cabinet, stepping back from the edge by 10-15 mm.

Having strengthened the guides, it proceeds to install the doors. As a rule, with a support roller at the bottom of the door and a groove for its movement in the guide.

Doors are inserted by feeding them upwards, and by installing the lower roller and the groove of the guide.

The smooth movement of the doors is regulated by adjusting screws and a hexagon. Doors are installed in guides. In our case, there are two doors. One overlap the other. The total width of each door is 1200 mm. The sliding wardrobe is mounted, you can use it.
It was just a special case of one of the wardrobe options, on which we showed you possible options for installing individual parts. And now I would like to give a specific example.
Do-it-yourself sliding wardrobe (specific example of installation)
So, first of all, a drawing of the future cabinet.

The drawing is actually only for the interior of the cabinet, since there will be sliding doors on top (on top).
The total length of the cabinet (from wall to wall) - 3420 mm
Cabinet depth: - 500 mm
Height from floor to ceiling - 2500 mm
Chipboard thickness - 16 mm.
The material is calculated and ordered. It is better to order the edge of the laminate at all ends of the boards, since the sawdust and resins from which the "boards" are made will emit harmful substances through the open ends. The surcharge is minimal, but the benefits are real.

We carefully measure and check the holes for drilling. It was decided to fasten the elements not only with the help of confirmations, but also with dowels for strength.

We start assembling future shelves.

The shelves grow as the cabinet is erected, but still lie on the floor, and not in their rightful place against the wall ...

Now that they have two "legs", you can put the shelves against the wall. Trying them on on the spot.

We attach the top shelf.

In order to fix it evenly, we fix it on the corner clamps.

Put the shelves against the wall again.

We mark the third rack and insert the dowels.

We install it in place against the wall.

We continue assembling the extreme rack with the shelf.

Let's drill into the ends of the shelf.

We attach the extreme drain with a shelf to the central structure.

We mount the pipe using shoulder flanges.

Below, under the pipe, add a shelf.

Shakaf, albeit not a coupe yet, has already begun to perform its direct functions.

We add the rack to the left.

The extreme left shelves are already attached directly to the wall. The pipes for the hangers also go from the rack to the wall.

One more picture.

We start assembling the boxes. We mark their elements and fasten them together with dowels, glue, clamps.

We fix the bottom plywood ...

With self-tapping screws.

Manufactured 9 boxes. All outer shelves and racks are fixed to the walls, floor and ceiling. Now you can check how the cabinet will cope with the entire load. It remains to modify it to a coupe.

We order a group of sliding doors and guides for them.

We saw the guides in size with the ceiling and floor.

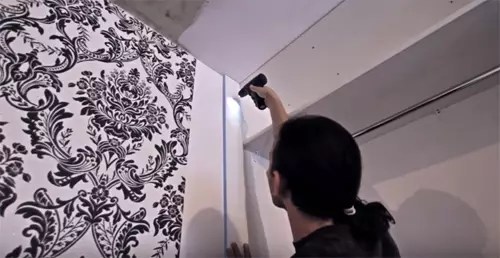
We drill holes in the ceiling plate for dowels.

We attach the guides to the ceiling.

We install doors. They are installed like in a glass sideboard.

minor improvements remain. We glue the seal on the ends of the doors.

Here is the appearance of the newly-minted wardrobe - compartment. Now it is only functional, but also beautiful, since all clothes are hidden behind its doors.

Here is just such an option - the eyes are afraid, but the hands are doing. As a result, from a set of sawn planks, a handful of self-tapping screws and dowels, we assemble a complete and functional wardrobe. At the same time, having significantly saved on its manufacture and installation, for the sake of which everything was actually started.
We will send the material to you by e-mail
Personal control of all important stages of production allows you to create furniture with unique characteristics at no extra cost. This article describes how to make a wardrobe with your own hands. Drawings, detailed instructions, photo and video materials will help you realize your own plans quickly and efficiently.
Even a complex project can be successfully implemented on its own after proper preparation.
To find out how to make a wardrobe yourself, you need to clarify the purpose of the furniture. A careful study of the following facts will come in handy:
- A significant internal volume implies the ability to accommodate clothes and shoes, household appliances, New Year's toys, bed linen and other things. For each position, it is necessary to provide an optimal storage mode, convenient for users.
- With a large facade, aesthetic parameters are essential. A beautiful front surface will have a significant impact on the overall perception of the corresponding interior.
- The selection of base materials is a critical task. Not only the cost, but also the ease of assembly, the durability of the structure largely depends on the correct decision.
Stages of making a wardrobe with your own hands
Measurements of the room and calculation of the dimensions of the wardrobe

This tool will simultaneously allow you to clarify the accuracy of horizontal and vertical elements of building structures. The easiest way to measure is for cabinet furniture. In this case, it is enough to take the minimum size and subtract a few centimeters to make a small margin.
It is much more difficult to accurately enter a built-in wardrobe. With your own hands, you need to make at least three measurements for each meter of length (height). If excessive defects are found, the surfaces should be pre-leveled.
Important! In any case, check the free opening of the nearest window (door) blocks. If necessary, install the shutter stops. Make sure that the cabinet does not cover the only light switch in the room or is too close to a ceiling or wall light.
Preparation of design documentation for creating a cabinet or built-in wardrobe with your own hands

These programs are available on the official websites of trade enterprises. They are completely free to use. Anyone can insert the results of their own measurements. The selection of guides is performed automatically, calculated for the load determined by the size of the web and the material.

With its help, you can make a high-quality project even without previous experience in design. Even a beginner will quickly master this tool using the following simple algorithm:

Drawings of parts can be given to a specialized workshop, or used to make individual parts of the wardrobe with your own hands. The electronic project is convenient for viewing from different points. You can quickly make various changes in it, taking into account additional requirements. The generated list is used to purchase the necessary components and parts.
Important! Quite large scraps from chipboard sheets and other materials remain in the workshop. It is better to take them with you to make it easier to correct errors during the installation process and carry out repair operations in the future.
Choice of rollers, materials, fittings and other components for the wardrobe

The drawing shows the main components of a typical design:
- The lower and upper rails for the wardrobe are attached to the floor and ceiling of the room (the bottom and the lid of the furniture, respectively).
- In this example, the main load is on the lower rollers. But there are also models with a suspended canvas.
- The side profile "C" additionally functions as a handle.
- The sealing elements are made of silicone, which ensures that the glass is securely fastened.
- The middle transverse elements strengthen the load-bearing frame, separate the individual elements of the web from different materials.


Do-it-yourself sliding door adjustment and other assembly features
| Photo | Adjustment of sliding wardrobe doors: description of technological operations with comments |
|---|---|
 | During the first installation and during operation, the following typical problems arise: loose fit of the shutters, lack of fixation in the closed position. |
 | To prevent the web from sliding back after hitting the side of the structure, a special locking element is installed inside the guide. It can be used to determine which door needs to be regulated from a certain side. |
 | First, the schlegel is separated (6 ÷ 8 cm) to free access to the adjusting screw. The top hole is used during the assembly process to tighten the fasteners. |
 | A hex wrench is used to adjust the position of the roller. In this example, the wizard uses # 4. |
 | Clockwise rotation raises the door. In the opposite direction, it lowers. |
 | These procedures are performed so that when closed, the canvas adheres without gaps in the lower and upper parts. After obtaining the desired result, proceed to the next stage. |
 | In the photo, an arrow is marked with a locking element made of durable sheet steel. When the roller moves to the middle, the spring rises up, preventing it from moving backward. If this part is shifted to the central axis of the wardrobe, a gap is formed. |
 | Moving an element is not easy. This is prevented by the ends of the springs, which rest against the bottom of the guide rails. They select a suitable piece of plastic, a board. |
 | With such a device, the stopper is pressed. Then the node is moved in the desired direction. |
 | The torn off brush can be tucked into the bottom hole, or you can apply glue for rigid attachment. |
Direct installation of a straight or corner cabinet with your own hands is no different from assembling standard furniture. In the same way, first install the bottom, walls, cover. Then, the inner and outer shelves are attached to the load-bearing frame.
For your information! It is convenient to order a sliding system for a sliding wardrobe after the installation of the case. In this case, it will be possible to make an accurate measurement.
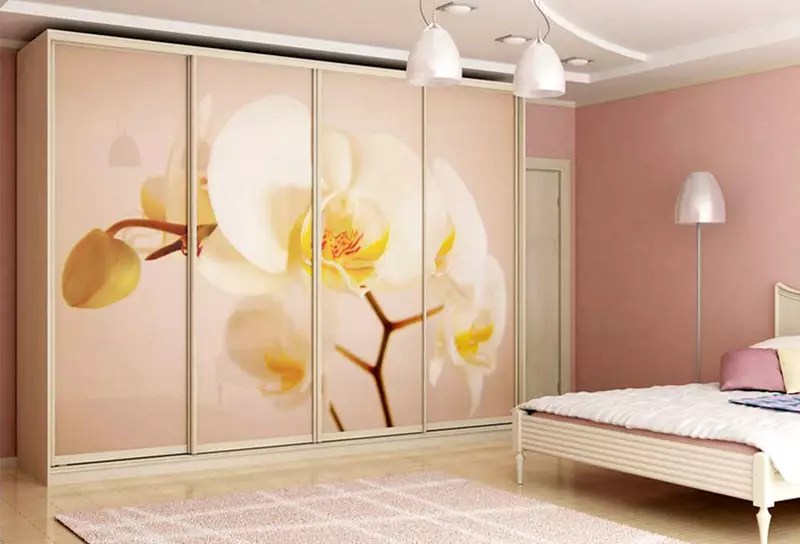
The appearance of a modern wardrobe, photo with good examples
The use of stained glass technology

Sandblasting drawings

Vinyl stickers


It should not be forgotten that they have limited strength. They can be damaged during cleaning of contaminants using aggressive chemical compounds.
Article
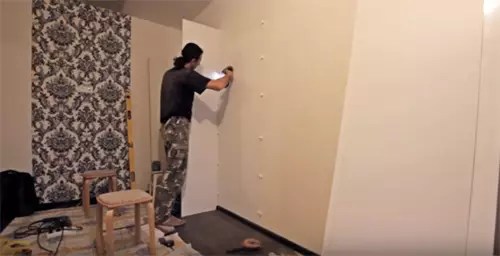
How to build a wardrobe at home without experience and skills in furniture business. There will be a photo and some text. Text on behalf of the author.
The logical continuation of my renovation in the room turned out to be the arrangement of a new, voluminous closet to replace the standard Soviet one, which probably everyone in the house has, or at least had. Having absolutely no experience in furniture business, I decided to study the topic of cabinet construction in the tyrnet and downloaded a program in which about 100 you can design a product ...
I was so carried away by this program that I probably created 10 variants of cabinets for my room, including the corner version, but settled on a simple flat one. The cabinet is divided into 3 sections of shelves. One for the Wife, the second for the unborn child, the third for my beloved. And 2 sections for short and long clothes.
Acquaintance with the theory forced me to purchase some tool ... Shiloh, confirmatory drill, countersink ... I learned a lot of new words and concepts for myself ...
In order to assemble a non-curved box, at least I bought 2 clamps and made an L-shaped template. At the same time I practiced drilling holes for confirmation.
On the forums, people use rulers and pencils trying to make markings on the end of the chipboard, and smart people make themselves a so-called Conductor. 2 pieces of composite, 2 pieces of chipboard, self-tapping screws, a bearing of a suitable diameter and a jig for drilling into the end is ready.
I met such a question on the forums - To put a dowel with a confirmation screed or not to put it? I read it, poked it around and found out that it is advisable to put a dowel next to the confirmation and made a conductor for drilling holes both under the confirmation and under the dowel. Nihai will be.
So, the cabinet was designed and given for cutting. A couple of days later I received a sea of boards. At first I somehow bothered, I thought that I could not figure it out, and in vain I started such a grandiose business ...
But after walking around them for half a day, he laid everything out, scattered it, and calmed down. I have hands, I have a head, thank God there is the Internet - I'll figure it out.
From the Soviet cabinet, there is a ceiling with a corner groove. On the basis of this design, we will assemble boxes. I'll practice at the same time ...
This case turned out to be convenient and not tricky ...
Marked, assembled, clamped, drilled, screwed and done. The main thing is to pay attention to the joints. Everything should be beautiful, neat, as for yourself.
So that the legs would slide on my new OSB floor, which was three times varnished with eco-friendly varnish and would not scratch it, I glued felt to the legs. I also assembled the middle partitions, installed sliders for the boxes and, of course, everything on dowels and confirmations, because this is the supporting part and should be stronger than Arnie's steel eggs.
The boxes moved from the garage to a warm room and also acquired runners on their wooden sides. I marked them strictly in the center.
It's cold outside, all our things are in the garage and the closet is just being erected ... I installed the side wall alone, and the first partition ... shelves, shmolki ... twist, sit down.
The depth of the cabinet is 650 mm. Height 2635mm, length 2758mm ... in general, such a large colossus.
We install the shelves using our device.
Then we install the facades. Not difficult. In the gaps between the facade and the shelves, I laid 2mm plastic, glued the facade with tape to the closed box, then opened it and screwed on the screws. Reliable, fast, error-free.
More facades
In principle, this is how the cabinet looks when assembled ...
And here we have a box with a secret.
It remains to install the doors ...
What I am actually doing here.
2 doors have been installed, though with the help of my wife ... she is on the other side of the frame.
General view without me.
With closed doors.
Basically that's all. I even hugged this piece at the end, welcoming it to my home ... before that I liked it at the end.
The question of how to make a wardrobe with your own hands sooner or later arises for every person who wants to save money on new furniture. Not everyone has the opportunity to purchase a wardrobe in a store, because such a purchase can be very expensive. There is another obstacle - to choose an item for a summer residence, at home, which can be especially problematic due to the lack of the required model. Therefore, self-production is a great alternative to expensive store furniture and additional savings for the family budget.
What do you need?
Many people think that making furniture is an incredibly difficult and overwhelming task, and before starting work, you should at least read the book "How to make a wardrobe with your own hands." But this is not the case. In fact, the production of a comfortable, spacious and beautiful piece of furniture can be divided into the appropriate stages: preparation of the necessary tools and materials, production of individual parts, assembly, installation.
First of all, you need to decide what the cabinet is for and where it will stand. After all, the furniture will serve for many years, so the issue must be taken seriously. Often, cabinets are arranged along the entire length of a blank wall, in the opening of an interior partition. As for cabinet furniture, it can be used to divide a one-room apartment into zones, this view will look good in a Khrushchev building.
Next, you need to calculate the dimensions of the cabinet. It should mean not only the width and height, but also the distance between the shelves, their number. For clarity, you need to transfer your idea to A4 sheet. It will also help to determine the material for the product: wood, lining, MDF, fiberboard. Often the frame is made of wooden beams and doors are ordered separately. Self-production is a good alternative for home, summer cottages. The design of the cabinet can be adapted for small apartments, it will look good in a Khrushchev building.
It is important to decide on the color of the product. There are many colors: "Beech", "Oak", "Alder", "Walnut". You can also always order the desired chipboard by choosing a color from the catalog.

Cabinet drawing
Depending on where the cabinet will be located - in the house, in the country, in the Khrushchev, it is necessary to draw up the corresponding drawings, break the product into its component parts, of which it consists. If the drawing school had a good mark, you can do everything yourself on a piece of paper. Also, drawings are created in special computer programs that can be found on the Internet.
Before you start drawing, it is important to take into account the external dimensions of the cabinet, the dimensions of the room. You should pay attention to the plinth, baguettes, switch, window sills, heating and take into account the distance from them.
- Skirting board in the room. If the cabinet is designed from wall to wall, then the skirting board will not allow the furniture to move tightly. In this case, you need to bevel the vertical edges of the cabinet, or dismantle the skirting board itself.
- Chipboard thickness. The thickness of the material is calculated taking into account what will be stored in the cabinet, its dimensions. If there are no long shelves for books - from 16 mm. When drawing, you can count on this thickness. For cabinet furniture, you need to choose a high-quality material, more expensive.
When creating drawings, cabinet diagrams for the ceiling, one must not forget that it is assembled in a lying position, and then it will need to be lifted and placed. Then its diagonal should be 3-5 cm shorter than the ceiling height. Otherwise, the ceiling may be hit when lifting the cabinet.
Manufacturing
After the drawings are ready, you can start making the necessary parts. Sawing boards is a rather difficult task, and it is better not to test yourself, but to order this work from professionals. As a rule, this service is provided at the place of purchase of chipboard sheets. The difficulty lies in the fact that a machine for sawing chipboard is quite an expensive pleasure, and it makes no sense to purchase it for one cabinet. Many people prefer to saw on their own with a jigsaw, but this results in chips, so it's better not to risk it.
It is necessary to decide in advance on the door opening system: to the sides, up, down, move as in a compartment. Taking into account the number of shelves, boxes, doors, you can calculate the required number of Euro screws, rivets for them, guides for boxes, holders.
Separately, it must be said about drills. They should only be in wood, which will allow you to make an accurate hole yourself without using additional forces. Their characteristic difference is the presence of a blade in the center and a flat profile (and not a cone, as in other types). Before assembling, it is important to practice drilling on unnecessary trimmings that remain after sawing the chipboard.

To avoid errors in measurements, you need to use high-precision instruments. You should avoid tape measures, and give preference to a metal meter and half-meter ruler, which can be purchased at every stationery store. But beware of Chinese-made plastic counterparts, they often have errors that can be a serious flaw in the assembly of the product.
Felt pads will help to facilitate further movement of the cabinet. They should be glued to the places where the item stands.
Making a wardrobe
Consider how to make a wardrobe yourself, using the example of furniture with swing doors. It is believed that this type is quite simple to assemble in comparison with a coupe, because there is no need to assemble the doors and the frame separately. The design has many variations, which gives room for imagination and allows you to choose the model that will suit all requirements. The cabinet can be filled with shelves, drawers, hanger bar. This model will be convenient both at home and in the country.

The dimensions of the swing cabinet are also individual, which allows it to fit into any layout of the apartment, including in the Khrushchev. Consider the drawings, diagrams using the following dimensions as an example: 2200x600x1500 mm.
Details of the piece of furniture:
- Sheets for sidewalls: 2184x575 - 2 pcs.
- Bottom: 1468х575 - 1 pc.
- Cover: 1500x600 - 1 pc.
- Shelves: 976х575 - 2 pcs.
- Shelves: 476х575 - 5 pcs.
- Wall: 268x500 - 2 pcs.
- Facades: 2081х497 - 3 pcs.
- Tsarga: 100x1468 - 1 pc.
- Drawer guides: 100x500 - 4 pcs.
- Int. box - 100x386 - 4 pcs.
- Bottom for drawers: 497x415 - 2 pcs. Fiberboard.
- Partition: 2068x575 - 1 pc.
- Wall: 2081х1497 - 1 pc. Fiberboard.
- Slats: 976x50 - 1pc., 476x50 - 1.

In order to independently make a cabinet, you will need: chipboard, fiberboard, edge, confirmations, screws, handles, legs, guides, bar.
The cabinet has large dimensions, therefore, the load on the bottom increases. It is recommended to attach kitchen legs to the bottom, which have a number of significant advantages:
- Good price.
- Possibility of regulation. This point is important because not everyone has perfect floors at home. It is especially important when installing furniture in the country, in the Khrushchev. Thanks to the legs, you can always adjust the desired height and level the cabinet.
- Load distribution.
When installing boxes, it is advisable to install mortise handles. If you plan to put ordinary ones, then the boxes need to be moved inside the furniture, otherwise they will interfere with the facade, the cabinet will have open doors. Therefore, in order not to have to redo the finished product, you should take care of the choice of accessories in advance.

Wooden furniture
A homemade solid wood wardrobe is an expensive pleasure and a luxury item in the home. When choosing a material, you should be guided by the following rules:
- The wood must be free of knots.
- There should be no interlayers in the wood mass.
- The annual rings should be close to each other.

To make furniture out of wood, 2 types of shields are made from it:
- Solid - from one piece of wood.
- Glued - this is when thin boards are glued to each other and then pressed. It is believed that the second type of massif is stronger. It does not change its shape, even when subjected to stress.
Types of wood:
- Hard: maple, oak, elm, beech, mountain ash, walnut, ash, apple, elm and sycamore. Frames of products, serious structures that will be subjected to loads are made from it.
- Soft: pine, cherry, willow, alder, cedar, spruce, juniper, poplar, aspen, chestnut and fir. Suitable for decorative elements, facades.
Most often, cabinets are made from solid oak. It has several advantages:
- Easy to handle.
- Insects don't like him.
- Does not rot.
- Long lasting.
- Does not react to moisture.
Another suitable material is beech. In terms of strength, it is not inferior to oak, so you can safely make furniture from it. But beech has a drawback - it easily absorbs moisture, which is not a good sign. But if the wardrobe will stand in a bedroom or another room with a favorable climate, you can safely choose an array as a material for a future product.

The manufacture of a cabinet from solid wood is carried out in the same way as from other materials, which allows the use of similar drawings. But it is not recommended to equip the whole house with them. The material is expensive and very moody. It should be remembered that solid wood products do not like changes in temperature and humidity. Otherwise, they bloat. Taking into account that many houses, apartments, summer cottages are equipped with a floor heating system, air conditioners, it will not be easy to create comfortable conditions for furniture.
At the same time, the array makes the dwelling truly royal and luxurious. Therefore, before use, it is important to treat the wood with special compounds in order to reduce its susceptibility to the environment.
Making a cabinet for yourself is not such a laborious process as it might seem at first glance. By clearly following the instructions and tips, you can independently assemble any cabinet or built-in piece of furniture.
 Forbidden Ancient Magic and Ancestral Spells
 The meaning of the name Adam Adam's family relationship
 How to dry a man's love on an apple