Traditional and unusual ways of attaching shelves to the wall. The main ways of attaching the cable duct to the wall Variants of fastening to the wall
Good afternoon, today we will talk ABOUT PLATES - as interior decoration.
I will tell you -
- about how you can transform a room with wall and regular plates.
- about how they can be attached to the wall (6 ways)
and also show many, many different photos with great "plate ideas".
So let's get started.
Plates on the walls can transform any room, make it cozy and harmonious. It is thanks to the elegant scattering of colored plates that many multi-colored decorative elements can be tied in the interior.
Blue pillows + Red floor lamp + beige curtains - all these, incompatible in color, the details suddenly one day begin to wonderfully harmonize with each other just because of the fact that appeared on the wall a red-blue-beige family of plates.
Plates can be fixed to the wall as you like. For example, a free chaotic "flock".
Plates can be placed on the wall ordered rows.
Or according to with mirror symmetry- when the right side reflects the left.
HOW TO CHOOSE WALL PLATES FOR YOUR INTERIOR.
Here are 2 options for matching plates to the design:
- The plates will be the same color as the whole interior === beige room - then the plates will be in ivory shades.
- Choose plates CONTRAST COLORS ==== beige room - so what, and let the plates be bright red.
For instance….
your interior does not stand out, is made in a calm brown-beige or pistachio-white tones, and you would like to "stir up and decorate" it.
You can do this ...
buy curtains, pillows, plates in one new color scheme and inject this new color into the room (pillows on the sofa, curtains on the window, plates on the wall).
The interior is instantly transformed, and there is a feeling that the skillful hand of a designer has worked here. What will be the surprise of your guests when they find out that it was you yourself who changed your apartment and for very little money.
WHITE PLATES - AS SPACE FOR CREATIVITY.
And another CLEAR IDEA is to buy white plates and paint them in the colors that ask for this room.
Let's say ...
… In your light interior, the MAIN COLOR SPOTS are a blue floor lamp and a pink pillow, presented by Aunt Klava.
We will build on these color accents.
First, let's practice on paper (in order to immediately check several options and guess with the color): we take a sheet of paper, cut white circles out of it and begin to decorate them, as you like, in blue and pink colors - these can be blots or stripes or flowers.
When the composition on paper circles satisfies us with its artistic performance, we can transfer this idea to real plates.
You can use regular acrylic paints (sold in the stationery department of any major store).

If you do not feel the ARTISTIC Courage in yourself - can be made easier.
We take masking tape (the one with which you seal the windows) and simply stick it on the plate with strips, leaving a distance of 1-2 cm between them.
And these unsealed places can be painted over with one color. When the paint dries, you can carefully remove the tape from the plate - this way we get perfectly even stripes. These are the ones in the photo with orange flowers.
THE DRAWING ON THE PLATES can be more complicated.
To do this, you need regular acrylic paints or special paints for working on glass.
Moreover, your drawing can be depicted entirely on ONE plate or take up SEVERAL plates AT ONCE.
HOW TO ATTACH THE PLATE ON THE WALL.
Here I have collected SEVERAL WAYS of attaching cymbals to the wall ...
Not always the plates with which we would like to decorate our wall have special devices on the bottom for attaching them to the wall.
Therefore, we have to come up with other ways of attaching the plates to the wall.
A very good way out from the situation it is to buy good glue and use it to glue a loop-string to the plate. It is better to give preference to epoxy glue - it is sold in two parts (powder and liquid) when these parts are combined, a mixture is obtained that looks like liquid amber resin - you can make a regular loop of twine and glue it to the back of the plate with this epoxy resin. Unlike ordinary super-glue, such a composition will firmly glue the string to the plate and you will not need to worry about how one day an elegant plate would fall on the head of a dear guest.
Or here are other ways of attaching cymbals to the wall.
ATTACHING ROPES TO THE WALL.
To do this, you need either such plates with a leaky openwork edge,
Or- in each plate, you need to carefully drill a hole with an ordinary drill with a special drill for drilling holes on the tile (so that the plate does not crack during the drilling process).
CLIP PLATES.
You can buy or do it yourself metal clamps for cymbals... On the back of the clamps there is a special loop for fastening the entire structure to the wall.
If you can't find such staples on sale, you can make them homemade analog.
For this we need twine or elastic + 3-5 paper clips.
Such a design is very quickly created and firmly fixed on the plates, and then on the wall, where the nail-holders are already filled.
The picture shows these methods:

FORGED PLATE FIXINGS.
Such mounts must be matched to the color of the plate. Usually, such structures are attached along the doorway, on either side of the mirror or window... As you can see, even a Halloween party can be decorated with plates.
SHELVES WITH NARROW RIBBED PLATE SHELVES.
Or on the wall you can build shelving unit with narrow shelves specially for cymbals.
The surface of each such shelf should:
- or have ribbed cuts
- or glued thin strips (something like rails).
Thanks to such a surface, each plate with its edge enters such a wash (or into the gap between the "rails") and it does not threaten to fall off the shelf.

SHELVES WITH PRINTED PLANKS(so that the plates don't slide off the shelves)
These racks also have narrow shelves, but the cymbals do not fight at the expense of the facets, they are not allowed to fall by the slats, which are transversely stuffed in the center of each span.
This solution is suitable when the height of the shelves is small - that is, the plate does not fit into the shelf in height.
It is also a solution when you want to place MORE ROWS of plates on a small rack.
FRAMES FOR PLATES ON THE WALL.
Such square frames can be ordered in a baguette workshop or made by yourself from small beams, painted white. We glue the reverse side of the frames with cardboard or plywood wrapped in colored wallpaper to match our interior. (or you can buy different-patterned gift paper in the gift-making department).
But how to fix the plates inside such frames?
Here's one way: We punch a hole in cardboard (or plywood). The plate also has a hole on the back. We take a stronger wire - we pass it through the hole on the plate - we twist the ends of the wire between ourselves - we thread both ends into the hole on the cardboard (plywood) - and we spread the ends of the second wire (splayed) so that they will not come out of the hole (for this, the wire must be tough enough).
The second way is similar: but instead of a wire, we take a strong string. We thread the twine into the hole on the plate - we tie the ends to a knot - we pass both ends into the hole made on the back wall of the frame - and from the same ends of the twine we make a loop on which we hang the entire frame skid structure.
And also - you can use good glue - for example, the favorite among all designers "Liquid Nails" - sold in any hardware store (inexpensive).
WALL PANNO WITH PLATES.
In one German town there lives only a good uncle ... with a very nice business.
And just look what beauty this local craftsman makes with his own hands.
If you take a closer look, it becomes clear that such a panel is easy to make from ordinary materials, glue and good artistic taste. Read more about panels made in this style in our special article on the website Semeynaya - kuchka. ru "Family handful"
WHAT CAN BE REPLACED by banal plates on the walls.
COVERS FROM BOXES ON THE WALL. You can buy several low round boxes - from each such box you get two "pseudo-plates" - one from the lid and the other from the bottom of the box.
Every detail can be paste over the remnants of colored wallpaper, self-adhesive film or corny paint with spray paint.
If in the center of each such cardboard plate you fix a photograph or elements of kitchen utensils- you will get an original design composition on your wall.

STEEL TRAYS ON THE WALL. Instead of plates, vintage trays can just as well show off on the wall.
They can be bought at regular stores, at flea markets, or brought from a trip.
A collection of trays can be assembled very quickly if notify all your friends that in the near future the best gift for you will be a tin tray from the time of our grandmothers.
By the way, this tray is very convenient to attach with magnets various notes and reminders.
SOFT PLATES ON THE WALL OF THE CHILDREN'S ROOM. It is quite natural that where children are jumping and having fun (in the children's room or in the living room on the Devan), it is undesirable to decorate the walls with heavy and hard dishes. For such cases, there are options.
Option one - we take ordinary round wooden frames or round wire rims. Ordinary wooden embroidery hoops can do this very well (you can buy them in the same department where buttons and other sewing accessories are sold). We wrap the frames with an elegant fabric with a pattern and we get a wonderful soft plate.
Option two - we buy foam patterned circles in a hardware store (such circles decorate the ceiling at the point where the chandelier is attached to it). Using spray paint or a brush, paint these ceiling decorations in the colors we need and attach them to the wall.
by the way it will turn out very cheaply and beautifully if cast such circles out of plaster... you think it's difficult ... in a special article I will tell you how, using old plastic cake lids and gypsum powder - you can make these round relief plates.
And if you know another way to fix the plate on the wall - write in the comments about it - and I will definitely tell you about it in this article.
I think this is not overlooking our article on plates, stay with us - we will be a lot of interesting things.
Olga Klishevskaya, specially for the site "Family handful" /Semeynaya- kuchka. ru
Laminate has long established itself as an excellent floor covering. But this material can be used not only for flooring, but also for decorating walls. Walls covered with laminate look great and retain their attractive appearance for a long time (much longer than walls with wallpaper or painting). In addition, decorating the floor and the adjacent wall with the same material allows you to visually increase the space, so this technique is often used by designers, especially when working with small rooms.
As paradoxical as it may sound, putting laminate flooring on the wall is much easier than laying it on the floor. But before introducing you to the technologies for attaching laminate to the wall, we suggest that you learn about the advantages and disadvantages of this decoration method, as well as find out which laminate is best suited for these purposes.
Advantages and disadvantages of "wall laminate"
Laminate - a beautiful and durable wall coveringIt should be noted right away that wall decoration with laminate has much more advantages than disadvantages. For clarity, we have combined both into a table.
Laying laminate on the wall: advantages and disadvantages
| № | Dignity | disadvantages |
| 1 | Laminate is an environmentally friendly product. | Laminate is susceptible to high temperatures. Using it near radiators or hobs is not recommended. |
| 2 | Possesses high wear resistance, therefore, when used on a wall, it "will not be demolished." | Decorating walls with laminate is more expensive than painting or wallpapering. |
| 3 | For wall decoration, you can use the thinnest (and cheapest) laminate, which makes it possible to significantly save money. | If the laminate is attached to the wall with glue, it is necessary to carry out sufficient preparatory work (in the case of defects or irregularities on the walls). |
| 4 | It has many different colors and shades. | It is sensitive to moisture, so its use in the kitchen or bathroom is undesirable. |
| 5 | Can be washed with normal detergents. | |
| 6 | Even strong defects and unevenness of the walls can be hidden with the help of laminate. | |
| 7 | It has excellent antistatic properties and practically does not attract dust. | |
| 8 | The technology for laying laminate on the wall is quite simple and can be done without assistance. |
Which laminate is suitable for wall mounting?
As already mentioned, the thinnest laminate with the minimum level of wear resistance can be used for wall mounting. So you don't have to "bother" with the strength classes of the material, and all your attention can be focused only on its appearance.
When decorating walls with laminate, you can use the most inexpensive options of 21-30 strength classes.
As for the system of locks (it can be glued, tongue-and-groove, click or kleimerny), then when laying a laminate with glue, this parameter is also not important, but when fastening to a wooden frame, it is better to choose a laminate with a click or kleimer system of locks.
 Click lock is most preferred for wall-mounted laminate flooring
 Having decided on which laminate is suitable for wall decoration, you can go directly to the technologies for its attachment. There are two main options for laying laminate on the wall: frame and glue fixing. Let's consider each of them in more detail.
Fastening with glue
By itself, the process of fixing the laminate with glue is the easiest way to install. But you can only glue the laminate on a smooth and even wall (the permissible level differences should not exceed 3 millimeters), therefore, if there are defects or irregularities on the wall, you will have to carry out preparatory work to level it.
 A set of tools for laying laminate flooring can be found in almost every home
 To prepare the wall surface, you will need a "standard" set of tools and materials for filler work.
- dry or ready-made putty (starting can be used);
- primer;
- spatulas of different widths;
- construction mixer (in the case of using dry putty);
- container for solution preparation.
For laying the laminate itself, you will need a relatively small list of materials and tools:
- laminate;
- glue;
Please note that moisture and heat can cause laminate flooring to expand. Therefore, it is recommended to use only high-quality glue or "liquid nails" of well-known brands.
- a hacksaw for cutting laminate (an ordinary hacksaw for metal will do);
- metal square and a pencil for marking;
- a wooden or rubber hammer;
- building level;
- rag to remove excess glue.
Laying technology
The first step is to carefully level the wall with a starter putty. When the putty is dry (usually it takes from 24 to 48 hours), the surface of the wall is primed in order to ensure better adhesion of the adhesive to the surface of the wall.
Laminate - the material is quite heavy, so it is strongly not recommended to neglect the preliminary priming of the wall surface.
When the wall is fully prepared, you can proceed directly to laying the laminate.
It starts from the bottom left corner. Glue or liquid nails are applied to the first panel. Then she is glued to the wall.
 Use only high-quality glue or "liquid nails" for fixing the laminate
 Depending on the brand of adhesive, the panel may need to be removed from the wall after a short pressure and allowed to dry for 5-10 minutes.
Please note that when laying the laminate on the wall, leave a small gap between the bottom row of panels and the floor. To do this, under the first panel, you need to put small (1–2 centimeters) spacers, which are easiest to make from scraps of the same laminate. At the end of the work, the gap between the wall and the floor will be hidden by the baseboard.
Following the first panel, subsequent ones are attached to the wall, the horizontal laying of which is periodically controlled using a building level. The surface of the laminate is tapped with a rubber mallet.
If at the end of the row the whole laminate panel does not fit, then it can be shortened using a conventional metal hacksaw.
Laying the second row begins with half of the panel (it is also shortened with a hacksaw).
 Laminate rows are staggered
 This is done to ensure that the laminate is staggered to give the surface a more attractive appearance.
If you are gluing the laminate without weathering the glue, then after laying two or three rows, you will need to take a break and let the glue "grab". Otherwise, the weight of the upper rows may cause the lower panels to shift.
 It is better to make a frame for a laminate from wooden blocks.
 Fastening a laminate to a wooden frame is a more time-consuming process, but it avoids the need for preliminary preparation of the walls. So if you are dealing with very uneven or deformed walls, we recommend that you use this particular technology. This method of fastening will also be the best option in cases where it is necessary to hide various technical communications behind the laminate sheathing, for example, electrical wiring or water supply pipes.
Required tools and materials
To make the frame, you will need wooden blocks. It is undesirable to use a metal profile, which is excellent for fastening drywall, for a frame under a laminate, since it is not very convenient to fasten laminate panels with metal screws.
Of the tools for installing the frame you will need:
- hacksaw for metal;
- drill or hammer drill;
- screwdriver or screwdriver;
- level and plumb line;
- hammer;
- roulette;
- cord or thick thread for installing "beacons";
- dowel-nails with which the frame is attached to the wall;
- stapler, hammer and level (needed to secure the laminate).
Work begins with the installation of the frame. The frame is installed perpendicular to the direction of laying.
It is good when the house or apartment is tastefully furnished. You come home from work and plunge into a cozy atmosphere. But there are feelings that something is missing, there are definitely places where you need to hang something. Maybe a cabinet, but it somehow does not fit into the interior or does not fit in size. Then the best option would be a shelf. It will perfectly match the general atmosphere in the house and, importantly, will help to save a lot of space.
You can keep various items and literature on the shelves.

After it has completely solidified, a shelf is put on the pins.
You can keep various items and literature on the shelves. They are attached absolutely in any room. How to properly fix the shelf on the wall so that it fits perfectly into the interior? This is not difficult as it might seem. This work will be done by anyone, there would be a desire.
When planning wall shelves, the type of fixing is decisive. After familiarizing yourself with the fastening method, you can easily choose the option that suits you.
With an invisible mount... By choosing this look, you will hide the fasteners, and the wall structure will look light and graceful, no matter what room it is hung in. It is desirable that the wall is concrete or brick. Plasterboard wall partitions less than 10 cm are not recommended.

How to properly fix the shelf on the wall so that it fits perfectly into the interior?

A wide variety of materials can be used for wall shelves.
With brackets... In this case, you cannot hide all the elements, they will always be visible. You can save money by purchasing metal or plastic corners. If you want to add beauty and originality to the interior item, buy decorative fasteners, but always in pairs. It is necessary to consider an important point - the brackets are not suitable for every interior.

They are attached absolutely in any room.

Working with him is not difficult, and he has a small mass.
On glass shelf holders... In such fasteners, rubber or silicone gaskets are used to protect the plane at the attachment point. Shelf supports can be of various sizes and shapes, there are options for suction cups. They are attached from below, while the top surface remains open.

This work will be done by anyone, there would be a desire.

How do I attach the shelf to the wall?
With hinges and corners... This is the most common method - easy, prudent, does not take much time, and will fit into any environment. The format of hinges or corners allows a decrease or increase in the load on the shelf. Fastening to rails or metal posts. Not all types you can apply in practice on your own. In some cases, it is worth contacting specialists.

When planning wall shelves, the type of fixing is decisive.

To hang a shelf on a brick or concrete wall, you need to make markings using a level.
There are a number of points that you need to familiarize yourself with in order to hang the shelf in an invisible way.
- Wall thickness. The installation of the shelf on an invisible mount should be carried out if the thickness of the brick partition is 250 mm, and of the concrete one - 105 mm. If the dimensions are less than the given data, then additional details will be needed. When the wall is made of drywall or cinder blocks, and the thickness does not exceed 100 mm, then invisible fasteners are acceptable if the shelf is used as a decoration and there are light objects on it.
- Shelf thickness. It should not be massive or, conversely, thin. It is desirable that the material does not sag, is dry and has a good finish. If there are light things on the shelf, then the thickness of the shelf should be at least 30 mm, you will store literature or heavier utensils - not exceed 60 mm, but not less than 45 mm.
- Selection of fasteners. To choose the right mount, you need to take into account the second point, and also know what function is intended for the shelf. The invisible mount consists of hinges and metal rods. The loops are attached to the back of the shelf, and the markings are made. Using the necessary tool, holes are made in the wall and a plug is inserted there. Then the screws are screwed in to a sufficient depth and hinges are put on them.
If you are using metal rods, remember that the diameter of the fastener should be 10-12. The first step is to find out what the length and width of the shelf is. Mark this data on the wall, drill holes. The same holes will need to be made on the shelf. The required number of pins will be required depending on the load. They are inserted into the wall half the length of the hole and fixed with glue. After it has completely solidified, a shelf is put on the pins.

After familiarizing yourself with the fastening method, you can easily choose the option that suits you.

We make the necessary holes with a puncher.
Fixing the shelf to the plasterboard wall
There are various types of plasterboard wall mountings. Here are some of them:
- Embedded beams are the optimal variation. Attached directly to the gypsum board when mounted to the wall. The bars of the required thickness are fixed in the place where you will mount the shelves or equipment.
- Fasteners are carried out to the gypsum board. This option is not difficult, since the fixing elements - butterfly dowels, umbrellas, Molly fasteners - easily pass through the plane and screw into the wall.
- Using profiles. In this case, you will need a magnet, preferably a powerful one, this will ensure the strength of the fastening. In the place where the metal profile passes, make holes through and through. The self-tapping screw should be 5-6 mm longer than the thickness of the gypsum board sheet. Then we fix the shelf to the plasterboard wall.
- Anchor fittings. Used to attach shelves that can support a significant weight. Their diameter should be between 6 mm and 1 cm.

Using the necessary tool, holes are made in the wall and a plug is inserted there.

We make sure that the drill and hardware are the same size.
Necessary materials
A wide variety of materials can be used for wall shelves:
- GKL. Designers often use drywall in interior design, especially if shelves made of this material are one of the main places in the room.
- Tree. Most often used for balcony shelves. Working with him is not difficult, and he has a small mass. When used correctly, these shelves can last a very long time.
- Chipboard or chipboard. Moisture-resistant material, withstands temperature changes, wear-resistant.
- Glass. It is very common in use. The glass shelves look very fashionable.
- Plastic. Publicly available material, as it is inexpensive, is not susceptible to mold.
- Metal. When working with him, you will definitely need a welding machine.

Then the screws are screwed in to a sufficient depth and hinges are put on them.

Required tools
Of the tools you will need: a level, a drill, or better a puncher, a screwdriver, dowels, self-tapping screws, a jigsaw, joiner's glue, a fixing set, a set of drills, a pencil, a hammer, and a wrench for anchor bolts.

If you are using metal rods, remember that the diameter of the fastener should be 10-12.

Upon completion of all stages of work, we attach the shelf.
Fastening process: step by step instructions
How do I attach the shelf to the wall? Before starting work on installing the shelf, remember that the holes in the shelf from the back are made 5 mm lower, and also make sure that the holes on the shelf and on the wall completely coincide.

The first step is to find out what the length and width of the shelf is.

Positioning the shelf, align it with the fasteners.
To hang a shelf on a brick or concrete wall, you need to make markings using a level. We make the necessary holes with a puncher. We carry out the work carefully, avoiding chips on the wall. We make sure that the drill and hardware are the same size. Then we attach the fastening elements, we check the building level. We carry out the adjustment if necessary.

The required number of pins will be required depending on the load.

Using bolts and nuts, self-tapping screws or screws, we fix the shelf.
Upon completion of all stages of work, we attach the shelf. If you didn't make it yourself, but bought it in a store, then all the necessary fastening elements are included. Positioning the shelf, align it with the fasteners. We make sure that there are no gaps between the shelf and the wall. Then we mark all the holes with a pencil. Using bolts and nuts, self-tapping screws or screws, we fix the shelf.

They are inserted into the wall half the length of the hole and fixed with glue.

If you didn't make it yourself, but bought it in a store, then all the necessary fastening elements are included.

We carry out the adjustment if necessary.
VIDEO: Fixing the shelf to the wall
The shelves in the interior of a modern room perform two main functions: they become a convenient stand for books, useful items or pleasant knick-knacks, and also help to emphasize the original style. Not only the aesthetic component is important, but also the technical side, that is, the quality of the products and the way they are fixed. Let's try to figure out when it is necessary to use the traditional fastening of shelves to the wall, and when - secret or unusual.
A modern room without shelves seems unfinished: often they are the touch that puts an end to the interior design. If you look into the catalog of furniture sets, you will notice that in addition to wardrobes, beds and dressers, these miniature products are necessarily present there. They come in various shapes, colors and sizes, but always correspond to the general style direction.
Two in one: bright decor and comfortable interior items
Both the visual appeal and functional qualities largely depend on strong and reliable fasteners for the shelves on the wall, so this article will be more devoted to metal corners, convenient brackets for mounting, tricky invisible hooks and hairpins.

Invisible fasteners don't distract attention from the design
When buying ready-made furniture sets, fittings and fixing material are usually supplied in the kit, but often there is a desire to make an original decor with your own hands, and then it is important to choose the correct method of fixing.
It would seem that there is nothing easier than hammering a couple of nails into the wall and hanging a shelf with pre-attached "ears" on them. But not everything is so simple. In addition to the most important task - to find the most suitable place - it is necessary to answer a whole series of questions: what nails, where exactly do you need to attach the "ears", will such fasteners withstand the weight of the structure?

Beautiful metal corners "for forging"
Consider the simplest version with corners. Suppose we have an ordinary wooden shelf - a simple horizontal product without decorative elements. We select the tool and material, guided by the following list:
- metal corner (2 or 3 pieces, depending on the length);
- ruler, pencil, construction tape measure;
- laser level;
- drill and drill;
- screws or dowels.
If the base is wooden, then ordinary nails can be used instead of self-tapping screws.

One of the options for attaching the corner
Instructions:
- Choosing the most suitable place. Try to select an area that is within reach - that is, not too high (a mistake many amateur designers). You should not clutter up a surface that has already been decorated (for example, with paintings or photographs); it is better to choose a free space. We put on the product and see if it fits well into the interior. If everything suits you, go to the next stage.
- We carefully consider the lower part of the board and try to choose the places for the fittings. A set of ready-made metal wall mounts for shelves can be purchased at a building materials store. We attach them to the bottom of the structure: we drill small holes with a small drill and fix the metal elements with self-tapping screws.
- We make the markup. Again, we attach the shelf to the selected place, in the holes on the corners we make marks with a pencil, preferably in each hole.
- With a drill we drill holes in the base, trying to accurately fall into the marks. For concrete slabs, it is better to use dowels.
- We put the shelf in place so that the holes in the corners and in the wall coincide. We tighten the screws, trying to make them fit smoothly and smoothly. The hanging process is now complete.
- We admire the result, arrange toys, vases, books.

Decorative mounts are an additional decoration
Construction Tricks: Secret Fasteners
All kinds of metal corners for wall shelves, convenient brackets, and a building profile are appropriate only if they are correctly selected and fully meet the stylistic features of the room. But sometimes the technical details do not match the environment and you have to go for a trick - use one of the secret fastening methods.

Decorative composition without unnecessary details
There are several generally accepted options for tight abutment and rigid fixation to provide invisible elements. Let's consider three of the most popular ones:
- hidden hinges;
- wooden block;
- metal rods.
The first method is the most popular. Hinged flat hinges are attached to the back of the shelf, then the structure is suspended on pre-screwed self-tapping screws. The main thing is to accurately measure the distance between the hinges, otherwise the extra holes "give out" the technical trick and spoil the idea. We recommend using a building level to level the horizontal.

The second method is threading the base of the product onto strong metal pins embedded in a concrete slab or brickwork. The pins can be pieces of reinforcement or steel threaded rods of the required diameter provided for this. The heavier the product (along with the potential filling), the more studs will have to be screwed into the wall. For guaranteed stability, the cross-section of the fasteners for wooden shelves should not be less than 12 mm, the length depends on the conditions.
The third option is the installation of a bar with a square or rectangular section, which subsequently serves as a base. Masking will take place if the thickness of the bar and the thickness of the shelf hung on it match perfectly. The connecting parts between the two surfaces are pins - wooden pins. To increase the strength, before joining the parts, they are greased with glue.

Wall-mounted set of three different designs
If your interior design did not include the use of additional visible elements, hidden fittings will help out.
Original ways of hanging shelves
Traditional methods are suitable for placing simple, uncomplicated structures in the interior in the form of a single horizontal board or a product resembling a glazed box. However, the imagination of modern designers is so rich that it allows you to create amazing structures in the form of labyrinths, trees, flowers, snakes. Fasteners can be as unusual as shelving, although in some cases the same secret hinges or decorative corners are appropriate.
Consider several options for how you can attach the shelves to the wall if an unusual project is chosen for implementation.
Non-standard interior solutions
Using a familiar object - a 17-20 mm thick wooden board - you can create a structure that is unique in design. Geometric shapes of different colors scattered on the wall, the silhouette of a bat with spread wings, an angular tree branch, a huge spiral - stands for interior accessories can take on the most incredible incarnations.

An original composition from a multi-level shelf in the entire wall in a teenager's room
A very simple but interesting solution is to create a family tree. Shelves-branches on both sides are attached to a vertically located panel - the trunk. The design is so simple that you can build it yourself in one evening. Individual boards are painted in natural colors to match the theme. The fastening material in both solutions remains invisible.

A light and elegant composition of elements of contrasting colors can decorate a kitchen, living room or bedroom. Pay attention to the fasteners: laconic light corners do not spoil the overall picture, as they successfully merge with the tone of the wallpaper. The weight of the product is small, so hidden pins could be used for installation.

Contrast composition
If you use decorative wooden coasters, you get a heavier picture.
Option on leather straps
Sometimes the most surprising are simple solutions, and a couple of improvised parts can be a great interior decoration. A leather belt acts as a fastener for a wooden shelf (a regular polished board). The material of manufacture is not necessarily genuine leather, it can be an artificial analogue or, in general, a wide textile tape. The main quality of suspensions is strength.

Cozy retro composition using belts
Obviously, a horizontally placed plank on suspensions, which is not additionally fixed, will not be able to withstand a stack of heavy books and is not a reliable support for crystal souvenirs. Its purpose is to serve as a decorative wall element, and small souvenirs, accessories, and light items can be placed on it.

The fasteners for the belts are a pair of long screws with plastic dowels, which will be located at some distance above the original decor. The procedure looks like this:
- we paint the boards in the desired color, if it is necessary to preserve the texture, we cover it with varnish;
- we prepare two old identical belts (or new ones bought in a store);
- fold the ends of each belt, trim it, drill small holes at a distance of 2-2.5 cm from the edge;
- using a drill and a hammer at a distance of 60-70 cm, we fix the dowels;
- we attach the ends to the dowels so that the belts in the form of loops hang down;
- insert a board into the prepared loops, align horizontally.
The result is a neat, beautiful decorative stand. You can complicate the composition by building another tier of the same lower or higher.
Caution: fragile glass
Glass plays a special role in the interior. On the one hand, it is a reliable material that can withstand a lot of weight, on the other hand, it is fragile material that can be easily broken with one awkward movement. For shelves, specially tempered, extra strong glass is used, which is difficult to break even with a hammer. We do not recommend forming parts of the required dimensions on our own; it is better to order cutting at a service that deals with glass processing.

Decorative metal brackets for attaching glass shelves
Here's what's surprising: transparent planes create the illusion of a free, uncluttered space, so glass decor is often used in rooms with limited space. To fix the glass panels, special brackets made of metal and plastic are used with soft elastic gaskets on the inside.

Long metal spokes act as fasteners
To carry out the installation, we first fix the brackets: we fix the dowels, insert the screws that come with the bracket into them, not forgetting to put on the washer. We fasten the brackets, check if they are evenly located in relation to each other. We insert the shelf. Sometimes, instead of wall holders, even more curious elements are used - thin metal cables or long pins resembling knitting needles.

Metal cables create a weightless, floating structure
Used materials are used
In interior design, original solutions, creative ideas, fantastic incarnations of seemingly ordinary projects are always appreciated. Using the usual fasteners, but replacing the traditional horizontal line with any object from the environment, you can build an unusual composition that harmoniously fits into the overall style.

Plasterboard box in a polypropylene baguette
The remnants of building materials will be useful to us, for example, cutting off large-section sewer pipes that remained from the pipeline device in the country. We fasten parts of the same length on long hairpins or do without fasteners at all: we tie the pipes with a bundle and set them on the floor.

Cozy storage systems for shoes made of plastic pipes
Old accessories do not lose their relevance, over time moving from the category of fashionable items to the category of vintage ones. It's time to remove the suitcases-travelers from the mezzanine and decorate one of the free walls with them - you get a luxurious decorative composition with a touch of nostalgia.

New life of old suitcases
Even from waste material, you can, if desired, create a masterpiece. After cleaning, polishing and processing, decrepit fruit boxes easily turn into wonderful shelves, with which you are not ashamed to decorate a nursery, hallway or bedroom.

Old boxes - retro style decor
Take a look around - perhaps your gaze will find an interesting object bored in the corner, and your hands will turn it into an unusual wall decor. But do not forget about interesting solutions for fixing shelves to the wall: reinforced wooden brackets, forged openwork corners, barely noticeable pins, hidden pins.
Drywall work: precise and accurate
By hammering nails into wooden logs or punching holes for dowels in a concrete or brick wall with a drill, we know for sure that the fasteners will not fail and will last as long as it takes. But with drywall, everything is more complicated. Convenient, quickly erected interior partitions are not a reliable basis for hanging wall decor.

Backlit shelves inside the plasterboard box
There are two ways to attach the shelves to the plasterboard base. The first is intended for light, small-volume structures, the second - for heavy, weighty products.
To mount a light shelf, you should follow the usual technical procedure: carefully drill the holes, trying not to crumble the material, screw in the dowels, then screws. Reliability can be increased by using special dowels - "umbrellas" or "butterflies".

Butterfly dowel installation diagram
Massive interior items are fixed differently. Their installation must be foreseen even before the construction of the partition. In the places where they will be located, an additional vertical or horizontal metal profile or wooden bars should be installed, to which self-tapping screws or bolts will be attached.

Experts insist on anchor bolts, as they consider them the most reliable for hanging heavy objects.
Interesting videos contain useful information that will definitely come in handy during renovation or improvement.
How to hang a store-bought shelf with hidden hinges:
One of the methods of invisible fastening is eccentrics:
Working with drywall:
As you can see, the variety of fasteners gives you an excellent choice of shelves of all kinds. Knowing the secrets of hanging wall elements, you can independently decorate the room with a new interior item. If, nevertheless, complications or questions arise, please contact professionals who know a lot about fasteners.
Choosing and purchasing insulation correctly is only half the battle. Experts say that in some cases the correct laying of insulation on the walls can bring 90% of the result. This means that if the work is done incorrectly, the effect will be only 10% of the calculated one.
Today, buildings are most often insulated with foam and mineral wool. In this article, we will discuss the features of fastening thermal insulation materials using the example of mineral wool. However, if you are insulating a room with another material, for example, foam or polystyrene foam, the article will also show the general principles of correct installation.
The principles of attaching insulation inside or outside are very similar. However, there are also differences that need to be cleared up.
Installation of insulation on the walls inside is most often done using lathing. This is a frame, in the form of bars, which are attached to the wall, and insulation plates are already inserted into the formed cells.

For external walls, the frame method is used less often. Most often they use a glue-foam or adhesive composition with dowels. The frame from the outside is used only for facing the facade with soft slabs of stone wool in order to reduce the load on the lower rows of insulation. In this case, it is made from a metal profile or a wooden bar.
So, we have identified three ways to fix the insulation to the wall, which can be combined:
- Lathing;
- Adhesive composition;
- Using dowels.
Each of them has its own advantages and disadvantages. Let's go in order.
Lathing
The lathing is used under ventilated facades. This is due to the fact that soft insulation, in principle, is not used for "wet" facades. It does not have sufficient rigidity to support the required weight of the plaster layer.

If you plan to finish in the form of "Bark beetle" or "Lamb", go to the following methods. Sheathing is often used for thermal insulation from the inside. There she fully justifies herself.
So how is the lathing made?
- Necessarily! A vapor barrier film must be laid on the wall, secured with stapling staples;
- The lower plinth profile is screwed on;
- On top of the vapor barrier, with the help of self-tapping screws, a bar with a thickness equal to the thickness of the insulation is screwed. The step of the timber in width should actually be equal to the width of the slab, but less by 2-5 centimeters. Most often they use a beam pitch of 60 cm.
- After that, starting from the bottom into the crate, the mineral wool is laid.
The slabs in the crate should be tight. In this case, the cold will not be passed through the gap between the timber and the stove. But, this approach is not used very often. It applies primarily to wooden houses. Also, soft mineral wool slabs necessarily require not only a vapor barrier inside, but a windproof layer outside. Otherwise the wind will blow. Installing a windscreen is an additional cost, therefore, two other methods of fastening are often used.
Laying the slabs in the crate is the right way when the question arises: how to fix the insulation to the ceiling.
On glue
As the only method of fastening exclusively with glue, it is rarely used and only under ventilated facades. For plastering work, additional reinforcement with umbrella dowels is required. However, this method has its own characteristics that need to be considered separately.
First, there are two types of adhesives:
- Dry mixes;
- Foam glue.
 The dry mix is sold in bags and requires dilution. Glue-foam is sold in cans and does not require preliminary preparation. The latter costs a little more, but the convenience is worth it.
First, you need to level the wall and smooth out all the irregularities as much as possible, possibly by plastering the surface.
Sets the bottom bar, which will be the starting point for thermal insulation. The dry mixture is applied to the board itself.
In the case of a dry mixture, it is necessary to apply the glue to the boards in several pieces and evenly, using a comb, distribute over the entire surface. After that, the insulation slabs are fixed on the wall. Usually, the installation of mineral wool or other materials starts from the corner and always from the bottom row.

Foam adhesive is applied around the perimeter of the board and in several stripes in the middle. After application, press the boards to the plane. The foam hardens from 30 minutes to 2 hours. During this time, it is possible to slightly adjust the position of the slab using a level.
Dry mixes are often used:
- EK THERMEX;
- Ceresit CT 190;
- Ceresit CT180.
Popular foam options:
- Ceresit CT 84;
- Soudabond EASY;
- Insta STIK.
The cost of one cylinder is from 200 to 500 rubles.
We have discussed the basic principles of how to fix the insulation on the wall using an adhesive composition. What exactly to use you can decide by reading a couple of opinions.
When we decided to insulate the facade, the foreman said that he would glue it on the foam. We were outraged, they say, the polyurethane foam is expanding, but he said that he would use glue-foam. I asked which one to buy, a good one or a simple one. We said, "Good." We did not regret it, after 30 minutes after gluing the sheet cannot be torn off. We decided to conduct an experiment and glued signs with the name of the street and the number on it. Everything is holding up perfectly.
With large wall differences, it is recommended to use polyurethane foam, specifically for foam. It is also called "liquid foam". If the curvature of the wall is one to three centimeters, this is not a problem at all. I bought it at Epicenter a year ago, glued the sheet for the sake of interest - a year has passed, everything is holding up, the sheet cannot be torn off. Styrofoam breaks, but holds.
On dowels
In 90% of cases, the fastening of mineral wool and other materials to the wall occurs using dowels.

Described separately.
Now we will just describe the sequence of work when using this method.
First of all, if an adhesive was first used to fix the insulation boards, they must be well fixed. Most often, it is possible to fasten with dowels 2-24 hours after gluing. A more accurate figure can be found in the instructions for the adhesive composition.
- Choosing and purchasing an umbrella of the required length;
- We drill a hole into which the fastener will be driven;
- Insert the dowel into the hole;
- Using a hammer, hammer in the anchor (with plastic nails, you need to be especially careful with effort).
Our sheet is securely fixed.

In the case of laying mineral wool, namely its rigid slabs, on the slabs themselves, you will have to pre-drill not only holes, but also round recesses for the umbrella caps. Otherwise, these hats will protrude above the surface of the insulation, which will create difficulties in the installation of the finish.
We have discussed the most popular ways of attaching insulation to the wall. Thinking about the difficulties and peculiarities of installation, they are increasingly choosing another material for insulation - polyurethane foam. It doesn't need to be fixed at all.
Dowels allow you to attach the material to a brick wall and surfaces made of concrete, as well as wood.
Alternative
Has a very low thermal conductivity. For this property, it is often used in northern latitudes. It is produced in the form of foam and sprayed using special equipment. Such insulation is more expensive, but more effective.

Practical chips
In this short section, we have collected useful, practical tips that will help you when installing thermal insulation.
- If using foam, moisten it with water before applying the foam adhesive. This will improve the adhesion (adhesion) of the foam to the sheet.
- When walls are insulated, there may be a blockage outside - a protrusion in the lower part of the wall of the house. In this case, the plinth profile can be omitted. Just cover the fill with waterproofing to avoid moisture getting into the heat insulator.
- Insulation sheets should always be fastened in a checkerboard pattern. This is necessary for the inconsistency of the seams. Such an attachment avoids cold bridges.
- Do not leave the fixed material on the wall unprotected. Fill up with foam or hard rock wool, or cover the soft boards with a windproof layer right away. If moisture gets into the insulation during the installation stage, the material will do its job very poorly.

We examined the general principles of how to fix mineral wool or other thermal insulation. As you can see, fastening the insulation to the wall is not a trivial task, but it requires some skills.
Perhaps you still have questions, then you are welcome to ask them in the comments.
And one more trick:
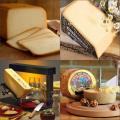 Famous Swiss cheeses Swiss hard cheese for hot dishes
 Swiss cheese Swiss cheese varieties
 The mystery of the death of Adolf Hitler