Aligning walls with their own hands
Not all apartments can boast smooth walls. And if during pasting wallpaper it can be unnoticed, then by mounting the ceiling plinth, all the shortcomings immediately pop up. Most often, this can be found in the houses of the 50-60s buildings. Depending on the degree of curvature there are several ways to align the walls with their own hands. About them and will be discussed in the article.
Alignment of walls of plasterboard
This is the most acceptable version of the alignment of the walls and the ceilings with their own hands. The mounting sheets of plasterboard does not require special skills, and work is done quite quickly. There are 2 ways to do it. If the curvature of the walls does not exceed 4 cm in the level of 4 cm on a 2 row meter, then a faster frameless method is suitable. If necessary, hide communication or additionally insulate the walls during alignment, the framework is mounted.
Before starting work, it is necessary to correctly pick up the material:
- for a residential room with a normal humidity, ordinary drywall with gray face sides are suitable;
- for the bathroom or any other room with high humidity, a special moisture-resistant G Clac with a green face is chosen to align the walls with a green face. It has special impregnations, but it costs somewhat more expensive;
- for the premises to which high fire-resistant requirements are presented, such as a kitchen, it is recommended to stop the choice on the Glevo. These sheets are moisture and fire-resistant, have a green color with red marking.
Technology Aligning walls with plasterboard without frame
When the walls are almost smooth and have minor differences, the stages of work will look like this:
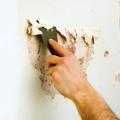
- careful preparation of the base, which includes a complete removal of wallpaper or paint to the layer of plaster;
- it is further recommended to catch up the entire wall, if empties are found or in some places, plaster leaves, it must be cleaned and apply a layer of putty for alignment;
- at the end, remove all the dust from the walls with a panicle or vacuum cleaner. If this is not done, then due to the dust layer, the adhesion of the adhesive composition with the base will decrease;
- now the surface can be rebounded. Since the sheets of GLCs are heavy, it is better to use special primer compounds for concrete, in which sand is present. This will increase the reliability of fastening for glue;
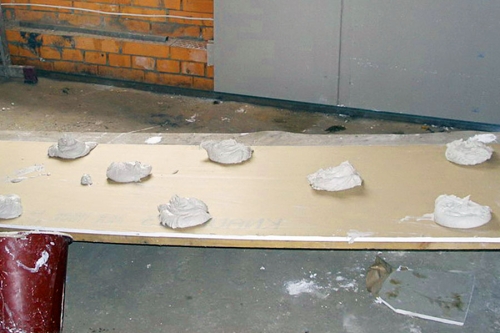
- glue for drywall is always sold in a dry form. Before work, the required amount is bred (for the first time it is better to prepare a little bit) of glue. According to the consistency, it must resemble the adhesive composition for tile, that is, be pretty thick. For the knead, a screwdriver or a drill with a nozzle mixer is used. Before starting work, it must draw in 5 minutes;
- the method of applying glue will depend on what facing material is further planned to be applied to aluminous plasterboard walls. If it is wallpaper, the glue is applied around the perimeter and in the center in small portions. But for finishing a heavy tile with all or a stone, the adhesive composition is distributed uniformly toothed across the surface of the sheet, also pre-apply it to the wall itself;
- the GLC leaf is applied to the wall, aligns and tightly pressed with a neat tapping with a rubber hammer or a fist. Do not forget that this is a fragile material and can be easily crap.
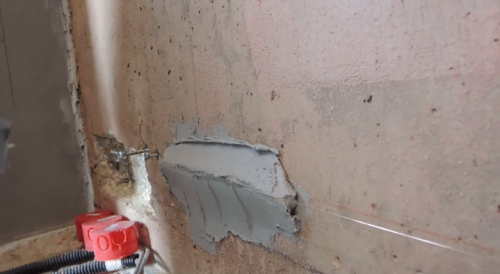
- If there is a socket in the mounting place, then before attaching the sheet, it marks its location. You can cut after fixation right on site;
Tip: Cut plasterboard smoothly and accurately quite difficult, so there are often errors in miscalculations. Such places are best to sharpen with the use of sickle. If the hole is made and not at all in the place, then it is necessary to take it by alabaster.
- At attaching the first sheet in the corner of the room, the second one is mounted to it. They should be placed at the same level. If, when pressed, the glue spoke out of the sheet, it must be carefully considered to carefully clean. There should be no small gaps between sheets.
Alignment of walls by plasterboard with very strong irregularities
In some cases, the walls have significant differences in height, but make the frame of the crates are not possible. For example, if the room is very small. If you do not want to work with putty, you can also contact the sheets of GLC. In this case, the order of work will be as follows:
- in essence, it will not do without a frame without a frame, but instead of a river or profile, whose thickness is at least 3-4 cm, drywall will be used. For this, a sheet with a thickness of 9 mm is cut into strips 10-12 cm wide;
- they are glued vertically in a step of 40 cm. Use preferably the glue of the greatest fixation is applied to it with a thick layer. In the future, it is he who will take over the maximum load. The composition is given time for full grasp - 2-3 days;
- next, the sheets themselves are glued to the finished frame. In this case, it is better to abandon the wall variant with a thickness of 12.5 mm and choose a thinner and light drywall with a thickness of 9 mm, originally intended for the ceiling.
Tip: Despite the seeming lightness, align the walls with plasterboard without a frame is quite laborious and difficult. It is necessary not only to choose the right glue composition, but also gently close all the resulting junctions with putty.

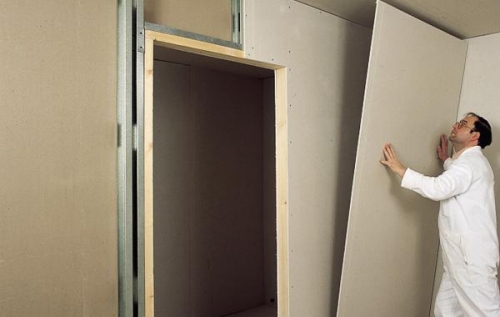
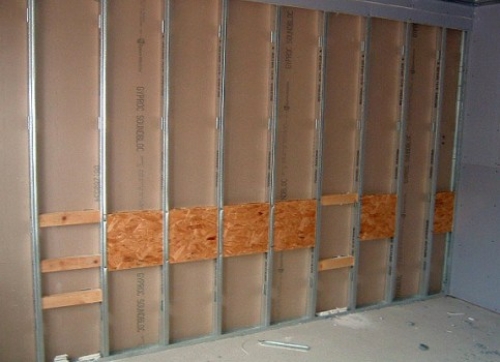
Alignment of walls with plasterboard with frame
- When arranging the framework, the preliminary preparation of the walls is minimized. But it is still desirable to remove all the deployed coating, whether it is the dug-up wallpaper or a creaking plaster. If possible, the walls are treated with antiseptic primers.
- For crates suit both inexpensive wooden slats and special metal profiles. The latter is recommended to use indoors with high humidity. If wall equalization work is made in a wooden house, the frame is fastened with the help of self-tapping screws, a perforator and dowel will be required in the apartment with brick or concrete walls.
- The first profile rail is mounted in the corner vertically over the entire height of the wall. All subsequent arrangements are similar in increments of 60 cm. Such a distance is due to the standard width of the plasterboard sheet of 120 cm.
- On all other walls of the rails are fixed as well. Be sure to make the crate around each window and the doorway in the form of edging. When it is finished on all leveling walls, begin to attach sheets.
- First they put one-piece sheets, starting below. The standard height is 250 cm, for most urban apartments it is enough to make a seamless coating. When the height of the ceiling is higher, then the top is made from drywall, cut exactly in size.
Tip: GLC Sheets around the perimeter have bevelled edges that facilitate their putty. Therefore, when connecting small pieces of materials, we must try that these edges will be at the joints.
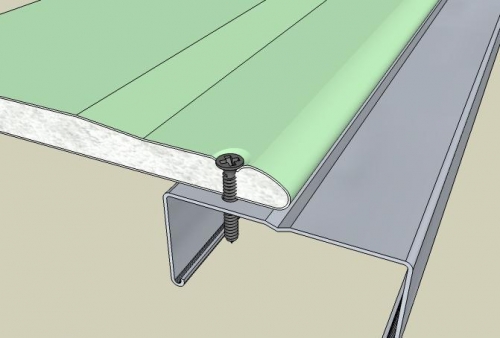
- For fixing, black screws of 35 mm are used in a step of 15 cm in all the slats, which are located under the sheet. In the material they should be included in such a way that the hats are not sticking out, but they did not deepen, but there were exactly the floss surface. When the sheet is completely fastened, you need to check all the screws, it happens that some of them begin to write. In this case, they should be twisted.
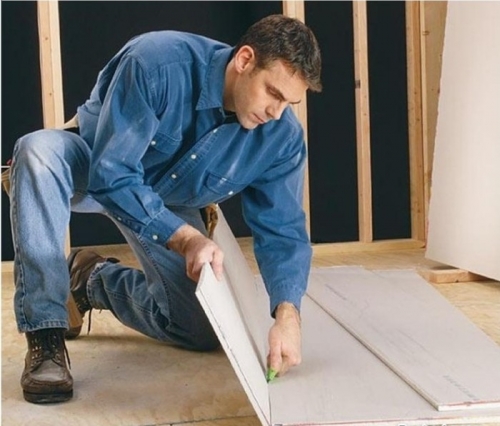
Tip: To cut drywall for sale special devices, but an ordinary stationery knife is suitable for small scales. Initially, the guide is tightly applied (for example, a rail, level) and it makes an even incision to the stationery knife, as much as possible in the material. It is necessary to try to cut through all the plaster through, for this, they wish 2-3 passages with a knife. Then the sheet in this place is slightly pressed and the cardboard side cutting down on the reverse side. As a result of such work, many gypsum dust is formed.
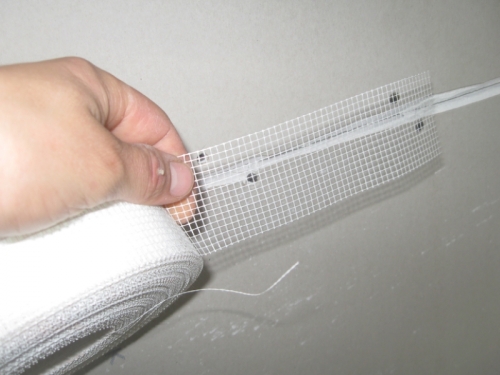
- Attach all the plasterboard - this is only the first stage to equalize the walls with their own hands. Then they are so ground and put only the joints and places where the screws are screwed. For greater strength and prevent subsequent cracking in places of compounds of individual sheets of plasterboard, they are sickled by a sickle ribbon. It deepens into the putty composition so as not to perform beyond its limits. Having finished the work, the composition leaves for a day.
- The finish layer of plaster or putty is applied on the entire surface of the wall. This is a difficult job, in the process that, you need to make an absolutely smooth surface of the whole area of \u200b\u200bthe wall. It is impossible to allow spills or recesses. Even a further slicer of a special grater will not allow them to completely hide them, and they will definitely be shown not only through painting, but even through the textured wallpaper.
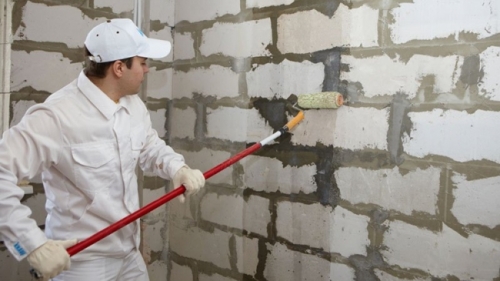
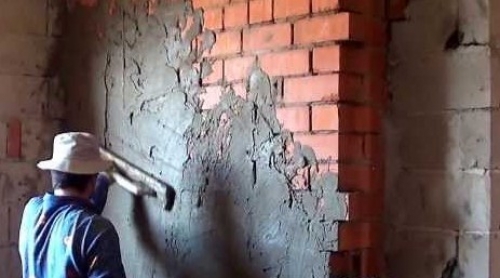
Alignment of walls putty
- Another traditional way of alignment of the walls is with a putty on the lighthouses or without them. It is used in the construction of new brick houses or when repaired in apartments.
- To make work qualitatively, you need to choose the properly to choose a putty composition. They differ in composition depending on the estimated operating conditions. There are two main types: plaster and cement putty. Consider how to work with each of these compositions.
Aligning the surface of the walls of plaster putty
- This is an excellent composition, if you need to align the walls of a small area. This is due to the fact that the composition is pretty quickly frozen and grasps. For this reason, it is still recommended for repair and sealing small cracks or chips, which consumes to close as soon as possible and continue to work.
- It is sold in a dry or finished form. The second option is preferable to those who have little experience in working with similar compositions, and therefore, the rate of application is low. Dry putty must be breeding a drill on medium turnover and in small quantities. After the mixture is shut down, it is immediately applied to the wall. The edges at the same time are completely smoothed, withdrawing to "zero".
- The finished solution is sold in meshes or buckets. No need to keep the entire container open during work, and it is desirable to take small portions into an additional container.
- The spacure on the wall is applied with a thick layer. For this, the spatula takes the mixture and with the help of spraying is attached to the wall. As a result, it should fill the entire wall very tightly, almost without cleansing. And immediately lines with a wide spatula. Movements are made smooth without too much push. It is necessary to achieve smoothness and flatness of the layer. The alignment of the first layer is made horizontally. As a rule, it is sufficient, but if the second layer is required, it is already applied only after the complete pouring of the previous one. Align it already vertically.
- Using the whole composition in the container, it must be cleaned from the residues of the old mixture, otherwise it will turn into solid lumps and spoil the subsequent portion.
Tip: putty has poor adhesion with painted surfaces. Therefore, if the base has an old paint coating, then it is completely believed. If it does not work, then the knife makes as much as possible.
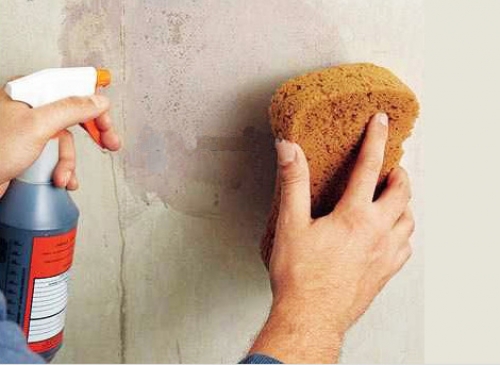
- The masters recommend using it is not good way to achieve the absolute smoothness of spacure walls. To do this, it is wetted from a sprayer or any other sprayer in 15 minutes after the end of the work. And immediately align the metal spatula. In this case, the finishing layer of plaster is no longer needed and you can immediately apply paint or glue wallpaper.
Alignment of the surface of the walls of cement putty
In essence, cement putty is similar to the mortar. But for it only purified components are used, such as:
- small sand that has been cleaned by large particles;
- high quality cement with polymer additives.
All this made it possible to create a solution of high quality and with the desired elasticity. The duration of setting longer than the gypsum analogue, therefore, at a time, it can be treated with a large area, thoroughly align the surface.
Stages of work
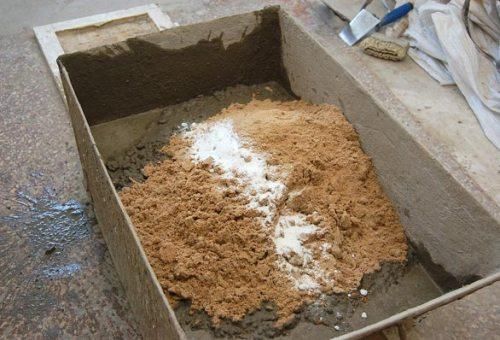
- Cement putty for sale in dry form. To prepare it, you need to take the required amount of clean cold water and pour into it the mixture, without ceasing stirring. You can do it with a drill or manually. If the composition is not done according to the instructions, then in the end it is necessary to achieve a homogeneous mass with a viscous consistency.
Tip: If you want to level a large area of \u200b\u200bthe walls, you can save and prepare a solution yourself. For this, the cement brand is mixed not lower than M400 ¼ part of the mass and fine-grained sand ¾ part of the mass is added to it.
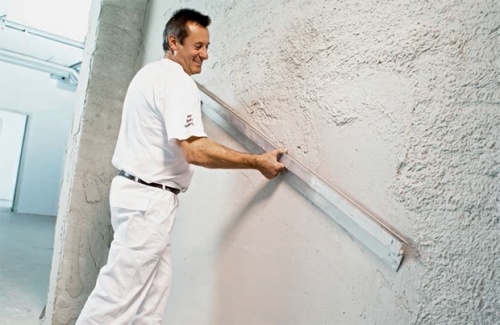
- The walls are processed by primer, and a thick layer of putty is applied to them using spray spray. And immediately leveled with horizontal smooth movements. For finishing treatment, after 20 minutes after the end of the work, it is wetted with water and smoothed by a spatula.
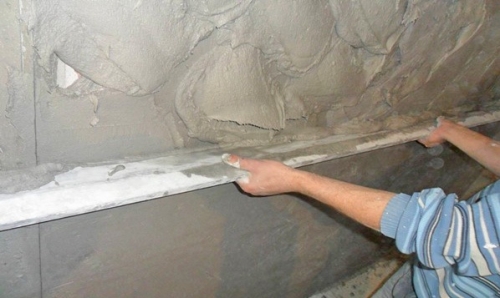
- It is recommended to check the surface of each layer using a level or long rule.
- With the thickness of the spacing layer from 2 to 4 cm, you will need to apply a painting mesh to strengthen. At a layer of 5 cm and no longer do without a special reinforcing net metal mesh.
- The best way to level the walls of the plaster is the work on beacons. Correctly putting them, you can be confident in the qualitative subsequent alignment of the mixture.
Alignment of walls video
Alignment of walls by lighthouses
Materials suitable for lighthouses:
- specially designed metal profiles that are sold in all construction stores;
- to install strings of beacons, a wire or a thin cable is suitable.
Stages of work
- First of all, lighthouses are put. Depending on the selected method, they are fixed on a cement solution or on a self-tapping screw. With this method of alignment of the walls, it is necessary to take care of the smooth rule, the length of which is at least 2 m. The distance between vertical beacons must be less than the selected rule length.
- At the top of the walls are attached to a dowel with the right step, the beacon cable is tied to them. Aligning his vertical with a level, the second dowel is attached from below, and the cable is tightly tensioned between them. This cable will become a guide under which the high-track of the cement mortar is applied in such a way that the string is fixed on it.
- When the solution is completely dry, the cable is cleaned, and the remaining cement solution and becomes a future lighthouse to align the wall.
- Profiles are attached to a similar way. But with the difference that they can not be removed. If it is decided to remove them, the resulting grooves at the end are screaming.
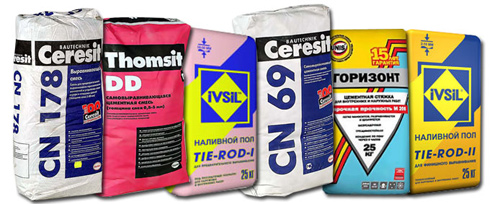
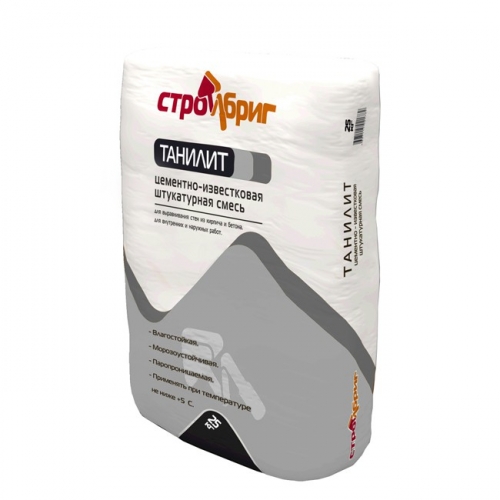
Mixes for alignment of walls
The composition of the mixture for alignment of the walls is distinguished by: cement, gypsum, polymeric or complex. In addition, depending on which grain size in them is used on: concrete, mortar or dispersed.
Until today, the most popular compositions on the basis of lime, sand or cement were the most popular. This is due to their low price, good plasticity and moisture resistance. But they have increasingly began to prefer more modern polymer mixtures that have better characteristics and more universal.
The composition of dry mixes:
- binding components, Functional fillers. Their function is that the solution does not frozen too fast. They also reduce the hygroscopic properties of the mixture;
- cellulosic esters. They must necessarily be present in composition, as they are thickeners and prevent the solution of the solution. To work at negative temperatures, antifreeze components are included;
- modifiers. They are able to dramatically affect the characteristics of putty. For example, increase or decrease the speed of frozen. If working with putty is planned at high temperature, you need to take the composition with an increased hardening period;
- water inhibitors. Thanks to them, plastering formulations for wall alignment have high plasticity without adding a large amount of water. In this connection, the strength of the finished coating is significantly improved;
- polymers. This is the most important component. It is due to him that the adhesion of plaster increases with any surface. In addition, polymer components improve resistance to mechanical damage.
Tip: Choosing a dry mixture for alignment of the walls, you must pay attention to the following characteristics:
- on the size of the sand fraction in the composition;
- on the cement brand. It is indicated by the letter "M" followed by a numerical value. The higher it is, the better the quality of the cement used, but also above its price. To align the walls in the apartment should not be overpacing for M400 or M500, which are designed for bearing walls. It is enough composition with marking M 150;
- for the presence of polymer additives.
Cement-sand mixtures for wall leveling
- In the factory conditions, polymers are always present in its composition. In the manufacture of her houses with their own hands, liquid for washing dishes is added as a plasticizer. The cement-sand composition is universal and is suitable for use in rooms with high humidity.
- For rough alignment, a cheaper mixture with coarse sand is suitable in the composition. To create a smooth surface, you need to choose a finishing putty with sand shallow fraction.
- The main advantages are the low price and the ability to do it yourself, as well as the suitability for a person who does not have experience.
Disadvantages are poor adhesion with concrete base, long drying, as well as a rather high probability of formation of cracks. The composition is viscous and heavy, which makes work with it physically laborious.
Cement-lime mixtures for alignment of walls
- By properties, they are similar to gypsum plaster. Instead of sand, it is used in it, which gives a solution of elasticity, while maintaining its quality.
- Lime prevents the appearance of mold and fungus on the walls and regulates the humidity level in the room. Unlike the previous composition, it hits well with concrete without prior preparation. And if necessary, drill a hole in the wall, will not be folded.
Disadvantages are a higher price than a sandy solution and low compressive strength.
Gypsum mixes for alignment of walls
- This is an excellent option for use on the walls in residential areas with normal humidity. When it is applied, an eco-friendly and vapor-permeable layer is formed.
- In addition to plasticity and convenience in work, it quickly dries out, which reduces the time of repair work, and also has sound and thermal insulation characteristics. Suitable for alignment of walls, where there are differences at an altitude of up to 6 cm.
Nevertheless, high cost, hygroscopicity and rapid grasp make it less universal.
Heat-saving mixes for wall leveling
Today you can find such on sale. This is a great option for apartments in panel houses, where the walls are quite thin and do not have additional insulation.
- The heat-saving plaster is made on the basis of a cement-lime dry mixture with the addition of perlite or polystyrene balls into it. They are suitable for rough alignment and require applying over the finishing leveling layer.
- To achieve the desired effect, a layer of such plaster should be twisted 10 cm. But due to low adhesion, it is first recommended to make a spray. For this, the mixture is breeding more liquid (the consistency of sour cream) and is sprayed onto the walls with a layer of 2-3 mm.
Tips for buying a composition for alignment of walls plaster
- It is better to pay more, but buy plaster well-known manufacturer, who has proven the high quality of its products.
- For alignment of walls from foam concrete, the gypsum composition is best. It quickly absorbs moisture from the applied composition, so at the end of the work on top spray water so that the composition does not crack.
- Although gypsum plaster and cost more, but their consumption is more economical. So, on average, 1 mg of 1m2 walls will require 15 kg of cement composition and only 10 GC of plaster.
- It is not worth buying the entire volume of plaster (if you need a lot). Initially, it is trying to try it and if working with it is convenient, to buy the remaining.
- Improper storage spoils plaster. Gypsum begins to capture too quickly, and cement crawl from the wall when applied.
 Alignment of walls
 Green curtains for calm in the house
 Curtains on the doorway