DIY designer lamps made of wood. How to make a chandelier from branches: master class DIY chandelier from twigs
Wooden objects look very lively, they carry the warmth of nature, and it is very pleasant to create something of your own, designer from them. To create a beautiful wood chandelier, there are a number of nuances to consider.
Features of the selection of branches
- You can collect or cut dry branches for a chandelier both in the forest and in the forest park. The smoothest and strongest pieces of wood are harvested along the coastline, they are saturated with salt, polished with water and can serve as a decoration for a long time.
- It is better to pick dry branches than wet ones (and, accordingly, do it in dry weather). Otherwise, the drying procedure for the branches may take a certain amount of time.
- Take care of nature, do not destroy trees, do not break off living healthy branches. Try to pick up fallen twigs.
- Do not take rotten pieces of wood. Even if they look artistic and make a beautiful lamp, their lifespan will be rather short.
- Before the production of a wooden chandelier, the prepared material should be impregnated with a solution for wood. So the branches will remain in their original form for a long time.
The choice of material for production depends on the purpose and design of the chandelier that you plan to make:
- Floor lamps need a solid foundation.
- Table lamps can be made from anything.
- Hanging chandeliers look light and elegant with intricately curved thin branches.
When the format of the future chandelier is determined, the branches are selected, you can start manufacturing.
Wall or ceiling chandelier picture
- frame with glass of the same size (one side - 50-60 cm, thickness - 5-8 cm)
- LED Strip Light
- led wiring
- plug and switch
- drill
- double sided tape
- wooden rods
- paint (acrylic)
Step-by-step instruction
- Remove the glass and backdrop from the frames, leaving only the frame.
- On the crossbar of the frame, step back 15 cm from both edges and put the serifs with a pencil.
- Drill 8-10 holes between the serifs at an equal distance from each other. To avoid unevenness, markings in the places under the hole will allow. The holes should have a diameter that matches the diameter of the prepared rods.
- Place 2 strips of double-sided tape around the edges of the frame. Glue the LED strip on it.
- Connect the light elements with a cord with an electric plug, do not forget about the switch.
- Since the backdrop of the frame will be visible behind the decorative branches, it must be decorated. The backdrop can be improved by making decoupage or covering it with special paints that add an interesting texture to the material.
- Dry all elements thoroughly and check the light row for functionality. Now the painting lamp can be assembled.
- Insert the prepared branches into the drilled holes. If necessary, trim them to make them look harmonious. Connect the frame to the dried, decorated backdrop.
Such a lamp will look harmoniously on the ceiling above the dining table or seating area, as well as on the wall. If you place the composition in the frame on the wall, as a design solution, you can make a second similar chandelier for the opposite wall.
Chandelier-ball made of branches
The principle of working on such a chandelier is similar to the design of hollow graceful balls of yarn.
Materials that will be needed in the work:
- thin dry rods
- inflatable beach ball
- double-sided tape
- balloon paint
- varnish for wood
- chandelier hanging chain
- wood glue
- cling film
- a pruning tool (such as a pruner)

Step-by-step instruction
- Clean the branches from twigs and leaves, cut them into pieces of the same length, for example, 10-20 cm.
- Inflate a beach ball. Wrap it with cling film.
- Use duct tape to secure the ball in the foil to the work surface so that it is stable.
- Lay the twigs on top of the ball, coating them with wood glue. It will turn out beautifully if the branches do not protrude more than 3 cm from the surface of the ball.
- Wait at least 5-6 hours until the glue is completely dry. Then remove it from the tape and turn it a little to the side. Reattach with tape to the work surface.
- In the same way, continue to glue the branches, leaving only a small window measuring 10 by 10 cm uncovered. It will serve as a hole for installing the lamp and socket on top of the chandelier.
- Leave the chandelier for a few hours until it is completely glued.
- The base - the ball - should be blown off (or cut) and removed from the almost finished chandelier through the mini-window created in the branches.
- The chandelier can now be spray painted or varnished. However, you can decorate it in any way.
- Attach a chain to the product and secure it to the ceiling by threading the socket and lamp inside the ball.
When choosing a light bulb, you should be careful - the tree is fire hazardous. Therefore, it is necessary to choose a lamp that will not heat up.
Other types of wooden chandeliers
The easiest to manufacture and assemble is a pendant lamp made of driftwood. It is also called a branch chandelier. One large snag is taken as a basis, which is decorated with graceful light bulbs. They look like fruit or are set on driftwood in simulated candlesticks.
The main difficulty is how to disguise the wiring in the snag.
Stages of work
- For assembly, cut the selected large snag from the bark, dry it and grind it with sandpaper.
- Choose suitable sized energy-saving bulbs that will not heat up the chandelier.
- Make thin cuts in the driftwood using a drill. You will place the wiring in them, and then mask the holes with putty.
- Install the lamps on the branches of the structure. They can either hang freely from the branches or be placed on top of the shades.
- Such a branch chandelier can be decorated with interesting wooden toys, Christmas tree decorations from Soviet times, old beads, chains, rhinestones - whatever.
- The structure is fixed to the ceiling with screws or a chain.
An interesting option is a wheel-shaped chandelier. For the manufacture of this type of lamp, a wheel should be made, which will determine the diameter of the supporting base. The wheel should include at least 2-3 layers of sheets connected with self-tapping screws. After marking the center and rim of the wheel, carefully cut it out.

A structure is assembled using copper wire, ceramic lamp holders and bolts for hanging the chandelier. Place the wiring between the sheets or at the top of the rim.
Even the most unusual do-it-yourself wood chandelier is easy to create.
It takes a minimum of tools and a little imagination to turn a piece of wood into a beautiful lighting fixture.
See below for crafting options and creative ideas for your unique interior detail.
Like any handmade product, a wooden chandelier has a number of features. They can be decisive when choosing such a model, therefore, before making a homemade product, you need to take into account the factors that affect its suitability for use in the existing conditions.
Advantages and disadvantages of the material
 The wood has a characteristic pattern that emphasizes the natural origin of the chandelier element. Each wooden product brings a special coziness to the interior and contributes to the creation of a homely atmosphere.
Lamps made of wood are appropriate in austere modern and classic interiors. Country-style and rustic design will be incomplete without them; wooden elements are also necessarily present in any ethnic design. Even a youth loft does not look very comfortable without them.
Heating from the proximity of the lamp, the wood gives off odorous substances and useful resins. When using conifers, the lamp will act as a fragrance and germicidal lamp.
Among the disadvantages:
- fire hazard of the material;
- the ability to darken and easily get dirty;
- susceptibility to damage by insects;
- unsuitability for use in rooms with high humidity.
Ease of handling
 Using waste or already partially processed material (branches, boards, plywood trimmings, etc.), you can get by with a minimum set of tools. When making homemade products, most often you only need cutting devices (jigsaw or hacksaw), as well as material for grinding (sandpaper). To attach parts to the base or suspension, you need to prepare a drill and attachments.
Peculiarities
Taking into account the shortcomings of wood, when designing a luminaire, it is necessary to provide for measures to protect it from the effects of unfavorable factors:
- you can reduce the fire hazard by using LEDs or low-power incandescent lamps, daylight, etc.;
- even when using a highly heating lamp, you can remove the wooden elements from it as much as possible, make the chandelier more voluminous or fix the heating parts of the structure on a long wire;
- Stains, impregnations, varnishes, etc will help prevent darkening and make the lamp easy to clean and more resistant to moisture;
- you can protect the product from insects with special preparations.
How to make a wood chandelier with your own hands?
Before you start making a ceiling or wall lamp, take care of a reliable suspension for it. In this capacity, you can use chains or rods from an old chandelier, strong cables and bolts with a ring or hook that will support the weight of the finished structure.
From driftwood

A beautiful snag, a thick bough of a fancy shape, snag, etc. natural materials are easy to use to create an unusual piece of furniture even without preparation. The remains of trees thrown ashore are especially good for this: they have a special surface texture, they look polished. In a forest or park, your own garden, it is easier to pick up large branches or root parts of trees turned out of the ground.
Read also Choose the right LED stretch ceiling chandelier
From the branches
Thin branches as a material for a lampshade can not always be used. They will go well with decor elements in rustic or rustic, fabulous styles. Any product of them in strict styles (hi-tech, minimalism, etc.) is inappropriate. But in a classic or Victorian interior, neatly woven lamps can be used without giving them a central place. Exquisite wood creations and Art Deco style are well combined.
 Photo from Instagram. Author azarechenskiy07 Photo from Instagram. Author mozhzhevelnik13
From planks
Edged and unedged board - material for any country, rustic, ethnic style. A well-crafted, smooth polished plank base will successfully fit into a minimalist interior, and even a modern high-tech design in combination with shiny metal and technological lighting elements.
A board with a slight processing, with left burrs and sawing marks, is appropriate to use in a youth loft-style setting. It can be combined with a metal suspension (cable, chain, piece of mounting profile, etc.), and with deliberately highlighted electrical wiring. In the latter case, the lamps are often suspended from long lengths of electrical cord.
Plywood
Plywood is the most affordable and easy-to-process material. A jigsaw is used to cut it. Using this tool, it is easy to cut out parts of any configuration from a thin sheet. But all plywood products have limitations in their use.
Even the most beautiful and neat ceiling or wall lampshade looks simple and naive. It cannot be used to decorate a classic interior. But in a strict minimalist or high-tech style, thick plywood can be used as a replacement for board bases for fixing lamps. In these cases, use high-quality material at least 2-3 cm thick, carefully grinding all its edges. The product must be covered with transparent varnish.
 Photo from Instagram. Author homelight.com.ua
  Photo from Instagram. Author designshop.kz Photo from Instagram. Author moikukorall
Waste plywood material (boxes and scraps) are good for loft, country, Provence style. You can make a beautiful wall light out of them by simply placing the lamp inside the drawer. The trims need to be finalized, giving them a convenient shape, and then connected by sawing grooves in the right places. You can arrange the elements randomly: if they have complex shapes, you get an unusual design thing.
From a log
A solid or sawn log is used in much the same way as a snag or an untreated board.
A rough and massive lamp suitable for rustic styles and any rustic, chalet, Scandinavian and other interiors using natural materials.
A beautifully crafted saw cut can find its place in Art Deco and minimalistic surroundings.
Simple homemade wood chandelier: instructions for making
A step-by-step master class will help you make a lamp from driftwood or any large, untreated piece of wood:
- it is advisable to immediately remove the integumentary tissues (bark, root shell), since pests most often live under it;
- polish the surface, revealing its texture and pattern (you can use a brush with metal bristles to get the effect of a driftwood);
- cover the workpiece with wood oil, wax, varnish (optional).
Read also 5 ideas on how to make a chandelier for a nursery
After the master has determined the best location for the workpiece, you need to mark the suspension mounts. Determining the desired points can only be experimentally.
Attach the cartridges to the bottom of the driftwood, directing the flow of light downward, or do it at the top. When the lamps are placed overhead, they will give diffused light reflected from the ceiling. When installing the cartridges, the electrical wiring is also performed, connecting the lighting elements in parallel. When 1 lamp burns out, the rest will not go out.
To make the connections secure, use a mounting block. It and the wiring should be masked in a recess in the driftwood body.
To isolate the electrical part from wood, you can use mounting boxes, which are easy to hide in the recess and secure with glue.
The part of the wire that will connect the chandelier and the wiring outlet on the ceiling is passed through a chain, rod or decorated, imitating a suspension.
Hang the finished chandelier, eliminate flaws and distortions. Connect the mains lead to the chandelier wiring through the socket. Insert into the lamp holders and turn on the chandelier.
Manufacturing option in the photo:
 Photo from Instagram. Author creative.product
  Photo from Instagram. Author creative.product
  Photo from Instagram. Author creative.product
  Photo from Instagram. Author creative.product
A wall sconce is made in the same way, but to connect to a network, you can use a connection through an outlet.
Design options for wooden lamps for various room interiors
In order for the product to look harmonious in the interior of the room, you need to correctly arrange its main part:
- in any semi-antique style, chipped or cracked boards and cuts are appropriate, they are tinted, they give texture by removing soft fabrics with a steel brush, varnish and create lacquer scuffs, use candle-shaped lamps;
- rustic, antique, fairytale styles will be combined with lamps made from cart wheels;
- the remains of a beautiful service fixed on a wooden board or ceramic pots used as lampshades for lamps will fit well into Provence and country styles;
- for a minimalistic design, make a base of saw cut or plywood without unnecessary decor, and place the lamps between the ceiling and this screen;
- a high-tech lamp made of wood is a combination of a rectilinear shape (bar, board) and shiny elements (rods, lampshades) made of chrome-plated metal.
 Photo from Instagram. Author designshop.kz
  Photo from
Do-it-yourself exclusive wood chandelier will become a worthy interior decoration. An unusual wooden lamp is selected taking into account the style of the room. The variety of ways to decorate lighting fixtures is amazing. It is not at all necessary to purchase expensive models from renowned design specialists. It is quite possible to assemble an original wooden chandelier with your own hands. The proposed ideas will facilitate the choice of the shape of the wood luminaire.
Everlasting classic
Massive wooden ceiling chandeliers appeared at the dawn of the 16th century. Most often, tree branches served as the main one, the edges of which were crowned with candles. The castles of wealthy gentlemen and churches were the main sphere of application of peculiar lighting devices at that time. But if earlier wooden chandeliers performed a purely practical function of lighting, now more attention is paid to appearance from the position of decorating a room.
The emergence of new practical materials and the development of technology have not diminished interest in natural sources. The tendency to take care of the environmental friendliness of surrounding objects and one's own health is one of the reasons for the growing popularity of wooden chandeliers.
Attention! The variety of forms of execution of lamps made of wood makes it possible to use them not only in traditional rustic styles, but also harmoniously integrate them into more modern interior trends.

For country and chalets, semi-antique wooden chandeliers are still relevant. Adherents of a brutal interior can easily assemble a simple chandelier with their own hands, where a powerful wooden beam acts as a frame. For fans of original configurations, the designers have prepared a lot of interesting ideas, and many ideas can be realized independently.
Concern about the high cost of a chandelier is justified only when choosing complex configurations where jewelry work is required to process the array or additional expensive materials are present. In most cases, the price is in the budget category.
A variety of wood chandeliers are presented in the photo:


Advantages and disadvantages of wood lamps
A wooden lamp is always stylish. It will not be difficult to purchase a ready-made model. But if a decision is made to arrange a wooden chandelier with your own hands, it is better to familiarize yourself in advance with all the positive and negative aspects of such a choice.
Main advantages:


The many advantages of chandeliers are overshadowed by some disadvantages:
- Initially, wood belongs to flammable materials, therefore it needs special processing. Flame retardant and insecticide protection will prevent the fixture from catching fire or damaging the frame by insects.
- If you want to do it yourself or buy a chandelier made of oak or mahogany, you will have to part with a large amount.
- The use of insufficiently dried wooden blanks in the work or poor-quality preliminary processing of the material will lead to deformation of the chandelier.
- Even in spite of reliable protection, the use of wooden luminaires in rooms with high humidity levels is undesirable.
Attention! When designing a lighting device, you should think in advance about the type of lamps used. For these purposes, LED spotlights or fluorescent lamps, which are not prone to heat, are optimal.
Wooden ceiling chandeliers of various models are shown in the photo:


Antique chandeliers
Semi-antique wooden lamps can be roughly divided into groups according to the category of complexity. Some are presented in simple forms and are available for making with their own hands, even for novice craftsmen. Others are complex and require specific woodworking skills and special processing tools.
Studying a wide range of models will give an idea of the possible options for decorating a room with a wooden chandelier.
Simple geometric shapes, connected by chains and decorated with spotlights, are quite possible to assemble on your own. The deliberate roughness of a wooden chandelier will look actual in a village hut, a simple country house.

Another original wood chandelier model that showcases the simplicity of the rustic style. Light ropes, contrasting in color with dark wood, give the lamp a zest. The configuration is ideal for DIY assembly. A suitable setting for such a lamp is a country-style interior.

Another example of a laconic wood chandelier, which does not require significant efforts to make it yourself. A couple of bars, a small piece of chain and 4 LED lights - and the main part of the kit is already at hand.

Artificially created contrasting veins are part of the designer's intention. You can assemble a similar model of a wooden chandelier in one weekend. The only thing that should be taken care of in advance is to find suitable shades, classic glass will be inappropriate here.

Working on the numerous plafond strips can take a lot of time and effort, therefore, with insufficient experience, it is better to purchase such a lamp made of wood ready-made.

The chandelier, where wood, metal and glass are harmoniously combined, invisibly plunges into the atmosphere of the Middle Ages, where you can meet a knight in armor along the dark corridors. Such a lamp will ideally fit into the interior of a spacious living room of a country house or a cafe, where the theme of antiquity is interestingly played up.
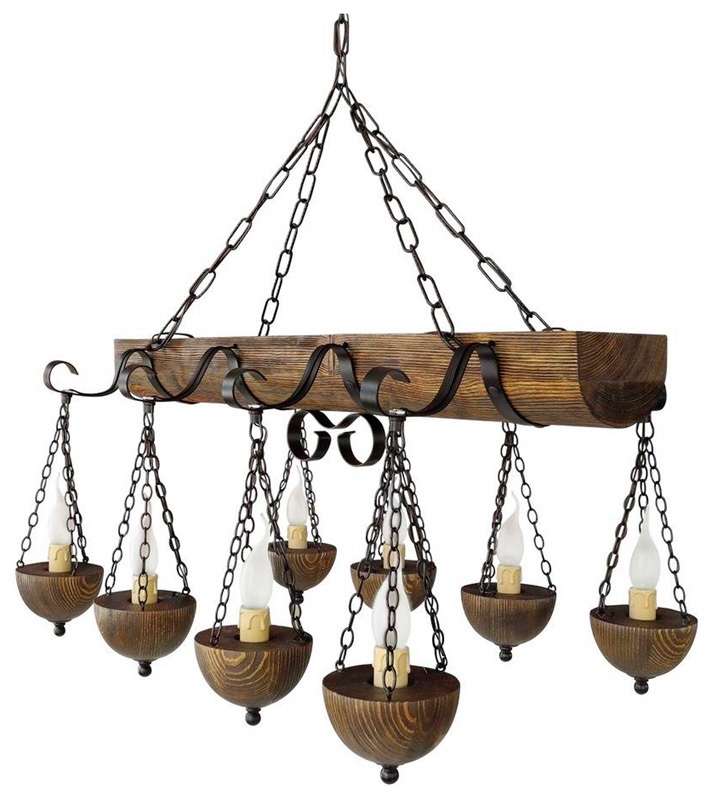
Candle-shaped lamps most closely match the theme of antiquity. A wooden ceiling chandelier with numerous hanging elements is able to dispel the darkness even in a large room. If you have experience with metal, such a wooden model can be assembled with your own hands.

Another example of the original designer's idea, where objects familiar in everyday life become an accent element of the interior. A hunting lodge or rustic tavern is the right place for a non-trivial wood chandelier.
Comment! These wooden models on chains are best hung in rooms with high ceilings. The standard height of 2.5 m will not be enough.

Peculiar torches are another easy way to find yourself in the atmosphere of the Middle Ages. The decoration of the lamp made of wood with metal and the lamp in the form of candles fully correspond to the idea of antiquity.

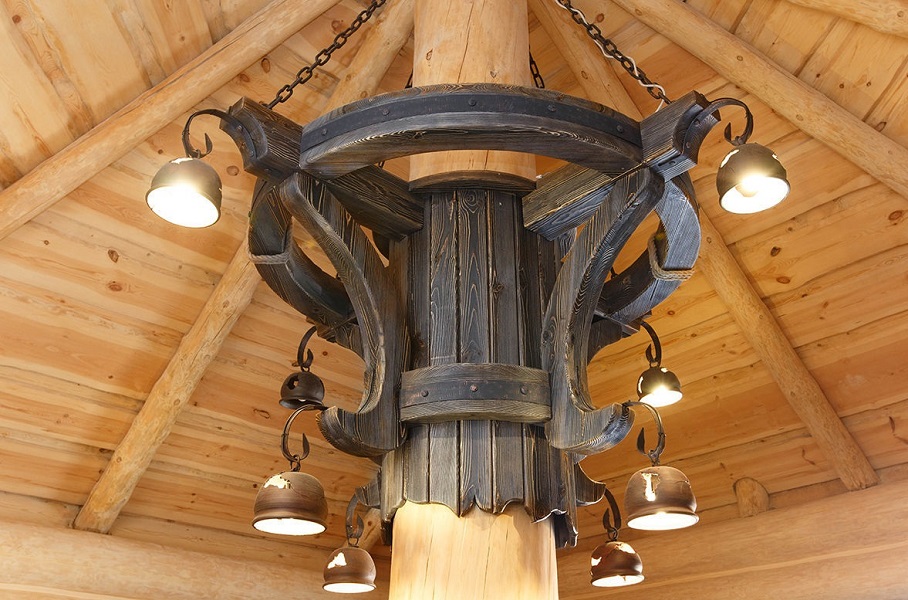
The wooden chandelier, where the frame resembles the steering wheel of a ship, looks more sophisticated than previous examples. Such a model made of wood will harmoniously fit into an interior with a Mediterranean style. It will be difficult to translate the idea into reality with your own hand due to the presence of small details and glass shades.
Experienced craftsmen will be able to master the manufacture of such a wood chandelier. The luminaire is ideal for interiors dominated by eco-style.

Horns of wild animals as the frame of a wooden chandelier - what could be more interesting. It will be difficult to find such a base, therefore it is better to satisfy the vending idea with a ready-made copy of the lamp.

The section of semi-antique wood chandeliers is completed by a photo of a kind of combined copy of the two models presented earlier.
Original design ideas
Country, chalet, eco style - not all areas where wooden lamps are applicable. Art Nouveau interiors often include non-trivial solutions to familiar household items. This tradition extends primarily to chandeliers.
The place and suitable design for the original models presented below will be determined by everyone independently.

The laconic outline of a wood chandelier, crowned with LED lamps at the edges of the branches, is ideal for an interior where minimalism and functionality are at the forefront.

The complex-looking geometry of the next wooden lamp is quite simple to do it yourself. LED lamps and bars corresponding to them in length are the main parts of a non-standard wood chandelier.

Another example of a laconic and at the same time original form of a wood lighting fixture. Here you will need to prepare in advance the grooves in the wooden planks for laying the electrical cable. Lamps of a different shape give a completely different perception of the chandelier than in the previous sample. The undoubted advantage of both wooden models, which can be easily assembled with your own hands, is the ability to illuminate a large space around, so they are ideal when arranging a terrace or gazebo.
Another wooden specimen intended for outdoor use. The unusual shape of a wooden chandelier is fixed on a pole and gives full illumination of the surrounding area.

A real wooden masterpiece, appropriately complemented by glass inserts, will adequately decorate the most presentable interior. Scandinavian style or other eco-style will organically accept a sophisticated wood chandelier.
An identical smaller luminaire model is suitable for the interior of a small room. This can be a kitchen or a children's room.

Returning to the topic of geometry, I would like to present another uncomplicated and at the same time interesting specimen of a wooden chandelier, which will not be difficult to assemble with your own hands.

An unusual combination of an openwork base, complemented by matte shades. Such a chandelier made of wood and glass will not go unnoticed and will successfully act as an accent element of the interior.

The luminaire made of metal and wood is characterized by high functionality due to the ability to adjust the direction of the light flux. The idea is difficult to execute with your own hand, so it is better to stop at buying a ready-made copy.
DIY wooden masterpieces
To assemble a wooden chandelier with your own hands, experience with wood will not be enough. You will also need basic knowledge of electrical engineering. As a basis, you can take a finished model made of wood or develop your own original design. Depending on the skills of handling metal, they select exclusively a wooden lamp or a lighting device supplemented with metal elements. The photo gallery will once again demonstrate the possible options for making a wooden chandelier with your own hands.


Wooden chandeliers are a stylish element of the interior, which is suitable not only for rustic design trends with a national flavor, but also for modern room design ideas. Country and chalet, Scandinavian and eco style, modern and loft - you can choose the right model of a wooden lamp for each style.
To create a comfortable and cozy atmosphere in a living space, you need to organize high-quality and technically competent lighting using various devices.
For fans of original solutions, we recommend that you pay attention to wood lamps that you can make with your own hands. Recently, such products can be found in various cafes, catering establishments, museum and art galleries, and other public places.

Features and practicality of wooden lamps
Natural wood is characterized by high aesthetic properties. This is an excellent raw material that will allow skilled craftsmen to bring their wildest fantasies to life. Nevertheless, against the backdrop of numerous advantages, the possibilities of using wooden products are limited by some of their disadvantages.
First, about the merits:
- Easy to operate.
- Environmental Safety. Even when exposed to high temperatures, no toxic substances are released. The use of natural wood can have a positive effect on a person with chronic respiratory diseases. This is especially true when using products from coniferous trees.
- Wood is considered a pliable material from which various works of art can be created. The versatility of this raw material allows it to be used for the manufacture of products of various configurations and shapes that will fit into any interiors.
- Natural wood can be used in combination with plastic, metal or glass.

disadvantages
Despite its many advantages, the tree has several disadvantages:
- This is one of the most flammable materials, so it is not recommended to use it in rooms with sources of fire - fireplaces, burners, etc. To increase fire safety, wood is covered with special protective equipment that prevents combustion and ignition.
- Without a protective coating, wood will remain sensitive to sudden changes in temperature and high levels of humidity. This imposes other restrictions on wooden luminaires associated with use in bathrooms and kitchens.
- Wood is home to a variety of small pests, including termites and bedbugs. To protect against them, it must also be covered with protective equipment.
It's important to know! The insensitivity to temperature changes explains the fact that ordinary filament lamps cannot be used in wooden luminaires. Ideally, these should be LED products, less often fluorescent or halogen lamps.

Styles and shapes used
Any lighting device, regardless of the material of manufacture, according to the method of installation and application, can be divided into three main categories:
- suspension;
- point;
- ceiling.
Pendant lights are considered to be more common as the antiquity and retro style has returned in recent years. A wooden ceiling chandelier is suitable for use in spacious rooms and living rooms, while spotlights will look perfect in small sizes with low ceilings.
The main style directions when creating the interior of a room and lamps:
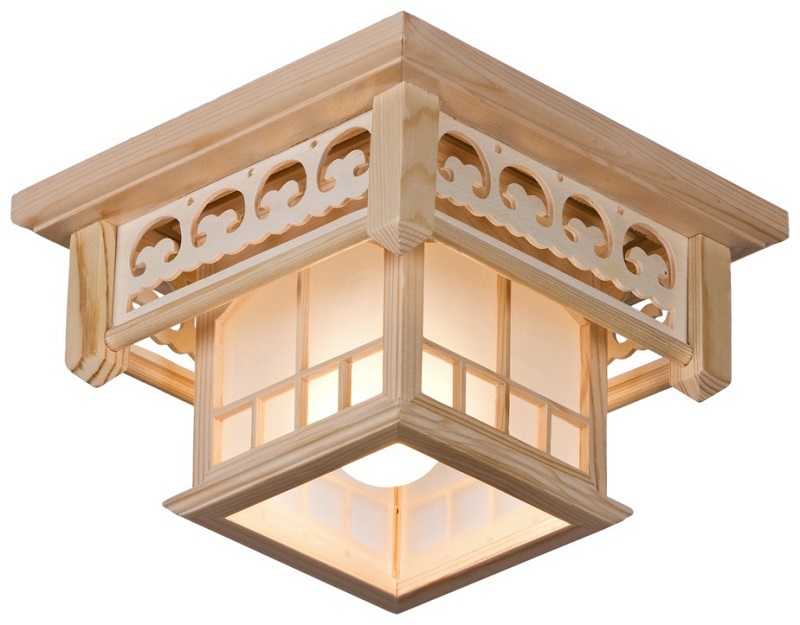
- The oriental theme implies the use of natural wood or solid wood that does not contain minor impurities. Designers try to observe clear geometric shapes, straight lines, decorating devices with patterns characteristic of Eastern culture.
- Products in the "country" style look as simple as possible, and sometimes rude. But with proper operation and choosing the right interior, the lamps look beneficial, increase comfort and create a spirit of unity with nature.
- Retro. It is possible to manufacture extravagant lighting fixtures that were used in the old days.
- Modern - modern lighting fixtures in which they try to combine wooden and forged elements, including lattices and patterned structures.
- Chalet implies the use of only natural wood, according to the idea of the product should enhance the unity with nature.
- The classic style can be attributed to the secondary branch of retro. The luminaires are characterized by flowing lines and graceful shapes. In the manufacturing process, wood and stained glass are used.

Wooden lighting fixtures can belong not only to different styles, but also be made in one form or another. The most popular ones are:
- The lamp-wheel has been gaining popularity among connoisseurs of antique interiors in recent years. It is attached to the ceiling on beautiful chains or slats using special candles (bulbs resembling these products in shape). Light sources are often used in luxury castles and antique-style restaurants. Provide uniform illumination throughout the entire space of the room.
- Large beam with candles. For its production, an ordinary solid log is taken, which is suspended from the ceiling on a chain. The device will be an excellent element for the decor of living rooms, bedrooms and dining rooms, but in the kitchen and other small rooms, the lamp will look too bulky.
- Hanging chandelier made of boards tied with ropes. Usually made in conjunction with matte shades, made in a simple design. It can be supplemented with various decorative elements - everything is limited only by the author's imagination.
- A tree root lamp is an unusual option, which is created using dry tree roots and ropes. These lighting fixtures can be used in conjunction with a wooden clapboard, but it is important to take into account a small nuance: the operation of light sources with a minimum operating temperature is required, since they are in close proximity to the wooden walls of the product.
- A bar made of wood with several pots or lamps. An original solution for a ceiling chandelier.
- Children's lamps, shaped like animals, stars, balls, vehicles, etc.

Varieties of lamps
The variety of wood fixtures is not limited to the models listed above. The main limiting factor in their creation is the author's imagination. Several simple and most obvious solutions that can be taken as a basis in the manufacture of these lighting fixtures:
- A tall floor lamp can be crafted from wood slats. Usually the product is installed in the center of the room or in some visible place.
- Wooden body made of thin sheets of pressed veneer with a non-standard shape.
- Small wall lamp made from sawn timber.
- Floor lamp from an old pallet. Simple yet extraordinary product. For its production, you can take a glass jar and a sawn pallet.
- U-shaped lamp made of wooden slats, which can be decorated with a variety of woven materials.
- Small pieces of wooden pallets can be used to create small table lamps.
- A wooden box can serve as a frame for a chandelier, under which several frosted shades are hidden.
- You can take an ordinary wooden snag, treat it with protective materials and build in neon light sources. The result is a wonderful desk lamp.
- Luminaires are also made from small hemp, which is usually not processed. The end result is an attractive, romantic option.
- An old tin can, two small boards. And nothing else is needed to create an extraordinary, simple and functional device!
- A wooden driftwood can act as a candlestick for a lamp that simulates a candle.
- Thin pressed sheets can be used to create a chandelier with shades that resemble flower buds.

DIY designer lamps
We offer you options for self-production of various wooden lamps, starting from the preparation of materials and ending with step-by-step instructions.
Preparation of the necessary materials
Wooden lamps can be made from a variety of raw materials: parts of a tree (rhizomes, stumps, branches, snags), processed wood (boards, plywood sheets, veneer), etc. The final choice depends on what idea you decide to bring to life. On the other hand, it is important to properly process any material and prepare it for use:
- dry the wood well;
- saturate with special substances that increase fire resistance and protection from insects, mold;
- when choosing a material, carefully inspect it and make sure there is no decay;
- in the process of creating a lampshade, use original cartridges, glue the parts with epoxy resin.

What lamps to use
Wood is a highly flammable material, which makes it possible to use certain light sources. It is strictly forbidden to use lamps with a filament, because when glowing, it emits a huge amount of heat, heating not only the cartridge, but also the wood.
On a note! Ideally, you should use LED lamps and strips, most of which emit a "cold" white glow and practically do not heat the product frame. Today they are the safest elements from a fire point of view.
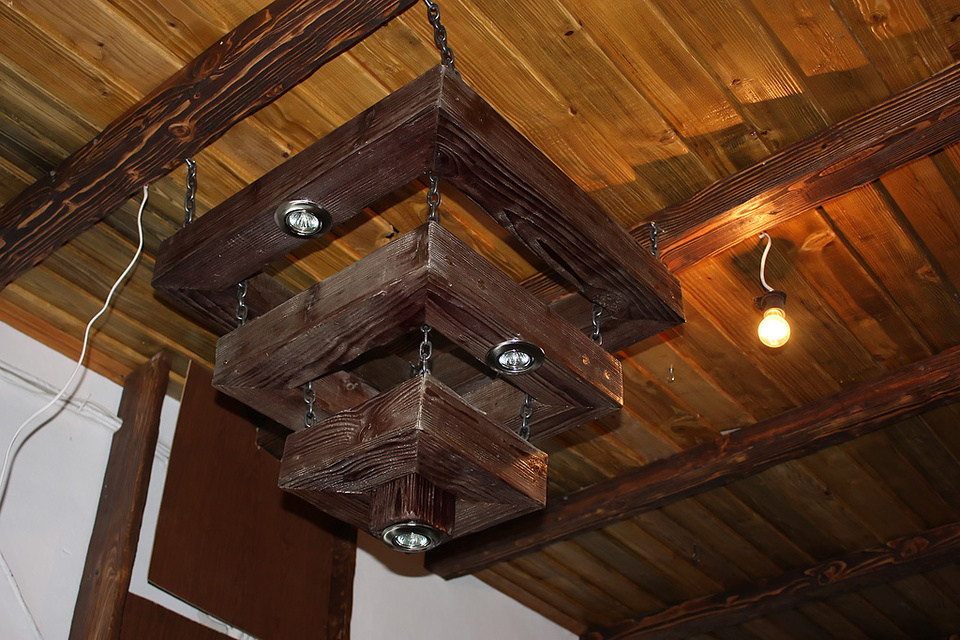
Master class: lamps from boards
For the production of such a chandelier, you can take several square bars (up to 100x100 mm). The specific dimensions depend on how large the final product should be. Apart from them. a mirror will come in handy. Any work is recommended to start with a sketch of the future chandelier. Be sure to include actual measurements.
The further process is as follows:
- Stock up on four similar sized sticks.
- Form a lock on the edge of each one. On one side there should be an empty rectangular depression, on the other there should be a convex central part that will go into such a depression. To do this, you need a jigsaw with a wood saw.
- Assemble the structure together, be sure to glue the parts together. Paint the desired color over the frame.
- Moving from above, guide the cable and install the holder on it. Fix the last element to the inside of the frame using special brackets.
- At the top, install a mirror piece that will reflect the rays of light in the desired direction.
- Build a hanger from a chain.
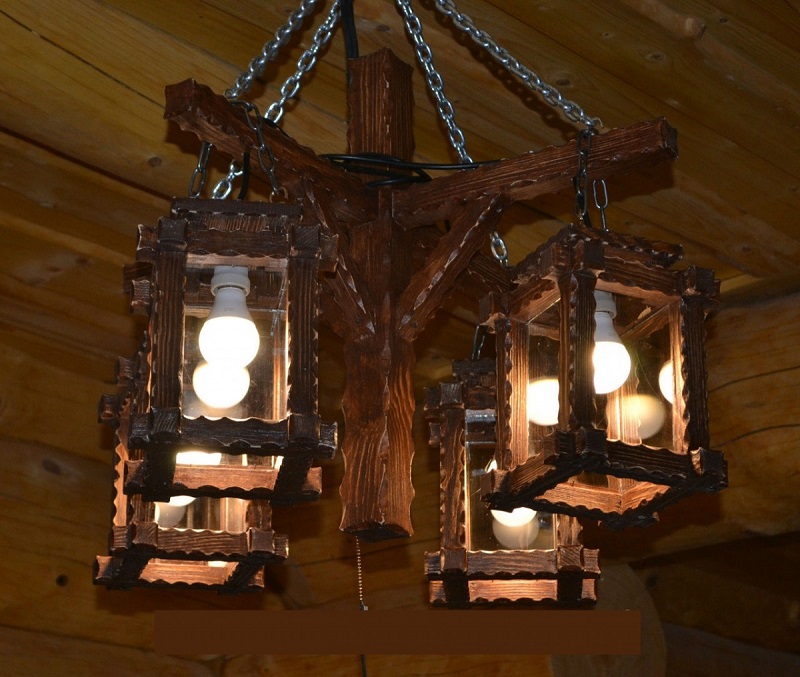
Master class: lampshades and lamps made of plywood
Plywood is considered one of the most convenient and easy-to-use wood materials, which does not require special skills to process. A plywood lamp can be installed almost anywhere - from the terrace of a country house to different rooms of the apartment.
Take a sheet of plywood in your hands and depict on it a layout of the future product, not only indicating the desired dimensions, but also setting them actually on the sheet. As a result, you should get a volumetric lamp, so you need to make blanks for all four sides.
Step-by-step instruction:
- Transfer the templates for all sides to the plywood of the desired thickness, indicating the actual dimensions of the future device.
- Cut out these shapes with a jigsaw. You can use a manual or automatic type tool. If the shape of the lamp is complex, then you cannot do without a laser machine.
- Sand all the edges of the cut with sandpaper.
- Do the same with the materials that will be used as roofing. Respect the dimensions, do not forget to sand the edges.
- Then you need to glue all the blanks, making sure that the thin sheets are located tightly to each other and securely fastened. Place the sticks to which the walls will be glued.
- Place the cartridge inside the product and secure it. Be sure to make a hole through which the wire will be led out.
- Secure the bottom and top. All of these elements must be glued to the same corner bars.
- All that remains is to create a suspension or wall mount.

Master class: lamps and chandeliers made of branches
Branches can be found almost everywhere, so they are rightfully considered the most affordable material for creating unusual wooden lamps. Go to the nearest park or square, collect some branches and get to work.
Important! Unlike other wooden blanks, the branches do not need to be dried. The presence of moisture in them determines flexibility and the ability to create unusual shapes. Over time, they dry out on their own, due to which the lighting fixture retains its final shape.
The lampshade can be made in different ways: by weaving or tying thick branches with ropes. Wood can be combined with other materials, including metal frames, forged elements.

Install a socket inside the lampshade or secure the LED strip using soft wire. If you wish, you can paint the wooden frame in the desired color.
Master class: a lamp from a log
In the manufacture of such a lighting device, you can use a log or snag. First, you need to dry the lumber and apply a protective coating that prevents insects and the appearance of mold. Create a blank of the required shape and dimensions. Make special holes for the cartridge, fix the hangers and place the electrical wiring inside. Several shades or lampshades made from glass or cans can be installed on a log.

If you want to save yourself from the hassle, then go to lighting stores and buy ready-made wooden lamps. Now you know their advantages and disadvantages, so it will not be difficult for you to make sure of the quality of the proposed product, to ensure its correct and competent operation. When making devices yourself, give free rein to your imagination, but do not forget about the simple rules of fire and electrical safety.
The problems with the choice of lamps are familiar to many. Luminaires are purchased last, so it can be difficult to combine them with all other interior elements. But you shouldn't despair. After all, spectacular lamps can be made independently, without spending a lot of time and money.
1. New Year's decor on the chandelier

You can decorate a finished lampshade with plastic beads, which can be purchased in the New Year's decor department. Bright colors and brilliance will turn the lamp into a real decoration of any interior.
2. Cityscape

The outlines of the city roofs, cut from dark paper, are pasted onto a light-colored lampshade. Such an applique will easily transform a boring monochromatic lamp.
3. The whole world at a glance

In every house there are old cards that have been unused for years. You can make a lamp from them with your own hands. Just wrap an old lampshade with a piece of a suitable size card. For a cleaner look, the paper can be coated with acrylic varnish.
4. From papier-mâché

To make an original lamp with your own hands, you will have to remember the papier-mâché technique, familiar to everyone from childhood. The paper needs to be torn into small pieces and left for a couple of hours in an aqueous solution of PVA. Then, layer by layer, the object of the desired shape is covered with paper pulp - for example, an inflated balloon. After the papier-mâché has dried, the lampshade is ready.
5. The second life of old newspapers

Simply covering the lampshade with a newspaper artificially aged with tea or coffee is too simple a solution. Cut circles out of it and glue them so that they partially cover each other. An interesting play of light and shadow is guaranteed. Additionally, it is better to varnish the lampshade.
6. Eternal lampshade

From an old metal basket or ordinary wire, you can make a lamp with your own hands, which will become a champion in strength and durability. In addition, such a lampshade is also completely fireproof.
7. From bright cocktail tubes

The lamp made of cocktail tubes looks democratic, but at the same time spectacular. Proto glue the tubes on one side of the old lampshade using silicone glue. If you cut the tubes in half, then the lamp will turn out to be smaller.
8. Chic and shine

Beads that have not been used can be used to decorate the lamp. String them onto fine jewelry wire (available at craft stores) and attach it to the metal base of the lampshade.
9. Clear geometry

Cocktail tubes, painted in gold or silver, will become the material for making a lamp with your own hands. They are fastened together with a threaded thread.
10. Lace patterns

Just cover or glue the plain lampshade with contrasting lace. In the first case, it is better to use elastic laces: they will fit more tightly to the surface of the lampshade and look neater.
11. Paper chaos

Plain white paper, rolled into tubes, becomes the raw material for the original lampshade. Glue them together in a chaotic manner, moving from bottom to top.

12. Cozy lamp for needlewomen

All buttons that do not find a use for themselves can be used to make a cute lamp. String the buttons on strong threads and secure them at the top of the lampshade.
13. In harmony with nature

An intricately shaped branch will be an excellent basis for an unusual lamp. In addition to her, you will need several bulbs in sockets. Just wrap the wires around the branch.
14. Almost edible chandelier

The base from the old lampshade, decorated with cutlery, looks quite brutal. Such a lamp will perfectly fit into the interior of a country-style or loft-style kitchen.
15. Delicate textile petals

For the manufacture of such a lamp, a fabric is selected, the edges of which do not crumble. The petals cut from it are attached to the lampshade with glue.
16. From decorative rope

Spread generously the base for the future lampshade with a thick one and wrap it tightly with a rope with a rough texture. It is not at all necessary to use an old lamp as a basis. Even old dishes, such as glasses or bowls, will work.
17. Lamp in a skirt

Translucent textiles, for example, tulle from old curtains, can find a second life. Gathering it in folds at the top, fix it on the annoying lampshade.
18. In patchwork style

Many colorful shreds are tied on a base from an old lampshade. The more, the better.
19. From favorite postcards

Often, postcards and photos, even those that you like, lie idle for years. Cover a boring lamp with them, and it will instantly transform.
20. Our whole life is a game

A deck that is missing a few cards should not be thrown away. Thick glossy paper with a contrasting pattern is an excellent material for lampshade decor, practical and beautiful.
So, the lighting problem has been resolved. It's time to get acquainted with
 How to install ski bindings
 Daria Domracheva and Ole Einar Bjoerndalen got married
 Ski Pole Walking: Dangerous or Beneficial?