How to make a children's house-bed do it yourself
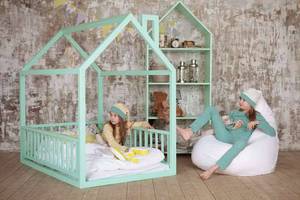
One of the main advantages of making furniture for your home manually is the ability to make it the desired size from the material of suitable quality and color. Everything is limited only by the fantasy of the creator and the area of \u200b\u200bthe children's room.
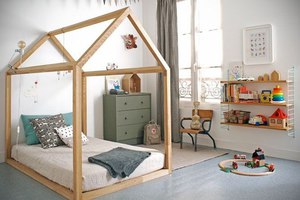
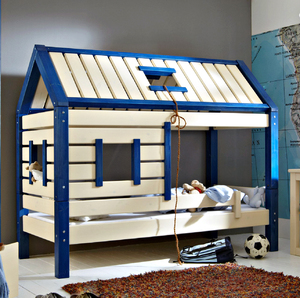
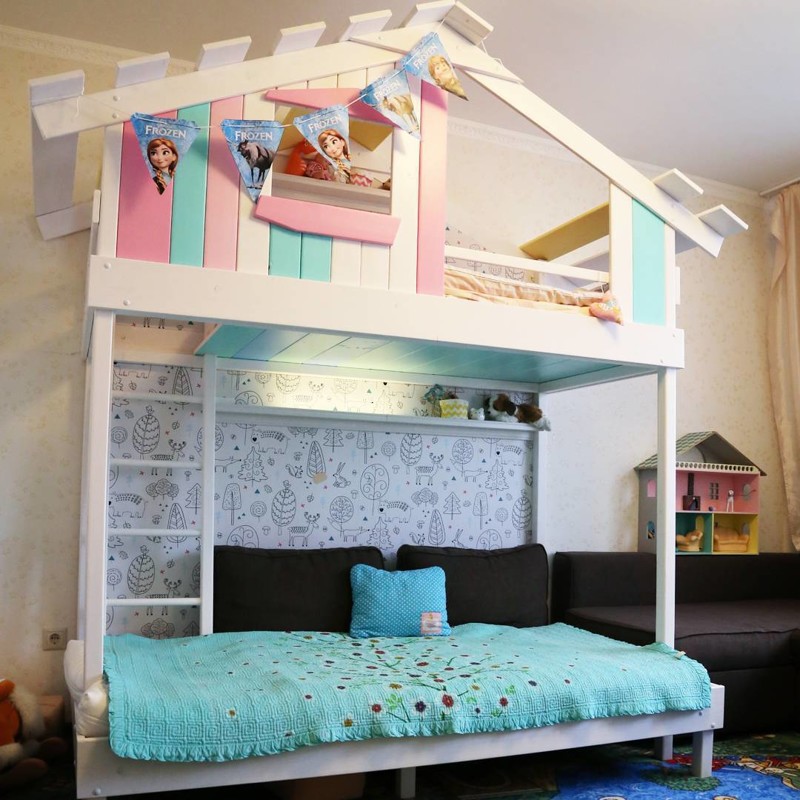
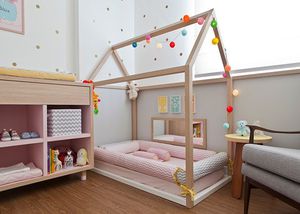
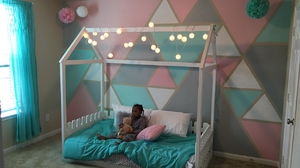
For example, for the boy's room, the house-bed can be made in marine tones. As a result, the child will receive not only a great place of rest, but also a real gaming military headquarters. The girl will be glad to the decor in the form of multi-colored flags, tender Fatin Baldakhin and other cute little things.
Preparation and process of manufacture
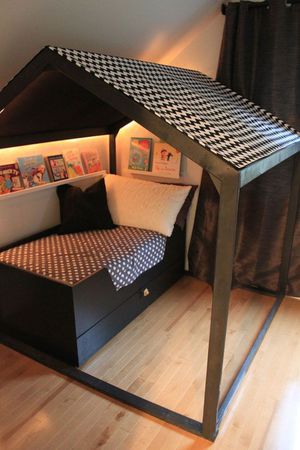
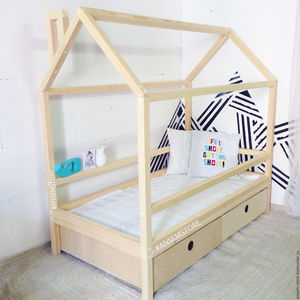
Places for children, especially having a Scandinavian style design, very often include a bed in the form of a frame or frame house as a mandatory element. In the workshop or in the store, similar elements of the interior are quite expensive. However, such a bed can be made and do it yourself.Even having a very modest budget.
Equipment and materials
To make a children's bed-house with your own hands, drawings are easy. Only the sizes of future structures and pair of blanks will be required..
You can purchase material in a construction store. There are also for sale a timber, from which the design of the house-bed is made. For the manufacture of a children's bed under the dimensions of the mattress on 165 centimeters of length and 80 centimeters widths will be required:
- Wooden bars in the number of two pieces of 40 at 70 1660 millimeters long.
- Four wooden bars 40 by 70 1200 millimeters long.
- Two flocks of a flat section of 10 by 70 to 1660 millimeters.
Step-by-step instruction
The implementation of the idea of \u200b\u200bthis bed can do in the amount of the order of fifty euros. You can reduce costs and use the details and bottom from the old bed on the rails.
Production of the base
 First you need to make the basis of the four bars with a length of 1200 millimeters each. This design is vertical bedpody. After installing and fixing each support bar, a small piece at an angle of 45 degrees is dumped at the top of the upper part. This is necessary for the further formation of a beautiful roof with two slopes.
Previously, the cutting line should be labeled with a pencil with a coated or line. The wood racks are placed here and the racks of wood with the help of ordinary hacksaw. But in specialized construction stores you can purchase a cutting device under a thro 'or another angle.
Build roof
For the manufacture of roofs, wooden bars are used in the amount of four pieces at a length of 730 millimeters. After their consolidation, you should make the same procedure as with the baseboards - to sign their edges of the joint with a roof under the corner of forty-five degrees.
Important! It is worth immediately paying attention to the resulting sections. To prevent the child's injury, it is necessary to process the sections of the sections of the slice of sandpaper. From the cropped 1200-millimeter vertical supports, the design of the house is assembled. All this is attached to the roof of the roof made from 730 millimeters from bars. The upper part of the skate with the pre-harvested glue for wood joins the overall design of the future bed.
The joints of all parts of the roof and the supports of a vertical nature are necessarily adjusted, preferably two or three times. After that, the entire upper part must be planted on 40-millimeter screws. Screw bolts and self-tapping screws at a distance of up to 4 millimeters from the joints of the two-piece roof lines. It is necessary to do this without pressing too much because the wood has a flammable property.
A small advice: When you drill the whole design, apply vice. You need to drill not very quickly, apply only dried out of a high-quality, suitable material of the material. After screwing two plates of the roof to the supports, the framework of the future house is obtained.
Gradually, our creation acquires its final outlines. The procedure is repeated with the remaining details. As a result, we get two identical frame structures - these are the walls of the end of the house bed.
Fastening Rama
To complete the end frame composition, a book is required to fasten an 820-millimeter bar. This balasine is a cross-bracketholding on itself a lot of vertical standing designs. Such a measure holds the whole bed in the balance sheet.
The distance from the cross-bar bed to the floor of the room is 150 millimeters, since the project implies the presence of a bed with a bed. But this does not mean that you are obliged to repeat everything. The bed can be without legs. In this case, the transverse timing will need to be screwed into the lower edge of the vertical support, without indents.
Please note - for assembling side details of the bed, a screed from the eccentric was used. It is also important to note that for such a fastener, your calculations must be very accurate. The result will be hit in a suitable point. If such a gluing is too complicated for you, then it will be better to use screws. Then you need to additionally buy flat corners with dimensions thirty to thirty millimeters. Such an approach significantly speeds up the process and simplifies the assembly itself.
If the design with angles to collect is easier and faster, why do some people still stop in gluing? The answer is simple - iron corners look less stylish and aesthetically. The eccentric gluing liquid is firmly and reliably fastenses all parts, their connection is at least.
 Related materials and objects for the screed process can be purchased in specialized stores for repair and construction. For such a hidden installation, it is necessary to drill holes in the lower bar of the bed with the help of a previously specified 11-millimeter roller. The hole should be shrinkable in the midline on the crossbar. Note that the hole is through. The depth reaches 130 millimeters.
From the edge of the crossbar block, the hole separates about 40 millimeters. It is worth paying attention to the size of the used bolts and self-tapping screws. The next step is needed on the side, just in the middle of the bar drill a neat opening with a sixmillimeter drill. It should be paid clearly in the earlier recess. In the resulting punishment, the screw is obliged to fall, then the entire design is fixed by an eccentric.
Another good advice. You can nourish all tree details of the bed for long screws, having previously finished them with a bonding substance. Please note that the connection must be required to be balanced using an angular type brackets.
Build the base of the house
 To build this part, we will use a few thick bars with a cross section of 40 by 70 to 1660. They will respond to the characteristics of the sides of the crib. From the inside, the wood bars are screwed down with self-tapping samples (10 to 70 to 1660).
Be sure to follow so that the screws always be equal to each other. These plates serve as a support for the installed frame that supports the bottom of the house-bed. The framework frame was already assembled by us with a bonding fluid - screed. At this stage, it is clearly important to accurately merge and customize, prevent errors in our own calculations.
Make a piece of 6 centimeters in advance of a wooden bar. It makes several holes under the self-tapping screw. They are at a fixed distance of 25 millimeters from each other. With its help, alleged holes are measured at all other future racks.
With a wooden template and pencil, we mark the place for the holes. It is important to draw a note on both sides of the bars on all four bedside racks. The top end of the template is important to accurately accommodate at the level of the upper edge from the transverse bar of the crossbar.
After the end of the hint, drillings are 6 millimeters, through holes are made in the intended places. A similar procedure is made only four times - vertical racks tightly and reliably join the beds of the bed.
From the inside of the longitudinal railway, you need to schedule a place for the future hole in which the eccentric is placed. It produces a drill of 10 millimeters. The outer side is processed, after which the screws are screwed into it for greater length - up to 10 centimeters.
It is important to consider that the bolts on self-drawing must smoothly enter the cooked holes, connecting verticals with side details of the bed. You can also additionally perform a gluing structure.
Special attention should be paid, of course, the joints of the joint. After all operations carried out in the holes of the lower tier, gluing liquid flows, after the bolts are tightened. It is necessary to carry out such an operation with all parts of the frame structure, then connect all this with the sidewalks of the bed-house.
Fastening a common frame
 The sidewalks of the house bed are already reliably fastened to the ends. Now it is necessary to strengthen the overall design. This is done with the help of four bars. To do this, we will use the details of 1660 millimeters long.
Be sure to take into account that the length of the beams must accurately coincide with the length of the sides of the crib. All components are fixed in the same way as in the previous stages - with the help of adhesive mixtures and self-tapping screws. Do not forget also about the additional strengthening of the composition with the help of angular fasteners.
Making a rush bottom
 In this case, the crib has a rack from the old rack bed. If you do not want to use the old bottom or do not have this, then in the construction store you can offer a great alternative - specialized lamellas. Such beds are suitable for standard mattresses.
Rakes are strengthened directly on flat planks, on the sides they are fixed to the four sides of the frame base. Spin all the details one to another you need so tight so that the parts of the screws are not sticking out of your product. You can also leave a small gap between each plank - in this case it was 8 centimeters. For the bottom of the standard mattress, it was necessary to fasten 14 plates.
Tip: From pieces that remained after cutting a lamellae, you can make a wonderful side. For little children, this is a mandatory security element. Collect it with one or more brackets fixed from each angle. That's all, work on a cot house is over. Temporary costs amounted to about noon.
 Facade design of a country house: a variety of stylistic directions
 Wooden ceilings - 25 interior examples
 How to make a children's game lick with your own hands