Homemade lip on a vase. We make a spoiler and a lip with our own hands. Working on the lip
To improve driving characteristics, a body kit is made on the car. When the car moves at a speed of more than 100 km / h, the driver will notice the operation of this product, the car will be pressed against the road. This car part will greatly decorate your car. The body kit will give the VAZ a modern and sporty look. You can make such a decoration for your car yourself if you have a strong desire. So, let's start making a body kit for a VAZ car.
We remove the bumpers from the car and wash them thoroughly so that they are perfectly clean. We come up with a design for the future body kit, draw a drawing on paper, taking into account the dimensions. What are the body kits for the VAZ, you can easily look on the Internet and choose the one you like, if you can't come up with it yourself. You need to know how many cm you want to make the bumper lower, measure everything accurately so that as a result the body kit does not touch the ground. Consider where the grates will be (if you install them). Then we glue the center of the bumper with masking tape, glue the foam on top and glue the foam and cardboard to the bottom (we set the desired shape for the future body kit). Fill the empty spaces between the foam with macroflex.


Almost every car enthusiast is interested in the question by what means the appearance of the car can be made special. No one wants to blend in with the mass, so many come up with various ways to highlight their car.
For this, various tuning and restyling options are offered. You can use various options for paints, specialized vinyl films, the installation of additional elements. Tuning a bumper is also a fairly common way to give a vehicle a certain look.
 Tuning a bumper with your own hands is not difficult at all!
 To perform this operation, you can seek help from qualified personnel. However, if you want to get by with low financial costs, you can do your own bumper tuning. This is, of course, a rather time-consuming process, but it will give you the opportunity to fully express your creativity and do without unnecessary costs.
Experts say there are two paths to take here:
- make a new product from scratch;
- treat the original bumper of your car properly.
The first way requires quite serious skills in terms of mechanical processing of materials and ownership of tools. Here you need a certain experience, an eye and set hands. Choosing the second option, we greatly simplify our task, because it is much easier to modify the standard bumper of the car than to re-manufacture it.
 One of the most common tuning options involves the use of polyurethane foam
 How to do bumper tuning with your own hands
So, if you decide to do all the work yourself, let's take a look at the front bumper as an example of how you can tune it.
First you need to stock up on all the necessary materials.... To complete the work, you will need the following things:
- epoxy resin;
- sandpaper with different grains (from 80 to 220);
- fiberglass;
- wire;
- polyurethane foam in cylinders;
- thick paper (namely paper, not cardboard).
 How to create a new bumper shape with your own hands
 After you have stocked up on everything you need, you will need to imagine in as much detail as possible the appearance that you want to give the front end of your car. For fidelity, you can sketch sketches or make an approximate drawing - this will greatly simplify the task in the process of its implementation.
After completing sketches and drawings, you can start working. Let's take a closer look at how the tuning process looks like step by step:

Conclusion
Tuning the front bumper is one of the common ways to change the appearance of a car, to make it special. Processing a regular bumper is easier than making a new piece. In fact, this is a simple process - it is quite possible to carry it out on your own. The main thing is attention, accuracy and conscientiousness.
It all started with a trip to a car shop; Once I went in, I saw an assortment of spoilers of various shapes, made of fiberglass and at reasonable prices (47-67 dollars), and, of course, I liked one. I leave a deposit, go out, try it on by car ... bad luck, the length of the spoiler turned out to be 10 cm less than desired. It's a shame, but I want to, and then different thoughts begin to creep in. One was like this - take this spoiler, cut it, make an insert of 10 cm, the minimum cost in time, but 7 more dollars are added to the cost of the spoiler, as a result we get 74 (the spoiler you liked cost 67 rubles) plus painting. The second thought is to completely do it yourself, while offhand we get the cost price in the range of 24-35 dollars. plus the shape of the spoiler can be made absolutely to your liking. Since my work schedule allows me to calmly go about my business and there are obvious savings, I decided to take on this business.
Unfortunately, my first step was taken in the direction of garbage containers, and all because after reading that you can take a polyurethane foam sealant and squeeze a form out of it, I went to the store. On the can I read that the volume of blown foam is about 20 liters, having estimated how much I need for the spoiler, I took one can ...
I put newspapers on the floor and let's blow the blank out of the foam sealant. It turned out what was written there - "the foam yield is 20 liters" in practice, only 5 :(. I also had to buy a couple of large ones, on which 40 liters are written. disadvantage - the more you warm up the balloon, the larger the pores in the frozen mass; it reached 5 cm. Having spent 5 cylinders, I spat on this business and concluded that if you need to sculpt a little, then the method is not bad and it is better for the balloon to be cold, and All this was not done in the heat, so I threw $ 18 in the trash.
Well, I had to take Styrofoam; by the way, at first I just wanted to use it, but then I abandoned this idea because of the large amount of garbage, which is remarkably electrified and then sticks to everything.
So, a sheet of foam plastic 1x1 m 5 cm thick was bought (though actually 4.5 cm, but this is so, little things). I cut out the wing blade diagonally, otherwise the width of the sheet was not enough. Further, I postponed the manufacture of the spoiler and took up a simpler one - a stand for the number. Everyone knows that Japanese numbers are more square and smaller than Russian ones, so our numbers do not look good in the places provided for them.
I cut out a blank, bought epoxy glue, but not the one in syringes for $ 1.5-5 per 30 ml, but in a paper box. The quantity and manufacturer are different, but the box is one. I didn't have fiberglass where to get it at that moment, I didn't know. And here old shirts "under silk" came in handy. In general, after a couple of days I glued this stand together, it took a few more days for grinding and painting. I took the paint in cans of 2.4 dollars each, covered it with the same varnish on top (it says Korean).
This is the thing:

Further ... no, not a spoiler, but a lip, it is easier to manufacture (at least the one that turned out :)). He took off the bumper, turned it over, and glued a blank out of foam plastic, which was held weakly on the bumper on the silicone auto-sealant. I tore off the blank and let's shape it. Then he wrapped her in plastic bags. I took the last tights from my friend, pulled them on and smeared them with epoxy. After two layers of pantyhose had dried, I pulled out the pig from the lip (so that the bags are needed to pull it out, the epoxy does not stick to them). The epoxy will finally cure after a few days. She, of course, seems to be hard in a day, but this is not always the case (my lip has dried for more than a week). Although it all depends on the amount of hardener, the more it is, the faster it polymerizes, but it also turns out to be more fragile, and it is better to add a plating agent for flexibility. Further, the glued lip is not yet strong, so I took the shirt again and glued it from the inside, 2 layers. Two shirts went to the lip. For strength in building materials, I bought a reinforcing mesh and glued it to it. And then there was grinding, priming, painting.


As for the clinging lip ... on the first trip out of town, I updated it :) (high speed + swelling on the road), in the 3rd photo it is already being repaired.
Well, it came to the spoiler ... I did the fastening like this: I cut out 1.5 mm plates from sheet steel, drilled 3 mm holes with a step of 2-3 cm, bent it with the letter L for better gluing and reduced weight, welded two 6 mm nuts at the base ... Then I pasted them into foam blanks, pasted over the wing of the wing with a couple of layers of fabric and put everything together. And then - lo and behold, a man known under the nickname Paperman told you where there is fiberglass, and I'll tell you that only carbon fiber is better than fiberglass :) (if you can find it), it is lighter and stronger.

A few tips: as practice has shown, the lip is not glued from fiberglass, it just crumbles like a cookie when struck, and the reinforcing mesh does not help :(, so be sure to look for fiberglass or carbon fiber, otherwise all your work will go down the drain after a small blow. it is then remarkably washed in a solvent, but it is cheaper and odorless to wash under running hot water. , touch the kitchen faucet more often to remove the electricity.
I advise you to glue at least three layers of fiberglass (on the spoiler it turned out 4 + two layers of tights and a net). Naturally, not all at once, but at intervals necessary for at least a slight polymerization of the resin. By the way, epoxy glue is polymerized, and does not dry. Moreover, this process is accelerated several times at a higher temperature (up to 120 C, if I'm not mistaken), so the main thing for it is time and temperature.
Having glued the spoiler, I threw the wires in it again, because in addition to the stop bar, I also wanted side lights. Then I skipped the puttying operation, but in vain, it would take a very long time to remove the planes with just a primer, and the layer is too thick. Well, in general, having suffered for almost a month with grinding, I started painting. There are generally two options, give it to specialists or paint it yourself. Of course, specialists will do better, but since everything is done with their own hands, then why not paint it. I bought 3 cans of black paint and painted it.


The glass for the stop bar was made of epoxy. Better, of course, to find a rod of the appropriate size made of plexiglass or plexus (something transparent and filed), but I could not find one.
Machine before and after:


The costs are as follows (for a lip, a stand for the number and a spoiler) USD:
Polyfoam - fit into one sheet, there is still = 2.3 dollars.
Fiberglass - it took about 2 m for 1.8 dollars = 3.6 dollars.
Fasteners and welding - scrap metal and oxygen from friends for beer = 1 dollar.
Shirts - I wanted to throw it away, the hand did not rise = 0.
LEDs 12 mm - 2x7 = 0.5 dollars.
Neon lights in the spoiler = 10 dollars *.
Paint - it took two cans = 4.7 dollars.
Primer, 3 cans = 6.5 dollars
Epoxy glue - I won't say for sure, but about 2 kg (let 8 bottles of 2 dollars each) = 16 dollars.
Foam sealant = 18 dollars *.
Wires - 2 meters = 0.3 dollars.
Chinese brushes - 3 pieces = 0.5 dollars.
Mesh = 0.7 dollars
Sandpaper = 3.4 dollars
In total, $ 67.5, though if you do not count the foam sealant and the stop bar, then $ 39.5. I did all this for 3 (three) months. So, if you have a lot of enthusiasm and patience, the freight train, then go ahead :) But I'm still going to make the rear and front bumpers (the not very beautiful lip turned out, as they say, the first pancake is lumpy), ears and you can also cover the hood, but I will not paint myself.
In addition to giving the exterior of the car a more aesthetic and modern look, in the VAZ 2106 the tuning of the "front" body kit contributes to the vehicle getting better aerodynamics, which is expressed in the powerful pressing of the front part of the "six" of the car by the air flow of the opposite direction.
Such body kits on the VAZ 2106, installed in place of the thresholds, serve to reduce various lateral air eddies aimed at separating the car from adhesion to the road surface. The body kit VAZ 2106, installed at the rear on the bumper and made by hand, makes it possible to reduce the twisting of the aft air - vortex flows following along the "six". The spoiler, as an element of the plastic body kit for the "six", serves to "press" the rear of the car to the road surface.
It should be noted that such aerodynamic-type "six" body kits can be installed on all vehicles of the passenger segment. For the manufacture of such products, it is enough to have primary skills in plumbing and the ability to use plumbing tools.
When looking for body kits for a VAZ 2106, the price is of decisive importance, because the products sold in the automotive markets in the Russian regions sin with the monotony of forms. With a fairly expensive cost, it is easier to make a homemade body kit for the "classic", since the purchase of its components will cost half the cost of the product.
Homemade body kit for the "six"
To answer the question of how to make body kits for a VAZ 2106, it is necessary to divide the work into three stages:
- Body kits for the sills of the car;
- Front bumper body kits;
- Rear bumper body kits.
At the first stage, it is required to prepare the thresholds for the "six". After purchasing this part in a car parts store, they need to give the color of the body part of the car, on which body kits are made on the VAZ 2106 (the photo can be viewed on our Internet portal). Before painting the thresholds for body kits on the "six", it is required to carry out a set of preliminary works before carrying out paintwork (cleaning, priming, painting and varnishing).
Installation of thresholds on standard mountings is not difficult. To prevent the penetration of corrosion of metal surfaces of the thresholds for body kits on the VAZ 2106, the entire surface of the product is processed with lithol - 24. After that, we install the products using fasteners - self-tapping screws: two screws - on the arches, three fasteners - under the vehicle doors. New holes during installation must also be lubricated with the recommended grease.

At the next stage, as a simplified version of the front body kit installation on the VAZ 2106, you can use the "five" bumper, and the direction indicators can be used from the Zhiguli prototype - VAZ 2101. When installing this product, you will need a certain skill to fit the newly mounted equipment.
When making frontal body kits of the "six" with your own hands, you need to design air lines for cooling the brake linings on the wheels. It is also necessary to provide additional elements to reduce the temperature values of the car's radiator and seats for fastening the fog lights. As starting materials, you can choose a thermoplastic or fiberglass structure or pieces of stainless steel.
The final stage - the installation of an aerodynamic body kit on the rear bumper of the "six" are made of fiberglass. Such a tuning stern body kit is cheaper to make of fiberglass by means of a matrix overlay, impregnating the novelty with polyester-type resins. It is better to make the outer coating from gelcoat (fiberglass camouflage material) or from its analogue. The advantage of structures of this type is excellent protective properties for external surfaces and giving the treated surface a smooth and even appearance.

The advantage of fiberglass in the manufacture of body kits on the VAZ "sixth model" with their own hands are high performance parameters, strength, heat resistance, suitability for repair work. The procedure for painting such elements of car tuning is similar to the execution of algorithms for painting metal surfaces (cleaning - degreasing - priming - painting) with time intervals for drying the painted surfaces.
In the updated bumper in the form of a plastic body kit on the VAZ 2106, air lines can be made for better cooling of the actuators of the wheel brake system. At the same time, they are designed in such a way that the air flow is directed towards the brake pads. For these purposes, it is possible to adapt air ducts used in construction by choosing suitable products in terms of size and configuration.
Installation of body kit on "six"
Installation of a body kit on a VAZ 2106 is carried out in the following sequence:
- We first try on the position of the body kit on the car to fit the new equipment;
- Before installing the body kit, we glue the "self-adhesive" of the shockproof type.
- We carry out work on grinding, painting and installation of the product.
Necessary remember that the installation of the body kit on the "six" has, in addition to the aesthetic appearance, a purely practical value. This is not only a sporty and aggressive exterior of the car, but also an improvement in the driving parameters of the vehicle. This begins to be felt when reaching a speed of 120 km / h.
Now in car dealerships there is a considerable variety of all kinds of spoilers. However, often those that you like externally, partly do not fit in size. Or those who are perfectly seated do not quite match their characteristics.
What can you make a car spoiler with your own hands?
If you are faced with similar problems, then, of course, there is an option to buy a ready-made spoiler, and in case of a shortage of length, just cut the object and make an insert. The cost of time is minimal, but here the cost of the material and paint is added to the cost of the spoiler itself. And this turns out to be quite costly.
Creating a spoiler from scratch is profitable (costs average about $ 25-35) and convenient.
In order to independently make a spoiler to your liking and the necessary requirements, we will need:
Styrofoam;
- epoxy adhesive;
- Sheet steel;
- fiberglass or old silk-like shirts;
- paint of the required color.
You can paint with a brush or.
Spoiler creation process
Working with foam is quite simple, but there is one caveat. After cutting, a lot of debris remains, which is very well electrified and can stick to the drying element at the most crucial moments. Therefore, try to remove the crumbs right away.
We cut a sheet of polystyrene with a size of 1x1 and a thickness of 4.5 cm (sellers usually declare 5 cm) diagonally. Cut out the wing blade. So the width of the styrofoam sheet is enough for you. Next, we move on to the mounts. It is necessary to cut 1.5 mm plates from the sheet steel. We drill 3 mm holes with a distance of about 2-3 cm. In order to reduce weight and improve adhesion, bend them with the letter L. After these manipulations, we weld two 6 mm nuts to the base. Now you can glue them into the foam blanks.
We glue the wing of the wing with epoxy glue with two layers of fabric. Then we assemble the structure.
Working on the lip
The lip is done the same way - not very difficult. Remove the bumper and turn it over. Next, you need to glue the blank from the foam. We shape and wrap with plastic bags. Ideally, it is better to find ordinary nylon tights for women, pull them over the mold and coat them with epoxy glue. When the two layers of tights are dry, you need to pull the pig out of the lip. The bags are needed just so that the blank comes off quietly, since the epoxy glue does not stick to them. We leave the structure for a few days so that the epoxy cures completely.
Then we take the fabric and glue the lip from the inside again. In order to make the structure even more durable, you can buy a reinforcing mesh in a building materials store and glue it with it as well. Next, we grind the structure, primer and paint. After complete drying of the paint.
Advice
1. Practice shows that a lip that is not made of fiberglass is quite vulnerable to impact. Therefore, if you have the opportunity to purchase fiberglass, or better carbon fiber, then the structures will be many times more impact-resistant and reliable.
2. Apply glue only with a brush, it is convenient and safe, besides, you can clearly calculate the amount of substance. The brush is well washed in a solvent or in running hot water.
3. Do not cook all the glue at once, there is a possibility not to have time to use it up. The largest part should be no more than 200 ml at a time.
4. If you did not have time to remove the foam crumbs in time, then try to touch the water tap in the kitchen more often, this is how electricity is removed.
5. If you are using fiberglass, then for reliability, glue at least three layers of it. Usually on the spoiler you get 4 layers of fiberglass, 2 layers of tights and a net. Each layer should harden, let the resin cure.
6. If you want to speed up the polymerization process, raise the temperature.
7. If you take into account all these nuances and do not rush to assemble the lip and the spoiler, then you can easily get it right the first time.
 We issue a passport for a child
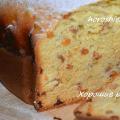 Easter cake in a bread maker - simple and delicious recipes with a photo step by step, video - How to make dough for Easter in a bread maker: Panasonic, Moulinex, Redmond, Kenwood
 In Chelyuskintsev park, a roller coaster trailer knocked down an administrator to death - Salidarnasts