Works with drywall: step-by-step instructions on the trim and alignment of walls by plasterboard, installation of partitions from GLC on the frame and without a frame. How to sheathe the walls of plasterboard with their own hands the walls of the walls by plaster
The decoration of the walls of the plasterboard received its complete recognition in the last decades of the last century. Today, the walls of the walls of GLC (drywall sheets) are made in a variety of housing. Environmentally friendly and easy in processing material is one of the fixed assets for various design solutions of modern interiors both housing and public buildings. The decoration of plasterboard allows not only to close old walls, but also to create additional enclosures indoors. About how to sow the walls with plasterboard in the house, will be discussed in this article.
This building material was invented by the Americans. The sheet of gypsum is covered with cardboard, as a result, a rather durable enclosing structure is obtained. Due to its basis, GLK is absolutely easy to cut the ordinary hacksaw and drill a drill.
Gypsum in the cardboard shell is so easy in processing that with it you can form internal fencing almost any configuration.
Fencing from this material is very easy to dismantle, and in their place to install new walls. The versatility of the surface of the gypsum sheets allows you to carry almost any finish coating.
Physical properties GLC
In accordance with the physical characteristics, the building material is divided into three types:
- Standard sheets (GLC) are used in ordinary residential and public spaces.
- Moisture-resistant cardboard (GPCB) is used in high humidity. G Clac in its composition has various anti-grapple and waterproof substances. Sheets are distinguished by green marking.
- The refractory material (GKLO) is used near the sources of elevated temperature (fencing near the fireplace, stationary heater, etc.). The surface of the Glevo is covered with flame retardant. Fireproof sheets are labeled in red.
Color marking GLC
Purpose and its thickness
Industry produces GLCs of several species depending on the location in the interior of the room. In this regard, the GLC (dry plaster) is made on three species:
Wall
Sheets are used to cover the walls of plasterboard and installation of lung partitions. The thickness of such sheets is 12.5 mm. The wall material is intended mainly for fastening it on the reference frame.
The frame is mounted from a special galvanized metal profile or tree.
Ceiling
Ceiling sheets are thinner, their thickness is 9.5 mm. The metal cutting frame of the support frame is done in such a way that the step between the mounts was not more than 40 cm.
Since the ceiling sheets are attached to the frame of the metal profile, the space remains between the overlap and the plaster ceiling. This allows you to install embedded lamps and conduct cable and wired communications for various purposes.
Arched
Arched plasterboard is still thinner - 6.5 mm. Such material is facing the curvilinear surfaces of the arches, ceilings and walls. Flexibility is achieved by wetting one of the sides of the cardboard.
To form a curved surface of the gypsum, the sheet is treated with a needle roller, and then wet the processed surface. After some time, the sheet acquires flexibility. Flexible material is fixed with self-drawing to the guide of a metal frame. After complete drying, the gypsum sheet becomes rigid again.
The construction industry produces plasterboard in sheets with a standard size of 1.2 x 2.5 m. Respectively, the area of \u200b\u200bsuch a sheet is 3 m 2. Along with this, sheets are made: 2 x 1.2 m, 3 x 1.2 m, 4 x 1.2 m.
Approximate price for 1 sheet of plasterboard
On the domestic GOC market, the 4th manufacturer is mainly represented. This is German Knauf, Finnish gyrox and two domestic wets and magma.
The cost of one sheet of 1.2 x 2.5 m in rubles
Glk Wall Sheet Technology
Technology of wall covering plasterboard is known in three versions. It is a frameless way of cladding, installing sheets on a wooden cut and lining of the walls of plasterboard on a metal frame. All these methods are not particularly complex and allow you to see the walls of the plasterboard with their own hands.
Frameless method
The main condition for the frameless decoration of the walls of GLC is a restriction in the height of the room. That is, the height of the room should not exceed 3 meters (the standard length of the dry plaster sheet). This method involves glueing GLC to the base of the walls. To do this, use a special adhesive composition.
Performing wall cladding work is produced in several stages:
Preparatory work
First you need to prepare the walls. From the surface, old wallpapers, plaster and other remnants of old finishing finish are cleaned. The following actions are followed:
- All cracks are put off. Deep cutters close to cement mortar. The bulbs of the wall are knocked down by a chisel or similar tool.
- Small detachants are cleaned with a spatula.
- After that, the surface of the fence is soaked with roller and brushes. The primer must dry out.
Cutting GLC
Then the sheets are trimmed in the following sequence:
- In accordance with the length and width of the walls, drywall on segments in the height of the room and the corresponding challenges are cut.
- The sheet is as follows: under the cut line marked with a pencil, put a wooden rail. A construction knife for a ruler makes an incision on the intended line.
- A sharp movement of hands pressed on the unnecessary part of the sheet. Race turns smooth. Special ruble cleaned the end of the segment.
Gluing gypsum sheets
Deciding to implement the finish in this way, the following should be performed:
- On the prepared surface of the walls, places (lighthouses) are noted to apply glue. Lighthouses are celebrated in a chess order at a distance of 20 - 30 cm from each other.
- On the packaging of dry glue, there is sure to prepare an adhesive mixture. In the absence of such adhesive composition prepare, mixing 2 pieces of dry powder and 1 part of the water.
- The glue is applied with a spatula with circular motions.
- Plasterboard is gently pressed against the wall. Applying excessive efforts, you can break the sheet.
 Glue
Glue
Correct the position of the exact leaf can be within 10 minutes after its installation. The vertical of the facing is controlled by a special level.
Installation of GLK on a wooden frame
Before sheening the walls with drywall do it yourself, make a wooden frame. For its manufacture, a wooden timber is used. Ceiling and floor-bearing, as well as vertical bearing racks made from a bar with a cross section of 50 x 60 mm. For the device of the root take the timber with a cross section of 40 x 60 mm.
Wooden timber must be dried and smooth. Tree is treated with olifa with antiseptic additives.
To cover the walls of plasterboard on a wooden frame, you need to prepare the following tool:
- a hammer;
- wooden hacksaw, perforator - drill;
- level, plumb;
- marker;
- lomik;
- screws, screws, dowels;
- brackets.
To know how to protect the walls with plasterboard, you need to explore the instructions. Step-by-step instructions for wall decoration plasterboard on a wooden frame looks like this:
- Using the level, mark the places of fastening the ceiling and outdoor timber.
- The horizontal bar is fixed with dowels with a perforator or self-drawing, depending on the type of fencing.
- Also in terms of the level of the side racks.
- The elements of the root fill the space between the racks. The bar is attached to the racks of screws. In difficult places use retaining trimming of a bar and a metallic bent profile.
- Ready sheets of walls are fixed with self-drawing to a wooden frame. Self-tapping screws in 30 - 40 cm increments. In difficult places, the pitch is reduced.
 Installing a wooden frame under GLK
Since the thickness of the bar leaves the space between the wall and plasterboard, then it can be filled with insulation. Even if the walls do not need insulation, the gasket under the cardboard will significantly increase the soundproofing of the structure.
Installation of GLK on a metal frame
It must be recognized that the walls of the walls of the plasterboard with their own hands or by the forces of specialists should be performed on a metal frame. The above-described methods of cladding of plasterboard walls are used only because of the cost savings. Facing the walls of GLCs in a metal frame provides 100% strength and reliability of the enclosing structure.
For mounting sheets use a special galvanized profile: UD and CD.
UD profile
It performs the function of the guide strip. The profile looks like a figured thin chaserler. The distance between the shelves is 28 mm. Profile height - 27 mm. The sale of UD comes up with a length of 3 and 4 m. Metal thickness from 0.4 to 0.6 mm.
Metallic profile is installed at the top, bottom and sides of the wall. The frame from it is a supporting structure for fastening the elements of the root, which subsequently places plasterboard sheets.
CD Profile
From it form the carrier part of the frame. The dyberry provides spatial stiffness of the supporting structure.
CD Profile is manufactured by a width of 60 mm and a height of 27 mm. Produce rakes 3 and 4 m long.
The auxiliary elements serve to connect the frame elements, as well as for attaching it to the wall.
For mounting a metal frame, the following tools will be required:
- a hammer;
- scissors for metal;
- perforator, screwdriver;
- suspensions;
- dowel - nails, selflessness;
- level and plumb;
- roulette, marker;
- pliers.
Step-by-step instructions for installing GLCs on a metal frame
To install sheets on a metal frame, you should follow the following sequence:
- Metal profile is cut on the required cuts with metal scissors.
- In terms of level, the guide profiles (ceiling, outdoor and side) are exposed.
- The perforator drills the profile through the length of the fence on the length of the dowel.
- Dowels score with a hammer to the hole.
- Vertical racks are inserted into the guide strips. Fix them with screws with a screwdriver.
- Then the vertical profile is connected by the sides with the wall of the dowels.
- After that, go to the attachment of horizontal elements of the root.
- Glk in a metal frame is fixed with self-drawing to the frame of the screwdriver.
Hats of selflessness slightly interpret dry plaster. It is necessary to do so that there are no protrusions on the shit surface of the cardboard.
Installation of communications and electrical fittings
The fastening of the binding elements is carried out as follows:
- Before facing the frame of the carbon sheets on the basis of walls under the frame, electric wires and cables are paved. Communications are fixed with plastic fasteners. Plastic is fixed with dowels to the wall.
- In advance places in the cardboard, drill with special holes with holes for outlet and switches.
- In the holes, the installation boxes under electrical fittings with special locks for cardboard are fixed.
- The ends of the wires are output through the boxes.
- In the boxes are installed the housings of sockets and switches, connecting them to the wires.
Preparation of walls under the finish coating
Finishing the walls of the walls with plasterboard of the entire surface. For the shtlock, you need to prepare the following:
- painting tape;
- starting and finishing putty;
- capacity for solution;
- set of spatulas;
- mixer or drill with screw nozzle;
- rag.
 Plasterboard shovels
Pluckle GLK is as follows:
- The starting putty is bred in the container with warm water. Do it in strict accordance with the instructions on the packaging of a dry mix.
- All seams are fixed with a paint ribbon starting mixture. All dents from the hats of self-tapping screws close up with a spatula.
- After 15 - 20 hours, it is started to the finish shlatovka. The finishing finish is also prepared as the starting lineup.
- Split the entire surface with a wide spatula. In hard-to-reach places enjoy a narrow tool.
- After that, the walls are so ground.
Ready walls covered with GKKL, have high adhesion. You can glue any wallpaper on such fences, laying ceramic tiles and other finishing cladding.
We make the walls of the walls of plasterboard: a practical decorative solution
Starting any repair and finishing work in an apartment or house, you need to choose in advance which material will be used. Many choose the walls of the walls of plasterboard - a fairly simple procedure that can be made independently. But, if you need to create a certain decorative element, composition, then you have to try well. Only then will turn out exactly what was conceived. Therefore, work with HCL plates is not always so easy as it may seem.

Features and advantages of wall decoration plasterboard
Gypsum Carton is considered universal material, it can be mounted almost on any surface types - brick, concrete, block, wooden. For proper installation use various options:
- erection of a metal and wooden frame;
- fastening the plates of GLK directly on the wall.
 Installation of sheets of plasterboard without crate
Unlike other materials, plasterboard covering of various surfaces can have many advantages:
- Work with dry plaster (another name of the plasterboard) allows you to finish the walls quickly. And also disappears the need to use various solutions that require certain conditions.
- The erected design of GCL fits into any designer ideas. It should not be thought that with the help of this material, only smooth sections create - you can successfully make various curvilinear and decorative elements.
- Plasterboard has excellent specifications. But very afraid of high humidity, so it is better to apply it in a complex with waterproofing materials.
- It is very convenient that the whole design can be very quickly dismantled. In this case, the use of a metal frame gives very good rigidity and not collapsed over time.
- It is possible to pave communications without creating different channels. This rule applies to the frame method.
- The surface of the GLK is referred to in processing almost all finishing coatings. Very convenient and the fact that different types of finishes can be combined with each other.
 Alignment of walls with GLCs is particularly relevant when the inner insulation is used at home
Creating decorative elements with the help of drywall, it is necessary to take into account that the creation of additional frameworks of the framework, which must be pre-calculated are correctly calculated.
Preparation for the walls of the walls
The lifting of the walls of plasterboard begins with its own hands with preliminary preparation. Often this process lasts much longer than the work itself. It is better to take care of the miscalculation of the necessary costs, material and drawing up a detailed plan (scheme) of work.
First of all, the premises should be made. It must be done with special care, any errors will lead to the fact that in the installation process there will be problems.
 Measurement measurement is an important stage of preparatory work.
On a note! There are various options for plasterboard sheets in the market, so you can choose material even for non-standard objects.
Also pay attention to both the stove thickness, it can be from 6 to 12.5 mm. The width starts from 60 cm and up to 120 cm.
When choosing, it is possible to navigate the color of the sheet, it gives the concept of its characteristics:
- the most common option is for simple premises, its color is gray;
- for wet premises - moisture-resistant plasterboard, color green;
- fire resistant sheets have red.
 Green plasterboard "says" about its moisture-resistant properties
They are immediately determined with the method of fastening the plate, the choice of additional materials will depend on this. If a frameless way is used, then you need to choose the right glue and its quantity. When creating the crate, the amount of metal profile and fittings are calculated. Do not forget about the need to prepare the desired tool.
What should be considered when installing GLK
So, it was already noted that much depends on the method of installation, which will be selected in advance. Consider the following:
- For premises with a large area, a frame method is suitable. But it must be remembered that the erected doom takes part of the area.
- Accordingly, small rooms are better to sow with glue plates. Only so manage to save the size of the object. If you use the frame, the room will become noticeably closer and more out.
- The use of a metal profile requires compliance with some rules. Among the main - strict adherence to the installation of the guides in the level.
Wall covering plasterboard using crate
The use of this method does not require certain skills. All work is performed quite simply, but requires care. It is not worth a hurry, it is better to do everything measured, as a result, getting a high-quality design that will delight the eye.

On a note! By itself, the technology of the walls of the walls of the plasterboard has some difficulty in terms of creating a crate. The procedure of cladding plates of GLC is not the main stage of such an event.
Montage Karcasa
Work on the creation of the crate is as follows:
- From the walls remove everything too much. There should be a clean surface.
- Marking. Immediately discharge the location of the vertical racks (step 55-60 cm). This makes it possible to make an abuser under the dowel in advance.
- Install the guide profile. It is done around the perimeter of the wall of the room. It is in it that the installation of vertical elements begin. They are fixed using P-shaped brackets.
- Fix horizontal ties.
 Step-by-step instructions for the construction of a metal crate
Each stage of work is carried out using a level. Only having achieved perfect evenness - each element is fixed.
Installation of plasterboard sheets
The walls of the wall plasterboard is made according to the following principle:
- The desired sheet size is measured. Excessively removed using a building knife.
- The edges of the sheets that will be located nearby are trimmed. Do it under a small angle.
- The installation of the hlock plate itself is to screw it to the profile. Observe step at 20-25 cm.
- Given that it is necessary to make a gap between the floor and the ceiling, it should be at least 5 mm.
- Now it remains only to close the joints between the sheets and proceed to the further finish.
 Metallic frame covering plasterboard
- Self-tapping vested literally floss with the surface. It is impossible to twist or do not cheat them.
- Between the sheets make a gap - 3-5 mm.
- If you plan to fix heavy elements, then make mortgages. They must be securely attached to the wall.
Thus, it turns out a room from plasterboard, which will serve for many years. In principle, if you follow the rules for further finishing, even when the decorative layer is replaced, it will not be necessary to change the walls of the walls of GLC.
Cleaning with glue
Installation of plasterboard on glue is better to spend when there is at least a little experience in carrying out such works. The fact is that it will be practically impossible to correct the deficiency in such work.
Guided by the following rules:
- The surface is carefully prepared. Align all irregularities. Old stucco is removed.
- All cracks are well shone. Naturally, it is not necessary to achieve perfect evenness, but also the flaws cannot be left.
 Preparation of the surface - cracking crack and depression
 Application of glue on a sheet of drywall in a checker order
It becomes extremely clear how to sheathe the walls of the room with plates of GLC. This procedure allows pretty quickly and most importantly to reliably create a surface that will serve for any further finish.
Some features
No matter what option will be chosen, there are some features that should be observed anyway.
- Before starting the walls of the walls with drywall - make pre-marking of the plates. What is it? Imagine that I want to install various lighting devices on the surface, and how to do it? After all, after installing GLK, it will have to spend unnecessary time to find a place where the wiring passes. Therefore, they do everything in advance.
- The direct drank holes for embedded lamps can be postponed. But then take into account the possibility of entering a metal (wooden) profile.
- The sheath around the window openings requires the greatest care. Often, under the windowson, there are heating batteries. So, immediately calculate the location of the removable screens. For this make additional mortgages and false panels.
- It is better not to risk and concerned with preliminary surface finish, which will be under plasterboard. What is included in it - applying compositions that will protect against various fungi and mold. And also make heat and waterproofing.
- Wooden frame is better to use in homes that are made of the same material.
 Wooden frame for plasterboard
There is no doubt that the walls of the walls using drywall will make it possible to create a surface that will allow you to show all the fantasy for further decoration.
Decoration of walls of plasterboard - nuances of the framework of frame and fastening sheets
The appearance of drywall in the construction sphere made it possible to move away from measures related to the leveling of surfaces, which used to be carried out by leveling solutions (plaster and putty). Installing this material allows you to create a surface with a high level of flatness on the wall or ceiling. This in turn is a guarantee of high-quality applying finishing.
Plasterboard sheets allows you to level the plane with any indicators of the area of \u200b\u200bthe area of \u200b\u200bthe area. If this difference is small up to 5 cm, you can use a frameless installation method. If more than 5 cm, then plasterboard is mounted only on the frame.
Tools and profiles
Currently, this leveling material is mounted on a metallic profile clamp. The technologies of the construction of a new surface is so simple that even a novice homemade master can cope with it.

Much more photo of walls of plasterboard See here.
This will require a plasterboard leaf itself and several profiles: for wall decoration - guide and rack, for ceiling - guide and ceiling. As well as direct suspensions and self-tapping screws with dowels.

- Perforator;
- Screwdriver;
- Planer to remove edges;
- Level;
- Plumb;
- Putty knife.

Mounting frame for plasterboard
Consider how the frame on the wall is installed. To do this, it is necessary to determine the slope of the wall itself. It can be tilted inside the room or out. To determine this, you need to put the top corner of the wall. If he was loaded from the lower corner from the floor, a not defined distance was removed, it means that the wall is tilted inside. If it lies tightly on the wall of the wall, then the place of installation of the plumb is shown a little on yourself, that is, combine the load with the bottom angle.
In the first case, it will be on the ceiling of the eye to the wall to make marks in each opposite corner horizontally. Connect their line to which the guide profile is installed. Then, using a plumb on the floor, to define two points in the corners, connect them between themselves and fix the guide profile on the floor.

In order to maintain profiles simply, it is necessary to cut them through the size of the wall length, make holes in them, set up the line and drive the fasteners via the holes. Then the perforator is made by holes in the floor or ceiling, where the plastic dowels are clogged. It is to them with self-draws and the upper and lower profiles are attached.

In the event that the length of the room is greater than the length of the profile (3 m), then you will have to increase them. There is nothing difficult in this. Two connected elements are inserted into each other by the ends and attach the screw. More often refuse from it, because the mount is made on one line.

The next step is to install rack profiles. Two extreme elements can be installed immediately by fixing to adjacent walls and to the upper and lower guide. To install intermediate elements, you will have to apply vertical lines on the wall, which will determine the place of installation. The standard distance between them is 60 cm, because the width of the drywall sheet is 120 cm. That is, three profiles are installed for each sheet, one of which in the middle.

Mounting plasterboard
So, the doomle is ready, you can go to the installation of drywall. Before installing each sheet, it is necessary to handle its edges with a special plane to create a small groove when docking. It will have to be embedded with putty.
Raise the sheet, set it to the crate so that it will lay on three vertical profiles. At the same time, the edge of the panel must be located in the middle of the frame element. That is, two sheets should be shrinking at one profile at once. This does not concern the angular element that the sheet closes completely.

The mounting of plasterboard is made by self-drawing, it is necessary to withstand certain sizes.
- The distance from the edge of the panel to the place of attachment is 10-15 mm.
- Distance between fasteners 100-150 mm.
- Depth screwing caps up to 5 mm.

After all the sheets are laid and fixed, it is necessary to embrace joints. For this, a spike solution is used, which is filled with seam. Then a special tape is immediately superimposed on it, which is covered with a layer of putty. A spatula will be needed here. Please note that the plasterboard mounting places to the frame are also closed with a solution.
Nuances Framework Frames on the ceiling
First of all, it is necessary to determine the lowest angle in the room. For this, the height of all angles is measured, the smallest size is what you need. It is here at a certain height that determines the location of the new ceiling, a laser level is installed. His light rays on the walls of the outline contour. They will have to install guide profiles to the walls.

The profiles are set to the ends into the grooves of the guides, their alignment on the threads and the mounting to the suspensions. After that, the frame should be strengthened by crossings, as in the case of a wall.
Finish trim of plasterboard
If the plasterboard wall need to paint or stick on it, then in this form, finishing works cannot be carried out. Gypsum drowns will have to end. To do this, its surface must be additionally aligned with the finish putty. This material has a fine-grained structure, and if they apply it to a thin layer and modify the sandpaper, the plane will be smooth.

Scheme of this type of work:
- Plasterboard surface is processed by primer. It is necessary that the surface is dried. It usually takes 4-6 hours. This must be done in order for the cardboard to become a surface with a high degree of adhesion.
- Next is applied with a layer of putty, which also need to dry.
- If the degree of evenness does not suit you, then you will have to apply another layer. But before that, the first must be treated with primer.
- Now the fine-grained sandpaper should be treated with an exhaust surface. For this, the Hacker is used to which sandpaper is fixed. Circular leisure movements, without effort and push, you have to go throughout the treated area.
- After that, a layer of primer is applied to the plasterboard.
- As soon as it dries, you can put painting or glue wallpaper.
back to content
Nuances of plasterboard installation in a wooden house
In principle, purely on the technology of the difference, in which house there is no plasterboard sheets, no. True, in a wooden house it is necessary to carry out some additional measures related to insulation and waterproofing of walls or ceiling.

After that, the lamp is mounted. By the way, wooden bars (railings) can be used in wooden houses instead of metal profiles. Although the metal profile is many times better. So, the frame is ready, the heat-insulating material can be stacked in its design. The choice of its market is huge, so it will not be a big problem. The only thing that I wanted to draw your attention is the choice of insulation by the criterion of a low price at high technical characteristics. And this is also not a problem.

In the event that plasterboard is installed in wet rooms, it is recommended to close the insulation from the drywall sheet with a vaporizolation material. It is to maintain thermal insulator from a detrimental impact of humidity. Some species have a porous loose structure, so they have a high indicator of hygroscopicity.

When the whole pie consisting of various materials will be ready, you can move to the installation of the sheets themselves. Read more How to make partitions from plasterboard read in our review.
- Working with plasterboard is more handy with a partner. Sheets are large, one to understand them and will be uncomfortable.
- To install the screws, it is best to use a screwdriver with a restriction of screwing depth. This will not make fasteners.
- All wooden elements (when it comes to a wooden house), remaining under the plasterboard facing, it is necessary to handle the antiseptic composition.
- In wet rooms it is necessary to use moisture-resistant plasterboard. It has a cardboard cladding of greenish color.
Sheathe the walls of plasterboard do it yourself
Plasterboard sheets allow you to level the walls, workshchically hid any irregularities, create a variety of protrusions and recesses, etc. The material is characterized by sufficient strength, it is easy to process and use, you can install such sheets without any problems.
Sheathe the walls of plasterboard do it yourself
Having understood in the basic principles, you can independently align the walls of your home or, for example, to make a new partition. It is only necessary to determine the required form of a finished result and select the optimal method of fixing sheets.
Fastening sheets of plasterboard sheets
There are two main methods for fastening plasterboard sheets, namely:
- installation on the previously erected frame;
- frameless fastening on the glue composition.
Installation on the pre-erected frame
In some situations, to achieve the best results, the above methods are used comprehensively.
Framework technology is the most reliable. The base is collected from a special plasterboard profile. At the end, it will also be left to fasten sheets to the frame with screws and perform the required finishing works. The framework of the framework technology is that the total thickness of the finished skin will be more than 4-5 cm, i.e. The useful room will significantly decrease.
Frame technology is the most reliable
Choose a suitable attachment method. I want to fix the sheets as reliable as possible - do the framework. It is important to keep the available quadrature - use glue based method.
Preparation of walls to the trimming of plasterboard
The walls of the walls of plasterboard requires the implementation of several preparatory stages.
The first stage is the removal of the old finish. Before securing the frame or glued sheets, it is strongly recommended to get rid of the old wall coating. Carefully delete it to the bottom. Additionally, dismantling the old finish will free up a few centimeters that can be used for a new trim, while saving as much free space as possible.
First stage - removal of old finish
The second stage is the primer of the walls. This operation is not mandatory, but experts strongly recommend it. Additionally, the surface is treated with an antiseptic preparation.
Second Stage - Grinding Walls
The third stage is preliminary markup. To begin with, it will be enough to note above the floor and under the ceiling of the border, from which it will begin and on which plasterboard walls will be completed. Traditionally, a distance of 50 mm is deposited.
Frame construction guide
The first stage is the preparation of materials. A galvanized profile applies to assembling a frame for plasterboard. On the floor, the ceiling and adjacent walls are started by the so-called. UD profile. Dowels are used to fix such profiles.
Galvanized profile applies to assembling a frame for plasterboard
The second stage is the installation of jumpers. After the starting profiles are secured, proceed to the installation of vertical jumpers. This is designed to the so-called. CD profile. It is on him that will rely on the plasterboard. The profile must "look" on the wall, a wide side of the room. Mounting performed using self-tapping screws designed specifically for galvanized profiles.
Fastening a guide profile to the floor
The first primary profile will fasten near the side wall. The following secure in a step of 60 cm. In this case, the distance needs to be postponed from the center of the installed profiles, and not from their edges. Under the next wall, the CD profile also needs to be attached close, regardless of how much the distance will be between it and the previous profile.
The third stage is the strengthening of fasteners. In order for the capture of profiles more reliable, it is strongly recommended to use perforated suspensions. These products have the kind of galvanized strips with perforated ends. Such clamps should be given the letter "P" and consolidate them with the middle of the wall, placing under each profile installed vertically. At the edges of the element are "ears". Screw them to the profile. Check the accurate placement of all items using the level and if you have such a need to adjust.
How to fix the frame
In the event that the height of the wall exceeds the length of one sheet of plasterboard (standard 2.5 m), add the missing piece of the material below either from above. In the joints of the joints, install jumpers from the already familiar CD profile.
Fastening profiles to concrete and brick surfaces
Installation of sheets and completion of work
The frame is ready, and you can safely go to the main job. It is also performed in several stages and requires the master of maximum care and responsibility.
How to sheathe the walls of plasterboard. Ready carcass
How to mount plasterboard to the wall
Creating curved plasterboard designs
The second stage is to fill the gaps. In the event that one sheet of material is not enough to fill out the entire existing space, take a new sheet and cut out the pieces of the desired size from it. Plasterboard is remarkably cut with an ordinary building knife. It is enough simply to cut the plasterboard paper along the cut-off line and gently turn the element, after which it is similar to cut the paper on the back side. Secure the remnants and proceed to the final finish.
The third stage is the finishing trim of plasterboard design. First you need to close the seams. The seal is performed using a special self-adhesive grid. The laid mesh must be sharpened. Usually a fairly starting putty. It will allow you to get the most smooth surface.
The last touch before the coating is decorative material is putting the joints and recesses from the self-tapping screws.
To fulfill further work, you need to decide which material will be used as an finishing coating. For example, in the case of styling of a tile or other opaque thick material, it is simply impressed by the joints of the neighboring sheets, wait until the putty dry and go to the finishing cladding. The bed is applied to the plasterboard of the layer of about 1.5-2 mm, in a thicker coating there is no need.
Gypsum County Partitions
Stick up the surface using the skin, and then process the walls of the primer. If further painting is planned, the surface must be as smooth and smooth as possible. If there are irregularities, apply a new layer of putty, skill it and check the surface for the presence of irregularities. If necessary, repeat the described procedures.
Plasterboard on the wall in the bedroom
Frameless wall covering plasterboard
If the walls made of drywall are made without that in a small place, the arrangement of the framework can become an incomplete luxury, because Because of it, the total area of \u200b\u200bthe room decreases into several square meters. In such a situation, the optimal option is the fastening of sheets to the base with the help of glue.
Frameless wall covering plasterboard
First stage - surface preparation. It is strongly recommended to align the surface. Any kind of holes, bulges and similar defects will worsen the quality of the clutch of sheets with the base. Use putty for alignment. After the putty dry is driving the base.
The second stage is the preparation of sheets of plasterboard. Remove plasterboard on the sheets of the desired size. Over the floor and under the ceiling, leave the gaps of the width of about 5 cm.
The second stage - preparation of plasterboard sheets
Third stage - preparation of mounting holes. Drill in the wall of the hole for the placement of the dowels. The fasteners must be screwed so much so that their caps form a single plane with the base.
The fourth stage is to prepare the adhesive solution. The glue is prepared from a dry mix and clean water specifically designed for such a work. Explore the manufacturer's instructions. It contains a recipe for specifically your glue, because For different mixtures, the order of preparation may vary. The consistency of the finished mixture will be reminded by a paste. The glue dries very quickly, so it is strongly recommended to prepare it with small portions and immediately before starting work. Specific drying time is also indicated in the instructions.
Technology of installation of plasterboard for glue
Attach plasterboard to the base and evenly press. If necessary, you can compact fixation using a rubber hammer. In this case, you first need to apply a wooden bar and knock the hammer on it, otherwise you can break the holes in the coating.
Wait until glue takes strength. Drying time information is necessarily provided in the instructions. Carefully examine the manual before starting work and save it before it is completed. Only after complete drying of the adhesive can be moved to further stages.
Sixth stage - seaming seams. In this case, the self-adhesive tape is also used already familiar to you. Stick the tape on the seams and cover the joints of the joints so that they are at the same level with the main surface. Alignment is performed using a starting putty.
Sixth stage - seaming seams
The finish putty is used only if necessary, for example, when plasterboard is prepared under painting. At the end, only to separate the walls with the selected coating will remain.
Thus, drywall allows you to get perfectly smooth and smooth walls without excess time and cash costs. Select the most optimal method for fastening sheets and proceed to install. Follow the instructions and do not forget the recommendations received.
Outlet of the walls of plasterboard
Video - shelter the walls of drywall do it yourself
How to correctly complete the walls of the walls by plasterboard
How to put the wall with plasterboard? What tool and method of trim choose? We will try to tell about it and other in brief in the article so that even the newcomer does not have doubts that he can do it with his own hands.

First you need to explore the front of the work, evaluate the scale and select the necessary way to install.
As you know, the walls of private houses and apartments are made of reinforced concrete, brick and wood. On any of these surfaces, it is possible to glue drywall or set the framework. The main criteria that affect the installation method are the volume of room and the curvature of the walls. The plasterboard covering on the frame is considered the most optimal, but there should be disadvantages here - the area of \u200b\u200bthe room with the installed frame will significantly decrease (the total thickness of the casing will be more than 5 cm). Therefore, if you plan to carry out repairs in a small room, you may be the best option to be a frameless fastening on the glue composition. If defects and curvature of the walls do not exceed 20 mm, you can safely choose it, i.e. glue glue on plaster glue.

If we more or less disassembled with the attachment methods, then the question has yet remained open.
Tool for work
To cover surfaces on framework technology, you will need:
- Material itself - plasterboard sheets.
- Pencil, knife for cutting HCL sheets, blades.
- Roulette, construction level, better laser
- Scissors for metal
- Dowels 6x40, 6x60.
- Galvanized CD profile, UD.
- Perforated suspensions (CD bracket)
- Bulgarian, drill, screwdriver.
- Metal Selfness for Glk
- Belt, or selflessness (bugs) for fastening profiles
- Planer to align the edge
- Spatula and bucket, gypsum glue (if glue)
- All for finishing seams GLK


Preparation of surfaces
The lifting of the walls of the plasterboard means not only installation, but also preparation. Before covering the surface, you need to perform several preparatory work:
- Remove the old finish. Before proceeding with the finish, you need to remove all previous layers from the walls to the base.
- Treat walls. This procedure is not considered mandatory. However, experts recommend priming the walls and process them with a special antiseptic agent.
- Make preliminary marking. Mark the boundaries above the floor and under the ceiling, where the plates will begin and end. Usually the distance is 5 cm.

HCL attachment methods: advantages and disadvantages
As mentioned earlier, there are only two ways to entee drywall: gluing and mounting the plates on a metal or wooden frame. For a better understanding of which way it is better to choose, consider the advantages and disadvantages of each of them.

Frame method
From the advantages of the installation on the galvanized frame, it is necessary to allocate: the mechanical strength and reliability of the finished design, the possibility of installing sound insulation material, the installation of the material even on the most uneven surface. In addition, the design mounted on the frame can withstand a large weight of the tile. Therefore, this option can be used in the kitchen or in the bathroom.

The method of installation on a wood frame has the same advantages as the method of installing GLCs on a metal frame. It is worthwhile to take into account that the tree does not tolerate moisture, so this method of installation is not suitable for rooms with high humidity.
The disadvantages of the framework of installation can be called additional financial expenses on the necessary fasteners and the complexity of the installation.

Frameless method
The covering of the walls of GLCs is a lackless way is slightly simpler. It will not pick up the useful centimeters of your room and will not make you lay out a round sum for repairs, but it will be less strong compared to frame technology. The disadvantages of such a method refers to the impossibility of laying noise insulating material.

Montage Technology Sheets on Galvanized Profile
For assembling the frame, we take a galvanized profile. By sex, let the ceiling of UD profile, which is fixed using a 6x40 dowels. After fixing the starting profiles, proceed to the mounting of the vertical jumpers (CD profile). The edges of the profile must be addressed to the wall, a wide side of the room.

The profile is trimmed with scissors for the metro station or the grinder according to the desired size.

The profile is fixed specifically designed for galvanized profiles by self-draws. The first core profile is fucked near the side wall, the following is already with a step of 60 cm. The distance is set off from the center of profiles, and not from their edges. Under the next surface, the profile is fixed close, regardless of the distance between this and the previous profile.


To enhance fixation, it is recommended to use perforated suspensions. Products externally look like galvanized strips with perforated ends. These locks give the letter "P" and fix them with the middle of the wall under each vertical profile. At the edges of perforated suspensions there are so-called "ears". We screw them to the profile and check the fatality of all elements by the construction level.
Sound-thermal insulation material is placed between the wall and drywall sheet. Special mineral wool for GLC. After that, it is advisable to put a layer of vapor barrier film.

If the height of the wall will exceed the height of the plasterboard sheet, you can add the missing part of the material from above or below by setting the jumper from the CD profile.

How to carry out the trim on the prepared frame
Plasterboard sheets are fixed to the main profiles. The mount is carried out by 3.5 cm with self-strokes. For fast and easy work, it is best to use an electric screwdriver. Self-tightening until they are "recessed" their caps. Fastenings are tightened at a distance, within the borders of 150 mm in the center of GLC and around the perimeter. If one sheet is not enough, take a new sheet and cut the pieces of the desired size from it.


Sealing seams GLK
Now you can proceed to the finish finish. The technology is described in detail in the article about the putty of the walls. With the help of a special self-adhesive crucible tape, we close the seams. The tape is covered with a special putty Fugen from Knauf. For the last stroke, it is necessary to determine which material will be used for the finish coating. For example, if a tile or other rather tight material is stacked, you can simply shut out the seams and start laying the tile. If the wallpaper will be glued to the surface or simply paint, then we excite the seams, the holes from the screws several times.


Schucker grind the surface and process the primer. If in the future sheets will be painted, the surface must be perfectly smooth.
Frameless Mounting Sheets
The first stage is a surface primer. Ground, waiting for complete drying.

The next step will be the preparation of the adhesive solution. In pure water we fall asleep Perflix, mix, we achieve the delicate of the solution you need. It is advisable to knead the walking so that it does not glare with the plasterboard. Warning immediately that glue will dry quickly, so it is necessary to work with it.
The drywall sheet is easily cut by a knife, after which it is shaken. The edges remain torn, the plasterboard plasterboard is useful to us.

It is necessary to apply glue only on the rear surface of the sheet from dust and garbage. In the center and edges of GLC glue are applied by buns needed to us. They are made at a distance of 25 cm. If you need to glue a whole sheet, you can apply buns on the wall.

Plasterboard sheet apply to base and apply evenly. For better fixation, you can use a rubber hammer. We apply a tree bar and knock the hammer on it. It is impossible to knock onto the rubber hammer on the GLC itself, otherwise you can break through holes in the material.
Only after the complete drying of the glue can be seaming seams. The seams are close to the same principle as when installed on the profile.

Finally
The plasterboard cover does not take you special hassle, if all steps are performed sequentially.
- It is necessary to prepare the walls (clean them from old coating, dust, dirt, handle the primer).
- Select a method for fastening the material (frame, frameless).
- Purchase the necessary inventory.
- Secure plasterboard sheets.
- Seam the seams with a special ribbon, putty, treat the uneven surface with sandpaper and primed.
It is difficult to imagine modern repairs, which is done without plasterboard. This material unique in terms of its qualities has entered our life so tightly, that today it can be considered almost the most popular. But, despite all popularity and demand, not everyone who starts repairing their own hands, it turns out to be done without mistakes and flaws.
And in this article we will talk about how to sow plasterboard walls, and prevent the most common mistakes.
Preparation of walls to the trim

Methods for fastening drywall can be somewhat, and we will talk more about it just below. But not depending on what method you choose, or rather, which one is more suitable for your specific situation, you need to start the finish with careful surface preparation.
So, the first and most important stage is the removal of the old finish from the walls. Many people may have a question - why do it do if I'm going to install the frame?
Everything is simple, without proper processing, trimmed with plasterboard walls can start mochable, even if it is fixed on a special frame. This is especially true for the outer walls of the house, which, due to the temperature difference, the cold bridges are traditionally formed.

You can, of course get rid of them by the insulation of the wall, but this is already a completely different conversation, and another type of repair. In our situation, we do not produce additional insulation, and simply we are wearing the walls with plasterboard, and therefore they need to be protected, and for this you need to clear.
On how to remove old finish elements can be read on our website, or watch the video in this article, which shows the instruction manual for the removal of old wallpaper and paint. We will not focus on this, and we will turn right away to the next stage, which is the processing of walls by antiseptics.

Antiseptics are special fluids that penetrate the structure of the material from which the walls are built, and create a medium there, in which the bacteria is not able to multiply.
It is the bacteria that the mold is caused on the surface of the walls. And the mold in turn, very quickly begins to grow, and over time it will appear on the surface of the finish, even if it is mounted on the frame and on a substantial distance from the wall.
Tip! Many are wondering if it is possible to sow walls without moisture-resistant plasterboard. In principle, it is possible, but only if you are one hundred percent sure that your walls will not be exposed to moisture. On the other hand, the price of moisture-resistant sheet is not much higher, and whether it makes sense to save on it, unknown.

So, we take into the hands of a brush or roller, and we appline a thick layer into the walls. What it will be more, the better the impudent will be protected. It is not worth saving money on what can significantly affect the service life of the finish.
After the walls are processed, it remains to wait for a complete drying, which may occur in an hour or a few days later, it all depends on temperature and humidity in the room where the repair is made. In any case, you should not start mounting until the primer drying, especially if you are going to install plasterboard without an additional framework.
Installation

As you know, the installation methods can be somewhat, and there is no question of how to sneak the walls with plasterboard. The choice of method is entirely depends on the characteristic features of your home and walls in particular. For example, if the walls are often swollen, and eliminate it there is no possibility, it is best to make plasterboard mounting on the frame.
On the other hand. This method is being built by space, which means that it does not suit the premises with a small area, where it is impossible to sacrifice the cherished centimeters under any circumstances. To clearly decide on the choice of a method of installation, it is necessary to take into account a number of factors, and for this, you need to know all the advantages and disadvantages of both fastening options, but about everything in order.
Method First: Fastening for Glue

With this method of installation, plasterboard sheets are glued directly on the wall (see how the plasterboard is glued to the wall independently), and since we will not describe the entire process in detail, we suggest you to see how to sneak the walls with plasterboard video on which everything is shown. And in the meantime, we consider the main criteria.
Which should be guided by choosing this option:
- Under plasterboard fails to hide communications, such as wiring electrical wiring or heating pipe, so you will need to take care of in advance about this moment.
- Wet walls can be a significant interference with this installation method.. The moisture will begin to move from the walls to the finish, and over time, it will destroy even moisture-resistant plasterboard.

- Fastening to the wall can significantly save room space. Unlike the frame, here you will not lose the cherished centimeters, and the area will decrease the maximum of 3-4 centimeters.
- This method cannot be used with a significant curvature of the walls.. The maximum allowable drop is 2 centimeters if your walls are more curves, you will have to abandon the installation on glue.
- Installation on glue - more economical financial plan for attaching plasterboard. All you need is dry glue and water. In addition. It does not need a large set of tools, which is also very convenient, especially if you consider. What you do not often do repair work in the house.

- Simplicity - one of the most important factors. In order to glue a sheet of plasterboard sheet, you will not need any special skills of skills or experience. Everything is extremely simple and understandable, it is enough to see thematic photos or video materials.
- This method of installation is not suitable, if we, for example, we are wearing log walls with plasterboard. The fact is that the glue for drywall is very poor adhesion with wooden surfaces, and it interacts only with concrete or stone bases.

Gypsum Carton is an excellent finishing material, indispensable in alignment or constructing partitions, walls, ceilings.
The article presents the technology of the walls of the walls by plasterboard, describes the techniques of the walls of the walls of the plasterboard sheets.
Having read the article, you can independently, without the help of professionals, shelter the walls with a plasterboard sheet with their own hands.
To cover the walls, plasterboard is applied for a long time. For example, in Russia, plasterboard was widely used since the 50s of the last century. True, the material produced in the 20th century did not possess such high properties that make it available not only at cost, but also if possible.
Plasterboard has a number of advantages over other finishing materials:
- high fire resistance and sound insulation;
- low cost;
- low weight;
- Convenience in work, practicality and simplicity.
What you need to know to properly apply plasterboard when wearing walls?
Consider the main points of the technology of the walls of the walls by a plasterboard sheet.
For the trim, various methods of fastening material, frameless or frame, are used.
For constantly heated premises, it is recommended to use drywall with a thickness of at least 12 mmIn the summer house for the walls of the walls, it is advisable to use moisture-resistant, fire-resistant plasterboard sheet.
Frameless method of wall sheatting with their own hands Based on the use of plasterboard sheets with a thickness of at least 12 mm.
This method is more expedient to use on a flat surface, which is well held by the old plaster. In addition, the wall must be securely installed.
Installation steps are divided into preparatory, assembly, finishing.
At the preparatory stage, old paint, wallpapers, plaster, dust, dirt are removed from the surface.
Damaged areas are attached, cracks close up. For high-quality closure of the surface, cracks must be cut into a depth of at least 5 mm. Checked irregular surface.
When irregularities are not more than 4 mm, plasterboard sheets are mounted using plaster or solutions or putty.
When the surface is irregularity of up to 20 mm, the sheets are stacked with glue applied to lines with lines with a pitch of 25 ... 35 mm.
If irregularity is up to 40 mm, then laying of plasterboard sheets in two layers.
The first layer is performed by sheets sliced \u200b\u200bon the strip of up to 10 cm wide. The second layer is mounted from solid sheets and is fixed with putty.
From the tools needed to perform work, you can not do without a roulette, a sharp knife, level, jigsaw, rubber hammer.
We will need putty, grout, painting mesh and tape.
For fastening sheets of plasterboard, it is recommended to use special adhesive compositions.
Skye method of attaching GLK
The installation of the frame is necessary at high irregularities of the walls and on the wooden surface.
The frame method of the walls of the walls of the plasterboard is provided for the installation of a frame designed to align the surfaces and fastening of plasterboard sheets.
Frames can be collected from a wooden bar or galvanized metal profile.
For the construction of a wooden frame, it is recommended to use a timing by a cross section of at least 30 × 30 mm, carefully treated with antifungal, fire-fighting compositions. Of the compositions, you can recommend liquids Aquatex, Sezhez, Villagex. When assembling a frame from a wooden bar, be sure to leave at the top and bottom of the gaps for air circulation.
Bruks to the wall are attached with the help of a dowel-nail. Self-adhesive substrate is stacked under the bars.
Frame from a bar is appropriate to apply in wooden rooms. This will allow you to get an absolutely environmentally friendly room.
It is more expedient as frameworks to use structures mounted from metal galvanized CD or UD profiles.
CD profiles are designed to perform the role of carriers, and UD type profiles are guides.
Using UD profiles, the surface flatness is set, and the CD type profiles allow you to create volumetric structures and create stiffness to the construction.
To cover the walls of plasterboard, you need to perform a number of mandatory work.
The preparatory stage includes cleaning the walls from dust, dirt, old paint and wallpaper.
A markup is applied to the wall using a building level.
The support of the profile with self-draws or dowels is attached to the applied lines.
First of all, the extreme vertical guides should be consolidated. Staying between the extreme guides, the langer cord or the fishing line is fixed by the other guides, withsting surface flatness.
Configuring the carriers, proceed to the installation of reinforcing profiles. It should be remembered that the enhancing and leveling profiles serve as the basis for which the plasterboard sheet is attached.
P-shaped brackets should be used to give stiffness. By the way, the P-shaped brackets must be attached to the middle of the applied markup.
Collecting the frame, constantly remember the surface flatness.
Vertical carrier guides are attached through a distance of 400 ... 600 mm. Their length is equal to the height of the wall.
Plasterboard sheets to the frame are fastened with self-drawing strictly at right angles. The screw of the self-press should be recessed by 1 mm. The fastening step of the sheets by self-drawing is 25 cm.
First of all, sheets are mounted on the wall without opening.
- Facing the walls of plasterboard - 1008 masters on the site
- 9133 reviews about repair professionals
- Facing the walls of plasterboard in Moscow from 399 rubles / sq.m.
Facing with plasterboard is a fast and effective way to finish the walls in an apartment, a country house or office. The method is very popular. It allows you to align surfaces, hide communications, as well as implement non-standard design solutions. In particular, the panels can be used to create niches, protrusions, openings. Stying is made on concrete, brick, plaster, cement, wood.
The service is offered experienced specialists Website working in all parts of Moscow. At the stage of negotiations, the work plan is drawn up, the number of necessary materials is calculated. After the detail agreeing is a contract with a detailed estimate. Installation of plasterboard sheets preceded surface preparation. The masters remove the remains of old coatings, close the slits and dents and apply soil. HCL is mounted in two ways. With frameless, a special glue or mounting foam is taken. In the second embodiment, metal profiles are used.
The cost depends on the volume and complexity of work, raw materials rates. Photos are published photos of implemented projects, which simplifies the search for a better specialist. The initial price is 300 rubles per square meter.
The lifting of the walls of plasterboard for alignment and preparation for the finishing finish increasingly displaces the traditional starting plaster. Plasterboard for that and invented: Synonym for him, as is known - dry plaster. Alignment of the walls of plasterboard, firstly, much easier and cheaper than the old-fashioned plaster work. Especially - Wooden Walls: To shook the tree by the Old Testament method, you must first impose on the wall of Parchment, then felt soaked in with a liquid clay solution and a 2-level crate from the drady. Secondly, the most experienced plasterer, working as a falcon and celma, will not bring the plaster layer than 3 mm / m. The plaster itself, uric, will give irregularity more, because Apply stains. Meanwhile, for many modern methods of decorative decoration of walls 3 mm / m, this limit.
The covering of plasterboard allows the wall to the common, between the corners diagonally, irregularity is 2 mm. Besides, the covering of plasterboard has a track in front of a solid plaster. advantages:
- Hygienic and hypoallergenne - not dust, on dirty.
- Improves the heat and sound insulation of housing.
- "Breathe", i.e. absorbs excess water vapor from the air and gives in shortness; This is especially important in the apartment house from reinforced concrete or silicate brick. The breath of drywall is not so deep and even, like a tree, but still - not a stone.

The disadvantages of alignment of walls with plasterboard only 2, but serious enough.
First - fragility. If the wall of the furniture is used to be placed in the conventional way, it is possible that it is easy to close. If the case is attached to such a wall with a hidden or slipped man, she will not be anything at all. Plasterboard in the other case faces break and cracks.
The second is the bad availability of hidden communications.. If a pipe flowed in a conventional wall or overwhelmed wiring, the case will cost the shoe, which is subsequently closed. If an accident behind plasterboard, you have to remove at least one plate, porting the finishing finish to the need to fully replace it.
Taking into account all these circumstances and it is necessary to decide the question: or plasterboard. In modern housing of the budget and secondary level, the result is a cup of all in favor of the latter due to the low cost and ease of work. Therefore, the purpose of this article is to give the reader to a fullest performance, how to seize and align the walls with plasterboard with their own hands, because The lover of the room is OK. 12 sq. M. Masters by hired masters costs somewhere from 30 thousand rubles, the popularity of the material affects the pricing.
Material
Gypsum Carton is a pressed mass of cellulose filler with a gypsum binder covered with a protective paper layer. Produced by sheets (GLC), thickness up to 16 mm, and plates (GKP) with a thickness of up to 32 mm. For the walls of the walls and the ceiling, GLCs are used ordinary, moisture-resistant G Clac green, fire-resistant GKLOs of red or orange and fire-resistant gloa green with a red stripe.
GKLO and G CLVO are used to finish wooden buildings, because In the event of a fire, the spread of the flame is delayed for a time sufficient to evacuate people. All kinds of GCP and GPP are intended only for internal use, because Prolonged exposure to outdoor conditions are not kept. GKV racks in rooms with high humidity and episodic spraying (bathroom / bathroom, entrance hall, basement, garage), but not in the rains with the wind.

The parameters of the most commonly used GLC are given in Table., But in trade practice they are often divided easier: on arched thickness up to 6.5 mm, the ceiling is 9.5 mm thick and the walls with a thickness of 12.5 mm (all - including paper coating). Arched plasterboard is designed for the manufacture of volumetric decorative structures, but can find auxiliary use and during the walls of the walls, see below. Ceiling GLC less weights, as seen from the name, weave the ceilings.
Main methods of placing
The decoration of the walls of plasterboard can be performed frame (on the crate), frameless on glue and combined. The latter for all properties and qualities is equivalent to frameless, so they are often not separated. The advantage of the frameless covering of GLC is the limit simplicity and low cost of work. It also less affects the fragility of drywall due to the larger clutch area from the carrier (base) wall. The disadvantage is the dependence of the sustainability of the entire casing from the state of the base wall: if it is climbing or somehow still loses surface strength, there may be a sudden collapse of the entire trim at once. Also on the adhesion it is impossible to put GLK on the wooden walls. In principle, it is possible that such adhesives like aquarium silicone or moment-gel, equally well hold GLCs on the tree and never appear on the trimming stains. But the cost of the finish will be released such that the mahogany lining is hardly more expensive. Therefore, further focus will be paid to the cover of GLC on a frame, as more costly, but reliable and allowing to make the insulation of the room from the inside.Note: Some consider the additional advantage of the cover of GLC on the frame that it is done without stripping the base wall, i.e. For old plaster and wallpaper. But, firstly, it is impossible to do in sanitary and hygienic considerations. Secondly, without a technical assessment of the state of the main carrier surface, there can be no confidence in the reliability of the whole sheaving.
Glk on the frame
The technology of covering the walls of GLCs on the frame is based on the use of thin-walled steel galvanized profiles. The covering on a wooden crate to date perfectly outlived itself even on partitions in heated rooms: from heat deformations and warming on it after 3-4 years cracked cracks. The covering of GLCs on a wooden frame is suitable for small elements of bulk structures, sowed with sutures. The covering of the GLC in the steel frame includes a trail. Stages of work:
- Preparation of walls and existing communications;
- Selection of frame schemes, profiles and fasteners to it;
- Measuring the irregularity of the bearing wall, markup for the frame, cutting and cutting the GLC;
- Mounting frame;
- Fastening GLC to the frame;
- Scatching;
- Installation of closing plinth gaps.
Wall
From the wall under the trim, it is necessary to remove the old finish. Wiring stacked in the shoes; Pipes are rolled with a frame with a crosslinion (see below), because Make in profiles of the frame of the rosets under communication is unacceptable.
Profiles
To cover the walls, the profiles of sizes shown in Fig. Sometimes it may be necessary. Hat profile (see below). The shaped finishing profiles go most often on the trim of the slopes of GLC, but this is a special question, much more complex than the walls of the walls; Masters for 1 Sleeps take $ 30- $ 100, depending on its size and complexity.

Note: PS rack profiles are sometimes called wall, and the guides of the mon - confused.
Carcasses
Typical scheme of the wall of the wall of GLC on the frame from the profiles of Mon, PNP and PS Showing on the trail. Fig. Suitable for most types of stone walls, also in a wooden house from glued bar, because It practically does not breed and does not "play" from temperature drops. It is used for insulation from the inside and double trim (see also at the end). According to the typical crate, you can sow the walls of the GKP.

Covering on hatching profiles (See next. Fig.) It is much cheaper than typical, but permissible only in dry heated rooms. It is necessary to take the 75x50 chamber drying for wooden obresatin. If the overall irregularity of the wall is up to 10 mm, and local up to 3 mm / m, the hatch profiles can be fixed directly to the wall (see also below, about the fastener for the frame). The covering of hatching profiles is possible by trimming or slices of GLCs, as well as horizontally oriented sheets. This may be essential if the height of the room (for example, 3.6 or 2.4 m) is poorly consistent with the length of the sheets of HCL. Double trim on hatching profiles is not recommended.

Finally, it is possible when the thickness of the trim together the frame is required minimal, For example, in close premises. Then it is possible to fulfill the crate under GLC only from the ceiling profiles (next. Fig.), But double and single GLC thickness of over 14 mm and the GKP framework from the ceiling profiles will not stand. The recommended HCL thickness for installation on the frame from the ceiling profiles is up to 10 mm. The same type of frame can also be assembled only from PS profiles, however, it will be as weak, but full of typical thickness.

Note: Sealing-damper tape in all cases - from microporous rubber or similar material with a thickness of 4-6 mm.
Fastener
The sale of the rich nomenclature of fasteners for frames for GLCs is presented, but a direct suspension can be considered universal (pos. 1 in Fig. Below), especially since direct honey is permissible, pos. 2; Starting ahead "Mustache" will be fucked by the sideways. This allows you to mount the frame with the possibility of insulation on the walls with potholes / walls up to 40-50 mm. Mounting paws of direct suspensions permissible to flex back to mount exactly at an angle or wooden rack (see below). To the wall, straight suspensions are fastened with self-drawing in propylene dowels with the entry into the wall of the threaded part, not less:
- Concrete - 70 mm.
- From the red full-scale brick - 80 mm.
- From silicate and red hollow bricks - 90 mm.
- Wooden - 100 mm.
- Foam concrete, aerated concrete, PGB - 120 mm.

It is unlikely that any framework under GLC will cost without cross, to bypass the openings, communications and assembly of additional beams at the joints of sheet belts. Cuts are cut out of the same profile that the vertical frame racks. For their mounting on sale there are angular suspensions, but most of the masters do here without additional fasteners. If cutting the corners of the profile, as on the pos. 3a, we will get 3 fastening paws, pos. 3 b. But it is unacceptable to mount the crossbars in the loaded designs (pos. 3B) in loaded structures: the heads of the screws will become foci of dangerous local stresses in the trim. Sometimes the middle paw is cut out (pos. 3B), the side is rejected, and they are fastened with flimsy, but the node is weak. It will correctly cut through the middle paw and put it on top of the vertical rack, pos. 4. About the installation of the trim in it, the self-tapping screw will be shorter, the shelving sheet will fit, and the entire fastening unit will be very reliable.
How to fix?
Since it was ahead of time to touch the frame assembly and fastening of the trim, it must be said that the frame is going on the LN9 metal screw (with the press-press head), and the GLC is attached to the frame of TN25 self-stakes. The head of the latter is not conical! It smoothly goes into the body of the screw! If you attach GLC self-reserves with conical heads, the casing will not last long, see also further. The mounting holes for the self-tapping screws make their way in advance with a special profile flower, see fig. If they simply choke them, then the skirts under the cutting of the thread are not formed, and the self-tapping screws will not hold on at all.

Marking under the framework
On the cleaning of the wall with a long level rack - the rule (emphasis on "and") - determine its overall irregularity; Perhaps you have to change the selection of the frame circuit. Then find the height of the speakers itself. Thereafter on the ceiling Blind the line, perpendicular to the adjacent walls and the highest wall of the walls of the cruise wall, which is not less than 20-30 mm. From this line on a plunder on the floor, beat off another; In this way, the alignment of the framework details is essential.
Next, starting from the corner on the plumb, the vertical lines are battered with a pitch of 600 mm with such a calculation so that they accurately come to the shelves. It is also necessary to take into account that the sheets of GLCs must defend from adjacent walls, gender and ceiling by 20-30 mm. Those., The first line is beaten in 620-630 m from the angle, the following in 1220-1230 mm, etc. The last line should be defeated from the final angle to the same 20-30 mm plus half of the assembly profile width, i.e. 80-90 mm.
The next step - on the vertical lines make a mark in 80-90 mm from the floor and the following with a pitch of 600 mm, until less than 600 mm remains to the ceiling. Then the last vertical marks are also made in 80-90 mm from the ceiling. A straight suspension is applied to vertical marks in turns and the places of drilling holes under the walls in the wall mark on the place. If standard sheets in height in this room lack, in a similar way, but now in terms of the level, place the wall under the installation of the cross. Do not forget, the longitudinal axis of the profile of the crossbar should also come to the butcher of the plates of the belt of the sheath! So far, everything can be distinguished on markup and cutting GLC.
Preparation of GLC

At this stage of work, you must first cut into the size of incomplete sheets. Cutting GLCs simply: an incision with a mounting knife, a dormural on weight, rubbing off the inside, see fig. below. "From the inside" it is conditional, both plastic GLK is the same. Next, from the edges of the sheets, the chamfer is removed under the grip of the seams. To do this, you need to edit plasterboard plans, see fig. on right. If you have a one-time job for yourself, it is better to rent it, because For something else, this tool is unsuitable. You need to take a planer on 2 corners - in 45 and 22.5 degrees; Why - see further about the grout of the seams.

Note: Trim in size in the width of the latter along the row (belt) sheet you need to approx. 10 mm already than the measurements. The fact is that the thermal deformations of the sheets themselves should be given between them a gap of 1-2 mm. On the wall of the usual length somewhere so much and runs. You can also take into account this value when the wall layout under the framework, but there will be a lot of compensation, and the profile widths of 60 mm are enough on the usual wall to compensate for the discrepancy.
The next moment is markup and drilling / cutting holes and openings under outlet, lamps, pipes, ventilation, etc. To do this, it is convenient to use a sheet of conventional packaging cardboard with a width of 600 mm: it is applied to the wall, pressed over the recesses of the palm, outline the contours of the pencil, cut out and transferred to GCL. In the drywall, the holes are cut out with a feathers or a circular drill, and rectangular openings are a knife for drywall. It looks like a mounted, only the blade is thicker and stronger.
Assembly of the carcass
Mounting the frame under the cover of GLC begins with the installation of the guide profiles on the floor and the ceiling. If the adjacent walls are not trimmed, the profiles of PN put on them so that one whole frame is obtained, see fig. on right; The connection of its angles is for each on both sides of the TN9 screw (so that the head does not perform). The first attachment points to the floor / ceiling 60 mm from the edge; The rest - in increments ok. 300 mm so that the latter also accounted for 60 mm from the other edge.
The direct suspensions are fixed to the wall, insert PS / PS profiles (first at the bottom, then at the top), shifted to the place and check their levels horizontally and vertically with the rule and plumb or the level in which there is a checkpoint. If before. Works were accurately accomplished, then additional alignments will not need. Then sweep to the rack profiles "mustache" of direct suspensions and fasten profiles.
Next stage - installation of cross. As it is done, described above, but sometimes, let's say when the pipes running along the walls, the second level is required to the frame. This is done using 2-level crabs, see fig. left. It may also be necessary to assemble the crossing from pieces, because They will be trimmed. Collect from pieces of rack and guide profiles is permissible only in the most extreme case!
Profile segments are connected by direct connectors, pos. 1 and 2 in Fig.:
In responsible places, for example, in the stroke of door openings, windows and mortgages for the suspension of furniture and equipment, the crossmen with racks are very desirable to connect not in a simple way, but with the help of special crosses, t. single-level crab, pos. 3 and 4.
In the end, you should have something like the fact that in fig. on right.
Corners
In the case when the GKC is trimmed by all the walls, special attention should be paid to the stroke of the corners. Internal problems usually do not happen; The circuits of the internal corners for the skin on the frame and combined on the glue (see below) are given to pos. 1 and 2 trail. Fig. By the way, Glk Knauf over the past year-half-and-and-and-and-and-and-and-half before complete disgrace: everything in bubbles, soft, like foam, you can pierce your finger. Not counterfeit, original.
With external corners more difficult. It is impossible to put on their face at the rack, at once 2-sheets will have hanging edges, which is unacceptable. The rack must be put on one line of the angle, to attach the suspension of the same profile to it, and the edge of GKL, pos. 3. Then, the PU profile on the glue of the fogenfuller or similar, pos. 4. PU is better to take with the reinforcing grid, pos. five.
PU protrudes over GLCs by 2-2.5 mm. This protrusion must be reduced to the overall level of trim on a width of 400-500 mm, then it will not be noticeable and does not prevent any finish finish. Smooth the protrusion PU plaster starting putty and spatula of acc. widths.
Warming under the trim
Heat from the inside generally speaking, bad: the likelihood of the dew point is great. It is strongly recommended to lay the insulation under the clamp of GLC only if the wall is already insulated outside. In this case, insulation under the trim from the GLC concrete wall is made according to the scheme in Fig. on right. If the wall is brick or wooden, a semi-permeable waterproof membrane is superimposed before mounting the frame, the same as used during the heat insulation of the roofs: it does not let water, but will release its pair. Best - microperphored membrane.
Instead of foam, you can use a folgize or a similar parobararier. It is superimposed on the frame before installing the sheath with a solid layer of foil inside. Fall of the edges of the ribbons of the parobaper - from 15 cm; The jokes are sampled by construction scotch. Edges challenges on the floor, ceiling and walls are the same; Surplus are cut after installation of plinths. If there is no outer insulation yet, then it is necessary:
- Trying to do from G Clac.
- In the insulation, not to take Minvatu, and the cellulose insulation (EcoWhat), it does not fall down and retains the insulating properties of the wet. True, Equouth will come. 25% more expensive.
- On any wall before mounting a frame to impose a microporphored membrane.
Sheaving
To mark the holes for the fastening of the GLC to the frame in the sheets, the pioneer holes are drilled. 2 mm with a diameter, I apply sheets at the place and a plumbing hell pointing spaces on profiles. An indent of the floor from the floor of 20-30 mm is provided by the cutting of a wooden rail. Mark them and do not lose, otherwise then the holes will not come together!
The number of attachment points is 45-70 on a leaf of 2000-3000 mm long. 5 points fall on short sides (3 on the racks and 1st between them); The rest are evenly distributed over long sides and on the axial line. The extreme points must be defeated from the edge of the sheet by 9-12 mm.
An important point when attaching GLK to the frame - screwing the screws. The screwdriver must be placed on minimal turns so that the head of the self-press only goes into the coating paper without breaking it as on the pos. 2 Fig. In other cases, the fastening will be loosened by 1.5-1.8 times, and if it is dissatisfied (pos. 1), then the protruding heads of fasteners will weaken and the skin. Upon completion of the fastening of the head of the screws, they are maintained by a gypsum putty.
Note: If the objects on the frame will be 2-3 belts from the vertical sheets, then there is no point of weight, the strength of the trim is not added, only the framework is excessively complicated. At the junctions of the belts you need to put crossbars (see above), so that horizontal joints accurately have exactly on their middle, and attach GLC as usual.
On wood
Fasten the framework of GLCs directly to the wooden wall, as in Fig. - Gross mistake. Construction people see, already bored on this grief and firewood broke: a lot of floating crates under GLK in a wooden house wanders along the runet. In fact, an effective damper between the "walking" wooden wall and the covering of GCC is able to be ordinary direct suspensions, you just need to put them correctly.
The covering of the wooden walls of HCL is performed using the vertical counterclaim from BRUSEV from 60x75; Willow (60x100, 60x150) - worse will not be, only from the room more space takes away. The framework scheme is typical, from PN / PS profiles. As for the fastening of direct suspensions to the bars, then 2 options are possible.
The first is in the house of glued bar and with central heating. The mounting paws of the suspension will be rejected back and are attached to the bruis from the sides, so the entire covering will be tougher. The second is in other cases: the suspensions are attached to the bars of pairs of tapes with a tree of 6x60, through an oval hole in the suspension shelf (see again rice with fastener). Self-tapping screws are taken with tablets and screwed into wood, retreating from the edges of a hole by 6-10 mm. In this case, the trim is desirable to make a 2-layer of sheets of 9 mm (arched GCL).
Seam
Methods of stamps of seams between sheets / plates of GCL are different depending on the type of decorative wall decoration. Under the elastic finishing finish, requiring an absolutely flat basis, but not afraid of microcracks under it (phliseline or clear wallpapers, photo photos on PVC, plastic tile) Fask on the edges are removed under 22.5 degrees so that the vertex angle of the V-shaped groove between the plates was 45 Degree. The groove is watched by the starting gypsum putty with a plasticizer flush with a common surface.
Under other types of finishes, the edge plans put 45 degrees, and the vertex corner of the groove will be 90 degrees. In this case, the groove is filled with putty (better adhesive) in some excess, then triturated in the strip. Next, while the putty did not begin to be seized, applied the sickle tape (on the left in Fig.) And the polished steel spatula is pressed (right in Fig.) Or roll slightly wet smooth roller. When the grout hardens, rub the putty and sickle with a smooth transition to the overall plane, as on the outer corner, see above.
Note: At the crossroads of the joints, first impose and pressed on a pair of folded M-figurative segments of sickle with wings on the seams from 15 cm. Then stacked along the seam of the tape with the same adhesive on the wings.
Plinths
Plinths on the contour of the sheat are fixed to the floor or ceiling. If the adjacent walls are trimmed, then a reinforcing ribbon profile is put in the inner angle, as an external, and already fasten to it on the mounting glue of the plinth.
Without carcass
Covering GLK on glue without a frame, as stated at the beginning, it is quite possible. But, contrary to common conviction, its technology is determined mainly by the irregularities of the wall, and not its material. Options for sticking GCL on the walls are given in Fig.:
Method for pos. in - combined; Initially, the lamp of the same GKL is glid to the wall. By the method B lump glue ok. 10 cm in the diameter are applied in a checker in a step of 250 mm. The height of the lumps is the greatest irregularity of the wall + 20 mm, because The optimal thickness of the adhesive layer is 12-20 mm. The wall under the twinkling of GLCs should be carefully cleansed about dust and dirt.
Note: Prepare glue exactly according to the instructions. Bold dry glue with water is unacceptable, it is necessary to stir only a drill with a mixer. In general, the strength and reliability of glued trim depends on the quality of water for the preparation of glue.
Clause GLC to the wall with continuous leveling control horizontally (rule) and vertical (level with a bubble on a plumb). There is a stumbling block for beginners - a transmitted stove. Pull it from the wall is unacceptable, you can only press. In this case, it can help pre-stick on the wall of beacons from the trimming of the working GLK or any other, see fig. on right. Firms engaged in plasterboard, willingly give small waste of arched Glk, they are just trash. The transmitted lighthouse can be opened and glued again, in this case the beacons are just a support.
Lighthouses on the wall glue so that they come to between cakes or glue bands on the work plate. On the sheet / slab GKL, you need 4 lighthouse at some distance from the corners. The lighthouses are glued at the beginning of the lower row, even the rule, then from the lighthouses of the lower rows of the rows up, presses the rule and extending the level. Plates / Sheets GLC glue when glue under beacons will type strength, i.e. After 3-4 days.
Note: Recently, "Folk Builders" are even more needed and simplified the sticking of GLC on the wall, replacing the glue ... by mounting foam. Technically, it looks very doubtful, but there is no more or less long experience of the operation of such a plating, so in the future everything is possible. Look if you want, video //www.youtube.com/watch?v\u003dqeu7ijdnqva. , And there, decide whether to try. In wet cold (but not up to minus!) The utility rooms, probably, is worth it. If there is going on, then everywhere will fit. And the method is up to funny simple and cheap.
Decor from GLK?
The fact that the GLCs make bulk decorative interior details (left in Fig.):, Niche, shelves, suspended ceilings, even cabinets, are well known. However, a flat multi-level decorative trim of plasterboard is possible, in the center in Fig. For this billet glue on the wall, applying thin on them (approx. 2 mm) layer of glitter for drywall toothed spatula. If the room is being scented, where the stoves on the walls will not be, for example. Balcony, then the trim can be simply painted, but to stick PVC plinths or corners, on the right in Fig. An option for the sheath with joints is not to remove the chamfer from the edges, the gaps between the plates leave 2-3 mm, and roll in them a smooth roller T-shaped furniture PVC edge.
Suspension on GLC
For hanging on the covered GLC, the wall of furniture and household appliances should be provided in the framework of the furnace details from the wooden bar or OSP. If the point of the suspension accounts for up to 20-30 kg, the mortgages can be simply attached to profiles, as in Fig.:
If the suspension point accounts for more gravity or honeyes expensive technique (TV, microwave), then the mortgages need to be fraternized from the profile of racks. Well, and if the point of suspension accounts for less than 15-20 kg, then the suspensions can be attached through the trim, see for example. roller:
(No ratings no)


 Calculation of heating in the apartment: principles, algorithms, formulas, how is the calculation for heating
 Terminal intermediate KT 12
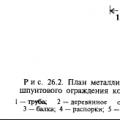 Construction of the ZIS in the conditions of a dense urban building information about the rules