The structure of the faucet in the kitchen. How to disassemble a single lever mixer. Prices for different types of kitchen faucets
Single-lever faucets attract with their laconic design and ease of control of water flow. Turning on the water, changing its temperature and pressure - all this with one turn of the handle. These devices are reliable and have a long service life—some branded ones come with a 5-year warranty. However, repair of a single-lever faucet is periodically necessary.
Types of single-lever mixers and their design
Despite the external similarity, there are two types of rotary or single-lever faucets - with a cartridge (cartridge) and ball - with a ball inside. You can repair any of them, but to do this you must first disassemble them. And so that you can not only disassemble, but also assemble, it is advisable to become familiar with the internal structure of each.
The design may be different, the structure remains the same
Cartridge mixer: structure
Cartridge mixers are so named because their shut-off and control mechanism is hidden in a special cartridge flask. In more expensive faucet models, the cartridge body is made of ceramic, in cheaper ones - from plastic. The good thing about these models is that they are easy to repair, but it is not always easy to achieve the required pressure with them - you need tighter control of the handle. But changing the water temperature is very easy - with a slight movement of the hand.
The structure of a single-lever faucet with a cartridge is simple. If you go from top to bottom:
- Switch with fixing screw.
- Locking (clamping) nut.
- Cartridge. The water flows are mixed in it, and the same device shuts off the water.
- The mixer body, which has a “seat” for the cartridge.
- Fasteners, studs and gaskets to ensure tightness.
- Spout (gander). It can be a separate part - in rotary models for the kitchen or part of the body - for sinks in the bathroom.
- If the spout is separate, gaskets are also installed below and there is also part of the body.

The cartridge itself contains several (usually 4) ceramic or metal disks of a special shape. A rod is welded to the upper disk. By changing the position of the rod, we change the position of the plates relative to each other, changing the amount of water passing through the holes in the plates.
In order for the faucet/mixer to work normally, the plates are ground very tightly. For this reason, cartridge single-lever faucets are very demanding on water quality. Foreign fragments getting between the plates causes the faucet to leak or stop working altogether. To avoid this, some manufacturers install filters on the incoming pipes. But, it’s better to supply and get clean water, which can be safely supplied to household appliances.
Single lever ball mixer
It got its name from the element in which the water is mixed - a ball with cavities. The ball is usually metal, hollow inside. Its outer part is polished to a shine. The ball has three holes - two for the entry of cold and hot water, one for the exit of already mixed water. A rod is attached to the ball, which fits into a cavity in the handle. This rod with a rigidly attached ball changes the temperature of the water and its pressure.

It is easier to adjust the parameters with such a device - the parts are well lapped, the handle moves easily. Mixers with a ball mechanism are less critical to the presence of mechanical impurities, but do not respond very well to the presence of hardness salts and excess iron. So for normal operation, pre-filtration is required here too.
How to disassemble and repair a faucet with a cartridge
Repairing a single-lever cartridge faucet often involves reassembling and cleaning the O-rings. Salts are deposited on them, debris and dirt accumulate, which is why the faucet begins to leak. To eliminate this nuisance, the mixer is disassembled, all parts are wiped of dirt (with soapy warm water), rinsed, dried, and put back in place.

Let's figure out how to disassemble a faucet with a cartridge. First, turn off the water, and then the procedure is as follows:

That's all. The single lever mixer with cartridge was disassembled. As you can see, there are not many details. The main working part is the cartridge. It is in it, inside, that mixing occurs.
Replacing the cartridge
The cartridge itself has a sealing gasket - a rubber seat at the bottom, which ensures a tight fit to the body. Over time, the rubber loses its elasticity and water begins to leak out. If this is the problem, you can first try to clean this ring from the salts and deposits that have formed on it. Place the cleaned part in place and check the work. If the leak does not stop, you will have to replace the cartridge.

Cartridges for “one-arm” faucets
Cartridges for mixers have different diameters, and the inlets and outlets in the lower part are located differently. Therefore, if you need to replace it, first you disassemble the mixer, get the treasured part and go to the store or market with it. You must choose exactly the same model without any deviations. At home, install the cartridge into the housing, turn it slightly until you feel that it “sits” in place. Next is assembly, it goes in reverse order.
First install the clamp nut. Actually, at this stage you can check how the new cartridge works. Turn on the water, adjust the temperature and pressure with the rod. To make it more convenient, you can put a handle on the rod. If everything is fine, continue assembly.
We disassemble and repair a single-lever ball mixer
The single-lever ball mixer was invented a little over 40 years ago. Its design is simple and reliable - there is nothing to break. If problems arise, it is only due to poor quality water - dirt particles settle on the rubber saddles on which the ball rests. The contact deteriorates, water leaks out and the faucet begins to leak.

Some ball valves are also available with a cartridge. Only inside the cartridge there are not plates, but a ball. Disassembly of this type is no different from that described above. All the difference is hidden inside the flask. There are also other types of taps. In them, the locking ball is installed directly into the rubber seat. There are some minor differences here.
The faucet lever is removed in the same way - first remove the plug, then unscrew the screw with a hexagon. Pull the lever up and remove it. Afterwards the steps are very simple and similar to those described above:
- We unscrew the cap, preferably by hand, since it is usually made of thin metal and is easy to bend.
- We unscrew the clamping nut, there is a washer under it, remove it too.
- Access to the ball has opened. Pull the rod and take out the ball.
- Under the ball there are two saddles, with springs so that the elastic bands are pressed more tightly to the ball.
That's it, sorted it out. Next comes the repair of the single-lever mixer. In theory, the problem is that deposits have accumulated at the contact point between the ball and the seat. They need to be removed - carefully clean and wipe. There may be problems with the springs. Dirt sometimes accumulates on them too, but more often they simply lose their elasticity.
The third source of problems is the ball itself. In general, it should be made of stainless steel; accordingly, it only needs to be cleaned of deposits. In reality, this is not always the case - cheap faucets have appeared even with plastic balls or made of cheap metal. In this case, peeling of the surface or other similar troubles may occur. Such a locking element will no longer work normally. It needs to be replaced. You also go to the store with the ball and select a replacement of the appropriate size. Assembling the mixer in the reverse order: springs from the seat, the seat is out of place, there is a ball on it, etc. When assembling the entire structure, carefully center everything - misalignment will lead to rapid wear and the tap will leak again.
Repair of a single lever faucet with swivel spout
Faucets with a swivel spout are installed on sinks in the kitchen or bathroom. Periodically it starts leaking from under it. In this case, the locking mechanism is not to blame; it’s just that the gaskets have lost their elasticity or the lubricant has dried out.

In this case, disassemble the mixer as described above, then remove it by pulling the spout up. Remove all old gaskets. If they are stuck, you can use a flathead screwdriver or even a knife blade. You have to remove them, but they are still replaceable. Use the removed gaskets to select new ones. It is advisable that they be made of silicone, not rubber. Silicone is more elastic, retains its properties longer, and tolerates contact with water better.
Lubricate the new gaskets with plumbing silicone grease and install them in place. Reinstall the spout. It must be pressed down well so that it rests against the union nut on the mixer body. Next is the assembly of the rest of the mechanism.
In the kitchen, the faucet is used much more actively than in the bathroom, so it breaks down much more often. In rare cases, the only solution to the problem that has arisen is to buy a new device and invite a plumber; in other cases, you can handle it yourself. By deciding to repair a kitchen faucet yourself, you will save on the services of a specialist and gain important experience. You just need to arm yourself with theory and tools.
- Leakage from under the nut at the water outlet, from under the handle (lever) or mixer valves in working condition.
- The correct movement of the lever or valves is disrupted (they stick, turn, do not lock in the desired position, etc.).
- At normal water pressure in the system, the jet is not powerful enough.
- Water drips from a closed tap.
Please note: the detected problem must be resolved as quickly as possible! This will extend the service life of the mixer and protect yourself and your neighbors from flooding, saving money, time and nerves.
The problem that raises the most questions is a leaking faucet. And here you need to know the “enemy” not only by sight, but also from the inside. We are talking about the design of mixers.
Design features of the main types of kitchen faucets
Such delights as thermostatic and touchless faucets are good for bathrooms. In the kitchen, more practical models - traditional two-valve and single-lever - are fighting for a place in the sun. The common elements for them are: body, spout (spout), aerator, sealing gaskets. Otherwise they differ significantly.
Installation of two-valve taps
Faucets with two valves that are familiar to the eye are designed quite simply. Under the flywheel, which you turn when operating the structure, there is a crane-axlebox - its locking element. Below is the design of such a kitchen faucet in pictures.

Axleboxes in a two-valve mixer (sectional view)
In products where several revolutions of the flywheel are required to supply or shut off water, worm axle boxes are installed. Their work is based on rotational-translational movements. The more you unscrew the valve, the further the axle box gasket will move away from the so-called “saddle”. The consequence of this is the flow of water into the internal cavity of the mixer, and then into its spout (spout).

Worm worm valve axle box for mixer
In models where it is enough to make only half a revolution to supply water, axle boxes with ceramic plates are installed. When you open the tap, the holes in them coincide and water flows into the spout.

Crane axle boxes with ceramic plates
The cost of faucet axle boxes is low, they are always available in plumbing stores, and their replacement is extremely simple.
Design and types of single-lever mixers
More modern and practical are models of faucets with one handle (lever) that regulates pressure and temperature. Mixing water in them is carried out in a hollow ball with three holes or in a special cartridge.
The mixing element in ball models has three openings, two of which are inlets - designed to supply hot and cold water to this miniature container, and one outlet - for supplying water at a given temperature to the sink.

Ball mixer device
The ball itself is located on two rubber “saddles”. Its displacement relative to them, carried out when the lever moves, allows you to regulate the pressure and temperature of the water being poured out. The ball is secured at the top with a sealing collar and a lock nut.

Schematic structure of a ball model of a kitchen faucet
The operating principle of a mixer with a cartridge that replaces a ball is similar. At the same time, their internal structure is fundamentally different. There are still the same three functional holes, but inside the cartridge there is not a cavity, but special metal-ceramic disks. Due to their displacement relative to each other and the degree of overlap of the supply holes, when turning the lever, the water supply is adjusted.

Replaceable ceramic cartridges
The kitchen faucet is leaking - how to fix it yourself
To repair a kitchen faucet you will need:
- knife with a sharp end;
- hex and adjustable wrench;
- screwdrivers;
- a new cartridge, valve axle, rubber gasket, etc. - depends on which part you will change;
- WD40 is a technical aerosol that is useful if parts are “stuck” to each other. However, you can get by with the traditional tapping of a hammer on a screwdriver, but there is a high risk of damaging the mixer.
Regardless of which faucet you have installed, before starting repairs, you must turn off the water supply to the system and drain its remaining water into a sink or a separate container. To do this, just open the tap. Then you can begin to repair it, taking into account the design features.

To repair a single-lever faucet, you will need a hex wrench.
Single lever kitchen faucet repair
The main principles of repair are sequence of actions and accuracy.
- Using a thin screwdriver or knife, pry and remove the decorative plug on the faucet body.
- In the resulting hole you will see a screw connecting the lever and the adjusting rod. Unscrew it using a hex wrench.
- Remove the lever from the body and unscrew the decorative casing. This can even be done by hand if the parts are not stuck to each other.

Removing the decorative casing
- There will be a locking (clamping) nut underneath it. Gently unscrew it with an adjustable wrench or by tapping it with a hammer on a screwdriver.
- If you disassemble the ball mixer, you will see a sealing collar under the nut. Inspect it for dirt, deformation and tears. Pull out the ball. Inspect its surface - it should be smooth and clean. It is necessary to remove the seals and support springs - their poor condition can cause the tap to leak.
- If you are disassembling a faucet with a cartridge, remove it and thoroughly inspect it.
- Replace the failed part.
- Reassemble the faucet in reverse order.
It is important! Do not tighten the nuts too tightly, as this may lead to deformation of the rubber seals and disruption of the normal operation of the mixer.

Installing a new cartridge
To extend the service life of the product and ensure smooth running of its rubbing parts, you can use a special silicone lubricant.

Removing the mixer handwheel
Repair of a two-valve mixer
What to do if your two-valve faucet is dripping in your kitchen? Almost everything is the same.
- On the valve flywheel, pry up and remove the decorative plug.
- Using a screwdriver, unscrew the screw that secures the flywheel.
- Remove the flywheel. There will be a crane box in front of you.
- Unscrew it counterclockwise and inspect it.

Removing the crane axle box
- If it is a worm-type axlebox and its gasket is damaged, replace it separately - buy it in a store (costs pennies) or cut it yourself from rubber of a suitable thickness. The axle box with ceramic discs is replaced entirely.
- Reassemble the faucet in reverse order.

General scheme of mixer repair work
Everything is as simple as possible and slightly reminiscent of a construction set. But a leaking faucet is not the only problem you may encounter while using it in the kitchen.
Other faucet breakdowns and fault prevention
The quality of water in many cities leaves much to be desired, so over time the aerator in the tap can become dirty. On the inside, hard deposits “grow” on it. When there are too many of them, the pressure and quality of the water deteriorate significantly. The solution to the problem is to replace the aerator. Ideally, it can be easily unscrewed with an adjustable wrench, but for stuck parts you will need WD40 or tapping with a hammer.
It is important! Carry out all work carefully, otherwise the mixer will have to be replaced completely.
The faucet is leaking, and during the inspection you found a crack in it? Then it's time to go for a new product. For a short time, silicone sealant can be an assistant.
You can extend the life of the faucet if you install a water filter and use the device carefully, without tightening the valves too tightly or moving the lever suddenly and all the way.
Video: repair of a single-lever faucet with a ceramic cartridge
Now you know what to do if your kitchen faucet is dripping. In most cases, the repair schemes discussed are also suitable for eliminating breakdowns of faucets in bathrooms. This is a good saving for the family budget. But if you are not confident in your abilities or you simply don’t have time, a competent plumber will complete all the work in a matter of minutes.
Most often, a ball valve is installed in the kitchen. It is convenient and simple, works flawlessly. Turning one knob is much more pleasant than turning two valves. In addition, the design of the ball valve also determines its reliability - it is simple and devoid of unnecessary parts that can fail at the wrong time.
The ball type mixer is very simple and easy to use.
Before repairing the faucet with your own hands, it is important to know its structure
The faucet must be disassembled with extreme care to avoid damaging anything.
However, the ball valve breaks sooner or later and begins to leak. And here you have to deal with an unpleasant thing - a design feature of the ball valve that determines its reliability at the same time and makes it difficult to repair it yourself. The fact is that the mixer mechanism is non-separable and the most important mechanisms are included in a cartridge that cannot be disassembled. If one part fails, the entire cartridge will have to be replaced.
Let us now take a closer look at other ball valve failures:
- Hull cracks;
- Failure of gaskets;
- Cartridge clogged.
Case cracks can be repaired with your own hands only if the crack is small. In this case, you can use a sealant. This will stop the leak for a while.
If the gaskets are worn out, they must be replaced:
- Shut off the water supply;
- Remove the mixer by unscrewing the inlets and the nut securing it;
- Replace the gasket;
- Reassemble the mixer.
If the cartridge is clogged, there is nothing you can do about it yourself - you will have to replace the entire cartridge. To do this, after shutting off the water and draining the water, remove the mixer. Next, the decorative plug is removed, the lever is removed and the cartridge is removed. The old cartridge is thrown away and a new one is installed in its place. Next, the crane is put back together.
If the mixer body bursts, its replacement is inevitable.
Sometimes the cause of malfunction and difficult water supply is a clogged aerator. Repairing such a malfunction with your own hands is not at all difficult. You need to unscrew the aerator and open the tap - if the water starts flowing with the same force, then the problem is definitely in the aerator. In this case, the aerator is washed, freed from debris and put back on. Sometimes the aerator is already completely destroyed. Then it is replaced with a new one.
If water stops flowing from the shower, but flows fine from the tap, then the spool gaskets are most likely worn out. If the top gasket fails, you don’t even need to remove the mixer. Simply remove the shower hose and change the gasket. If the problem persists, then the problem is in the bottom gasket and you will have to remove the mixer yourself.
Before removing any tap, the water supply must be interrupted.
Repairing faucets in the kitchen and bathroom yourself is not difficult. And it doesn’t even require experience in plumbing work or special knowledge of mechanisms. All work can be done quickly using the most accessible tool available in any home - a knife and a screwdriver.
What a mixer is in general, no one needs to be told; everyone knows for sure that this is a device with which cold water is mixed with hot water and supplied for various needs in the kitchen or bathroom. Over its history, humanity has experienced many types and types, as well as models of faucets. Today, the most popular and in demand are faucets with a single control lever, which can be used to set the desired pressure and required water temperature.
When asking for similar devices in a store, or planning to repair a single-lever kitchen faucet with your own hands, you may find that they also have other names. Such plumbing equipment can also be called mono-command, and in everyday life many people generally call it a joystick. Such joysticks owe their popularity to their reliability and long service life, since their internal parts practically do not rub against each other, they are made of metal and ceramics, and the rubber gaskets that are there are easily replaceable.
A single-lever device consists of several parts fastened together. In order to figure out how to repair a mixer tap with one handle, you will have to become a little more familiar with its design.
- Regulator (knob, lever) for water pressure and temperature.
- Nut or washer for fixing the main rod.
- A cartridge or a special ball-shaped valve with holes and grooves that provides mixing of water flows.
- Rubber gaskets (seats) to prevent leaks.
- The tap tube is threaded on one side and with a screwed-on aerator filter (mesh) on the other.
- Various cuffs and washers for screwing to the sink or sink and an adjustment ring to hold the structure together.
The principle of operation of such mixers is quite simple and understandable, if you look at it. There is already an article on our website about how it works, as well as exactly how to disassemble a single-lever mixer. In a nutshell, water enters the cartridge through two holes, after which it pours out, already mixed together. By moving the internal element (ball or cartridge) using the lever, you can select different positions of the holes and grooves that are responsible for supplying colder or hotter water.
It happens that faucets fail, then there is no way to do without repairs. The easiest way is to turn to a real professional plumber, who, just by looking at the problem, most often can make a “diagnosis”, name the cause of the breakdown and methods for resolving it. But such services are not available to everyone and not always.
- The cartridge system is considered more reliable because this element is made of ceramics or a special polymer, which very rarely fails, and even then due to manufacturing defects. However, it is more expensive and tends to become clogged with solid particles, for example, sand, clay or rust from the water supply.
- The ball mechanism will be cheaper, but is made of metal, so it is susceptible to some corrosive phenomena, oxidizes, and due to its shape, it can accumulate limescale on the surface, which will have to be cleaned regularly.
- Ball or cartridge seats, which are rubber gaskets, can also fail due to solid impurities in the water or substances dissolved in it. Then the gaskets can become deformed and even harden, which will certainly lead to failure of the entire mixer.
- Overtightened nuts and washers can also lead to damage, and the mixer may jam or even jam. But loose twists also do not bring anything good, since they also have a detrimental effect on the performance and durability of the system.
- Cracks, chips or manufacturing defects on the mixer body usually lead to leaks; this is a fairly common breakdown that should never be forgotten about, otherwise it’s no wonder you’ll flood your neighbors.
But the most important, main cause of breakdowns of all types of faucets, both single-lever and other, is hard water, which is present in our water supply. Over time, various substances settle on gaskets and internal surfaces, “sticking” to nuts, screws and washers, preventing them from functioning properly.
We have already figured out the basic structure, as well as the cause of possible breakdowns of the faucet; all that remains is to find out exactly what “symptoms” of breakdowns can cause a quick response, after which it is already possible and necessary to repair a single-lever kitchen faucet. There may be many signs that it’s time to pick up a screwdriver and wrench, but it doesn’t hurt to study the main ones and keep them in mind.
- When the faucet leaks or drips or flows from under the lever.
- If the lever is in the closed position and water is still dripping or flowing from the spout.
- When the stream of water is excessively thin, but there are no visible reasons for this, and the pressure in the water supply system remains good.
- If the control lever does not move smoothly, jerks, sticks, or does not reach its extreme points, then you should think about repairs as soon as possible.
- If when you open the tap you hear a strange, somewhat whistling hum, then it definitely smells like kerosene and you need to think about prevention and repair.
Before you start repairing a single-lever kitchen faucet, you need to take care to completely cut off the possibility of leakage and flooding of neighbors. To do this, you need to turn off the common taps in the apartment or house, if any. If there are none, then you will have to connect the housing office, asking to turn off the entire riser, otherwise trouble cannot be avoided.
In order to repair a single-lever faucet, you will most likely have to purchase the necessary spare parts. Ball systems most often require replacement of gaskets and seats (rubber or silicone), on which the ball mechanism sits. In cartridge designs, gaskets, couplings and cuffs can also fail, but more often the entire internal ceramic element needs to be replaced, or at least washed and cleaned. But in addition to storerooms and consumables, you will also need tools, otherwise you won’t be able to do anything.
- Wrenches, adjustable wrenches, sockets and hexagons.
- The screwdriver is shaped and flat, powerful, with a fairly long handle.
- Pliers or pliers.
- An ordinary knife with a sharp edge.
- Hammer.
- Remove the mixer handle. It's not much different from a cartridge faucet.
- After removing it, we take out the cam with the washer. You can immediately clean it of all rubbish. It won't be redundant.
- Next we take out the ball itself and inspect it carefully. First, let's look at the top washer; you just need to clean it. If the ball itself looks worn out, then only replacement will help. If the springs do not press the seats against the valves well, then it is worth replacing both. It's not very difficult. You hook them with a screwdriver and take them out.
- Well, that’s basically it. The problem may also be due to limescale deposits or wear of mechanical components.
- Weak pressure? The gaskets on the supply lines may be pinched, or there may be poor passage of pipes or hoses. It’s also worth mentioning the aerator, this is a mesh at the end of the tap. If something is not very good with the flow of water, then you should remove this mesh and clean it, this is done very simply, you can use a needle, or you can use strong pressure of water. If anything, then it can be changed, their price is low, so you can afford to replace them sometimes. However, if a similar situation occurs often, then this makes you think that it makes sense to install at least mechanical filters. This will greatly extend the operation of the device and the life of the sink.
How to understand that a faucet needs repair
As a rule, each of us opens and closes the water in the kitchen several dozen times during the day, but almost no one counts these times. Such movements place a very heavy load on the mixer, which on average is designed for a million such movements, but with frequent opening and closing it is also prone to breakage.
Nowadays it is difficult to imagine a kitchen sink without a convenient, modern faucet. This device allows you to adjust the temperature of the water in the tap to the desired value.
Although lever-type faucets are becoming popular, many people use wing-type faucets or handwheels, which have threaded faucet axle boxes and rubber round gaskets.
Such mixers are simpler in design than the first ones, which makes their repair and maintenance possible for an untrained person.
It is this kind of mixer that will be discussed in this article, namely, how to repair it.
There is probably no person who is not irritated by the constant dripping of water from the tap, and no matter how much he turns the valve, nothing changes.

In this state of affairs, replacing the crane axle box or rubber gasket cannot be avoided. And it’s absolutely possible to do it yourself, although you might think that you can’t do it without a specialist.
DIY kitchen faucet repair
So, you should start by removing the decorative plug. A small straight-tip screwdriver will help with this.We insert the tip of the screwdriver between the flywheel housing and the plug.
We pry it up and remove it.


Under the decorative trim there is a screw for fastening the “wing” to the rotating rod of the crane axle box.
We unscrew this screw, first with a screwdriver, and when it loosens, you can use your hand.


Next, remove the plastic part of the flywheel housing and set it aside.

In addition to the screw, the flywheel is held in place by longitudinal slots or splines on it and on the head of the valve axlebox, mounted on top of each other. This prevents the flywheel from slipping or turning during rotation.

Over time, this connection can oxidize, and the two parts seem to “stick” to each other. Therefore, it is not always possible to separate them by hand.
In such cases, one or two screwdrivers will help, which can be used as a puller.

To do this, insert a screwdriver between the flywheel and the mixer body.

Next, we are slowly trying to separate them. If we see that one screwdriver does not give the desired result and the edges of the flywheel begin to break, we use two screwdrivers at the same time, only from different sides.
This will prevent the flywheel from skewing to one side, which will be more effective when removing old connections.
In our case, we got by with one screwdriver. The flywheel has “broken off” and further dismantling can be done with one hand.

Now, the handle has been safely removed, now all that remains is to unscrew the valve axle.

The 17 key will help with this.

It is possible that the size of the key may differ depending on the design of the mixer, but this is the key that is usually used.
We place the key on the body of the valve axle box and slowly unscrew it counterclockwise.

Usually, there should be no problems with removing this part.
Here is the photo of the removed part.


It can be seen that it has a slightly rusty coating. But it’s not scary, the part itself is made of brass, so you can simply wipe off the rust with a dry cloth.
In the next photo, the seat of the crane axle box. The plane in depth should be as flat as possible. The tightness of the gasket and, as a result, water constipation depends on this.

After removing the faucet box, it is advisable to clean this surface with at least your little finger, because pieces of the old gasket or flakes of rust may remain on it.
After cleaning, you need to turn on the water for a second so that its pressure washes this dirt out.
Now let's return to the crane box. If it is really bad, you can buy a new one, already with a gasket. But it will be cheaper to replace only the gasket.
Moreover, crane axle boxes made in the USSR may not be found. They are distinguished from more modern ones by different splines for the flywheel.


You will have to buy a set, a flywheel along with a crane axle box, but this will be a little more expensive and both valves will have to be replaced.
Therefore, replacing the gasket will be easier and cheaper.
To remove the gasket, you need to unscrew the screw that secures it. Regular pliers will help with this.


Separately, finding the gasket turned out to be problematic. In return, the sellers offered a set for different occasions. This set included five spacers in the correct size.

Moreover, the price of the entire set was less than 0.5 US dollars.
The remaining gaskets may also come in handy over time.
So, we remove one of the gaskets and try to insert it into the seat of the faucet axle box. This may seem tricky since the gasket initially looks larger than this area. But as soon as she comes in, everything will be as it should.


It is also very important to clean the screw hole in it. The fact is that this hole in the gasket is not quite ready. That is, there is a hole, but it is not through. It is slightly filled with rubber, which will not allow the fastening nut to be threaded through it.
Therefore, before installing the gasket, its internal hole must be milled using small scissors, for example.
Take one of their cutting parts and insert it into the gasket hole. Next, remove excess rubber using circular movements. But you have to be very careful not to make a cut inside the hole. This will destroy the gasket when it is clamped with the screw.
So, the hole is prepared, the gasket is inserted, now you can tighten it with a screw. This also needs to be done with feeling.

We tighten the valve axle box, first by hand, and then press it with a key, clockwise.
The kitchen faucet is perhaps one of the most problematic plumbing devices. And this is quite understandable. It’s enough to remember how many times during the day we open and close it, turn the valves, wanting to get water at the desired temperature and pressure. The lack of water supply creates an emergency situation, which means that repairing a kitchen faucet in the event of a breakdown must be done quickly and efficiently.
This article will talk about how to repair a kitchen faucet effectively and without problems. Even a non-specialist can carry out repairs with his own hands. At the same time, you will save yourself from the need to urgently call a plumber.
Kitchen faucet repair - when and why it is necessary
The appearance of such signs as creaking or crunching when rotating valves or a lever (joystick) indicates that cleaning or replacement of worn parts is necessary. Further operation of a faulty mixer will lead to its complete failure and forced repair.
In any case, if the faucet in the kitchen sink is leaking, timely repairs will cost much less than replacing it.
Design of the main types of kitchen faucets
Depending on the design of the locking mechanisms, taps are divided into two-valve and single-lever (hinge).
Double-valve household taps have been known for a very long time. Essentially, these are two single-valve faucets, the spouts of which are combined into one. Design changes affected mainly locking devices. In recent decades, valves with 90-degree (quarter circle) stroke have been added to the traditional screw stroke valve.
The design of a single-lever kitchen faucet differs favorably from two-valve ones by the presence of a single hinge. This design allows the horizontal movement of the lever (joystick) to regulate the flow of hot and cold water into the mixing chamber, and the vertical movement to control the flow intensity.
The kitchen faucet is leaking - how to fix it yourself
The design of all types of kitchen faucets is such that they are easy to disassemble and reassemble. Therefore, almost everyone can handle repairing a kitchen faucet with their own hands. This does not require special professional skills, special equipment and tools.
Before starting repairs, you need to determine the cause of the problem. For diagnostics, it is not necessary to completely dismantle the mixer. For a visual assessment, it is enough to remove the locking mechanism from the housing. This will determine the entire course of further actions.
If serious damage is found in the case, it can no longer be repaired. A complete replacement of the device will be required. All removable parts, if they cannot be restored, can be easily replaced with similar ones.
Important! Before disassembling the mixer, turn off the hot and cold water supply taps. As a rule, supply risers are equipped with separate shut-off valves. Otherwise, you will have to turn off the taps of the main connection.
Single lever kitchen faucet repair
The service life of the mixer directly depends on the quality of tap water. First of all, the hinge of the locking mechanism and its chamber in the mixer body suffer from excessively hard water. These parts have a very smooth surface. Any contamination reduces their tightness or completely disables them.
How to repair a kitchen faucet with one handle? In most cases, repairs come down to cleaning the hinge parts from various types of deposits. But to replace worn or unrepairable parts, you have to purchase a repair kit.
Disassembly begins by removing the decorative plug with hot and cold water symbols, behind which there is a lever securing screw. Having correctly determined the type of screw head, unscrew it with the appropriate tool. Then carefully, in a strictly vertical direction, remove the handle. Next, use an adjustable wrench to unscrew the decorative washer-casing and the clamping nut. Carefully, without much effort, pull the rod and remove the entire cartridge assembly.
Repairing a kitchen faucet with a cartridge begins with inspecting the faucet body. Limescale, rust and other contaminants must be removed, taking care to avoid scratches and chips. Particular attention should be paid to the hinge joints, which ensure smooth free rotation of the handle (joystick) and spout.
Important! To reduce the cost of the product, most threaded parts are made from brittle metal alloys. Therefore, when making repairs, it is recommended to be extremely careful: first place the contaminated parts of the structure for several hours in warm water with the addition of cleaning agents, and use a special brass brush for cleaning.
Having ensured that the mixer body is in working condition, proceed to further diagnostics. It is important to determine the integrity of the plastic component of the cartridge, the condition of rubber valves with springs, sealing rings and gaskets.
If necessary, carefully remove scale, rust and other impurities contained in the water. If there is damage, replace either the entire cartridge assembly or individual parts that cannot be restored.
Repair of a two-valve mixer
As mentioned above, a two-valve kitchen mixer tap combines two identical screw taps in its design. The difference is that the hot water tap is more susceptible to temperature effects and characteristic deposits, which accelerates wear of parts.
Disassembly also begins with removing the valve or flywheel. To do this, use a flat, sharp object (for example, a screwdriver or knife) to remove the decorative plug. Then remove the fastening screw and valve. Using a suitable wrench or adjustable wrench, carefully unscrew the axle box.
For cranes equipped with valve axle boxes with a 90-degree stroke, pay attention to the condition of the spool. Manufactured using plastics or ceramics, these parts often fail as a result of excessive force. If cracks are found in the spool body, you will have to replace the entire valve axle box.
Important! All crane axle boxes are unified and interchangeable, regardless of design features. You need to pay attention to the type of threaded connection and the dimensions of the product. When purchasing, the easiest way is to take the failed part with you as a sample.
Mixers with outdated screw taps are disassembled in the same way as in the cases described above. The difference is that the crane box is disassembled into separate parts: the gland nut, the worm spindle and the valve. Here it is important to take into account the condition of the stuffing box, which is replaced if necessary.
Other structural parts will also have to be replaced if they are thoroughly worn out.. For example, the worm thread on a spindle often wears out. As a result, the rubber valve lining does not press against the seat, and the valve leaks. In such cases, it is necessary to replace the entire crane axle box.
The condition of the rubber part of the valve and the seat recess in the body must be paid attention to in all types of mixers. If contamination is detected, the valve seat should be thoroughly cleaned. It is also important to be careful here, since any mechanical damage will reduce the tightness of the valve.

Rubber parts are also cleaned. However, deformed and insufficiently elastic ones must be replaced.
Assemble the mixer in the reverse order of disassembly. When tightening threaded connections, do not use excessive force - this can lead to cracks in the body, disruption of threads, and failure of rubber seals. Insufficient force can lead to leaks. In addition, the tap may unintentionally unwind during operation.
Other breakdowns and troubleshooting
Malfunctions of household faucets often include damage to flexible connections, leakage of fittings, cracks and even ruptures of the vinyl tube. Often, the forces applied to the mixer cause the mounting screws to become loose. In both cases, if the faucet in the kitchen sink is leaking, urgent repairs are required.
Everything is complicated by the fact that such breakdowns are not always immediately noticeable. It may take a long time before the leak is discovered. Sometimes at the “signal” of the neighbors below.
This kind of kitchen faucet repair is also easy to do yourself. Flexible leads of the required length and fitting configuration are available in an assortment at specialized trading enterprises. They are easy to purchase and replace yourself.
To avoid unpleasant and costly consequences, you need to follow simple rules of prevention.

For example, if you install coarse and fine water filters, the formation of deposits on the faucet parts will be reduced. This will extend its service life and provide the family with environmentally friendly drinking water.
Periodically you need to check the reliability of the mixer and, if necessary, tighten all threaded connections. Avoid exposure of the mixer to any foreign objects that could cause mechanical damage. Rotate the tap valves or the rotary lever with smooth, effortless movements.
Conclusion
Even when purchasing a plumbing fixture, it is better to give preference to a more expensive but reliable product that does not require frequent repairs or quick replacement. It is important to carefully read the operating instructions for the device and strictly follow the attached instructions when disassembling and assembling the product.
If the faucet breaks down, it is important to carefully disassemble it, following the instructions suggested in the article, remove lime deposits or, if necessary, replace the parts with new ones.
 DIY brick foundation: strip and columnar
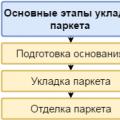 How to lay parquet: methods, necessary tools and step-by-step process for proper installation
 How to lay parquet: methods, necessary tools and step-by-step process for proper installation